
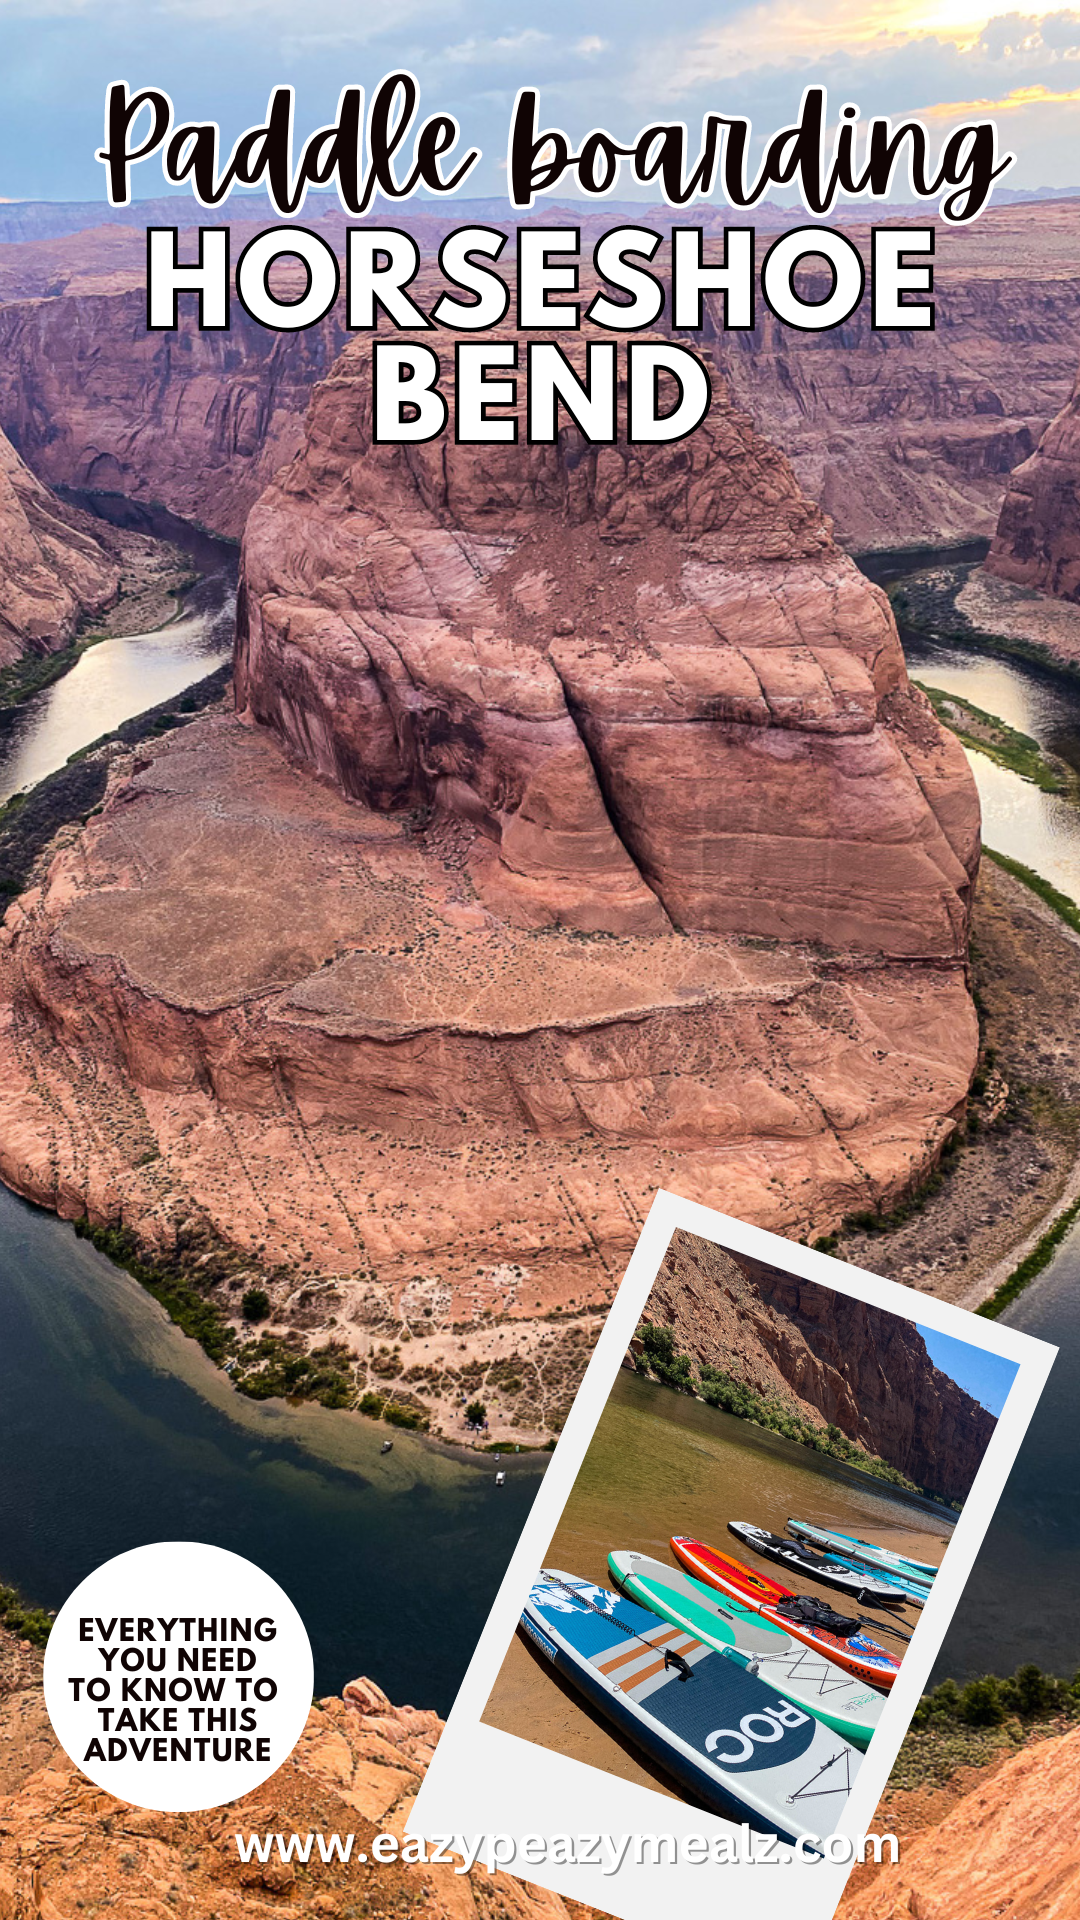
Ultimate Guide to Paddle boarding and Camping at Horseshoe Bend
Paddleboarding and camping at Horseshoe Bend is an adventure that promises breathtaking views and a unique outdoor experience. With 15 miles of beautiful water ways on the Colorado River, stunning red rock cliffs, wild horses and big horn sheep, and amazing nature, it is an experience of a lifetime. Here’s everything you need to know to plan your trip, from accommodation the night before to essential gear and safety tips.
Trip Overview
To be able to do this trip you need to do 3 things:
- Get to Marble Canyon/Lee’s Ferry, Page Arizona area.
- Have all the right gear. (Comprehensive list below)
- Reserve a backhaul service to drop you off.
Other than that, no reservations or permits are needed. Although you will likely want a hotel for the night before.
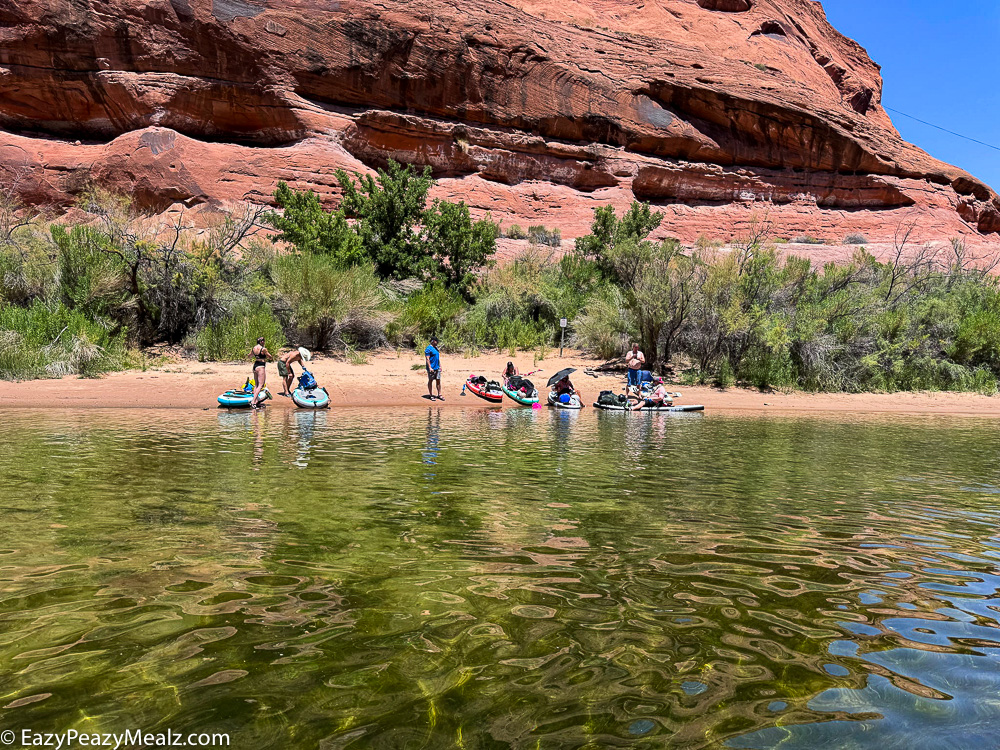
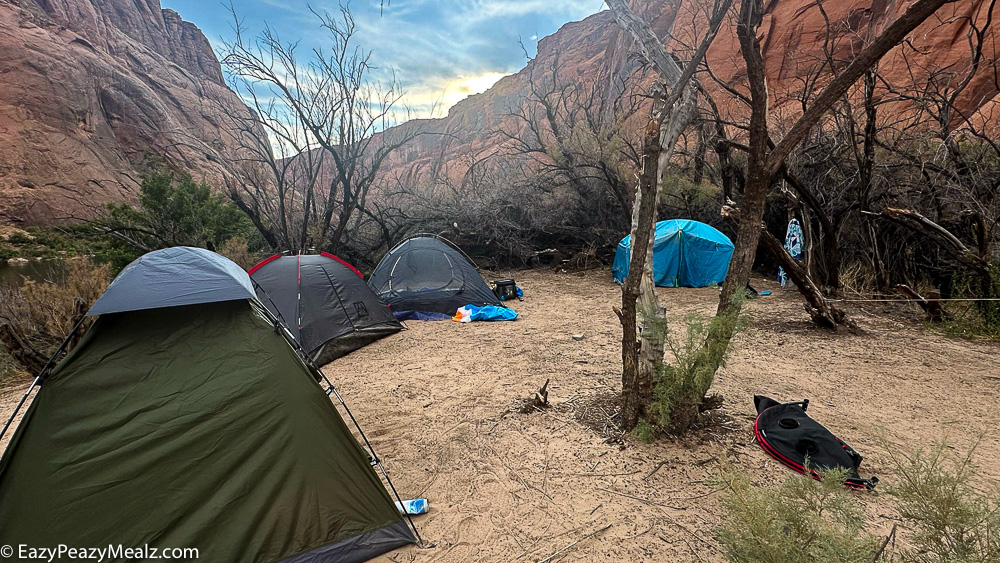
For this trip, you get on the Colorado River on a ferry starting at Lee’s Ferry, which is in Marble Canyon. The ferry will take you and all of your gear up to the Glen Canyon Dam in Page, AZ, and drops you off. Then you paddle about 15 miles down the river back to Lee’s Ferry. You get off the river around the half way point to camp overnight. There are several campsites along the way (6 first come, first serve campsites for overnight stays with self-composting toilets. No permit is required for camping, but most people will camp at the bend). We opted to camp about half a mile past the bend at the 8 mile campground, which is more private and offers a little more shade. You camp overnight, then paddle the second half of the river the following day, back to Lee’s Ferry.
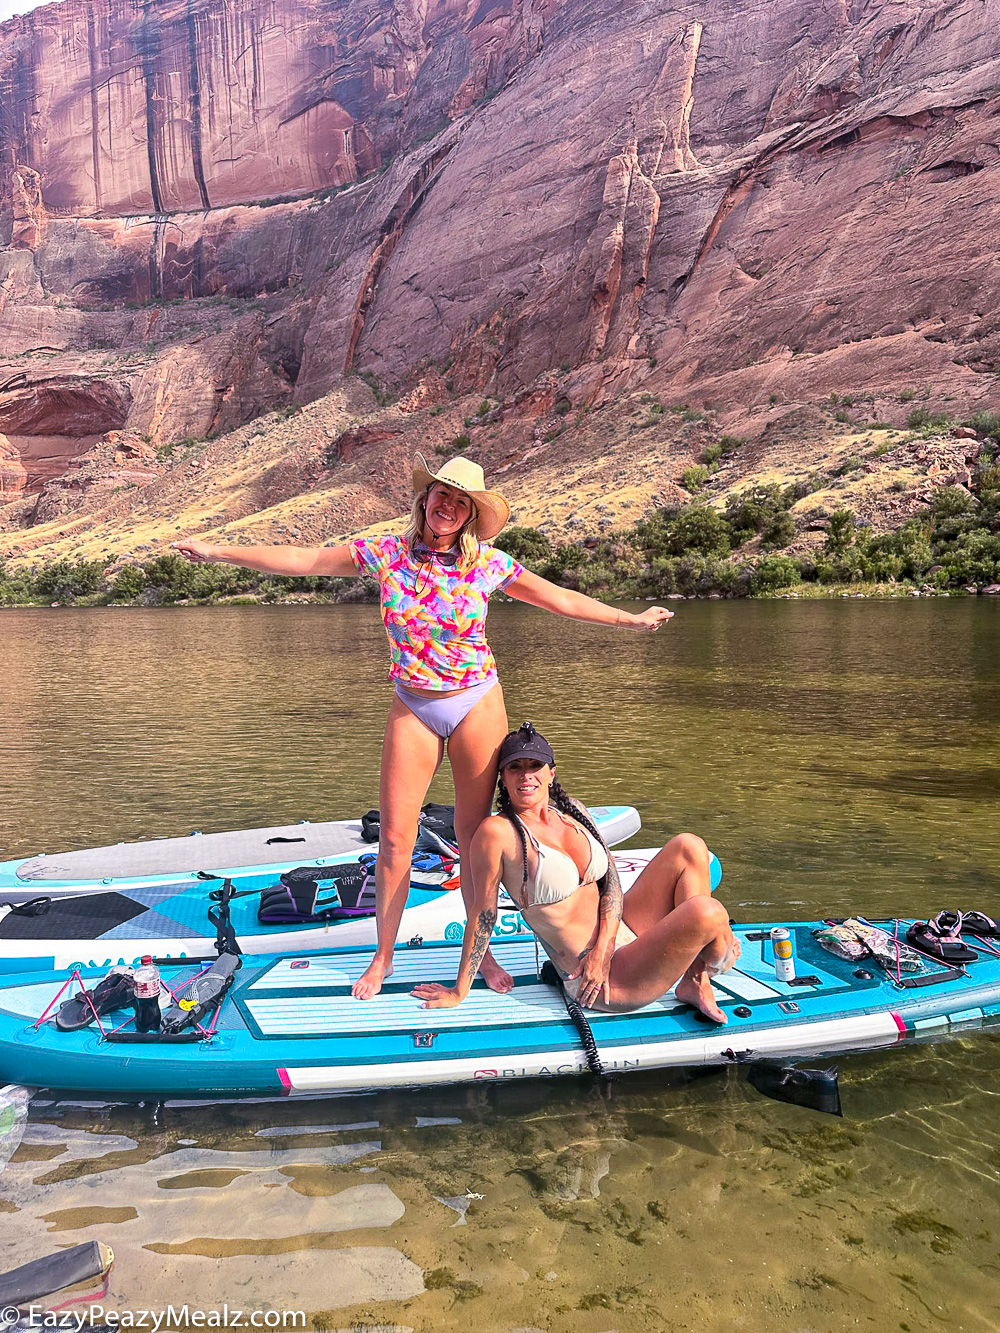
You mostly float, with some paddling, depending on weather conditions and wind, and you get to take in amazing views, and experience a once in a lifetime adventure. You pack all of your gear onto your paddle board or kayak, and it is a total blast!
Recommended Time To Visit
April-June and September-October. We went during July and it was extremely hot. The temperatures were 113 degrees F. So depending on when you visit, the experience will be different, as well as what you would need to pack. For example, when friends went in October, it was chillier at night, and they needed sleeping bags. We were great without them.
I also recommend being on the water during mornings, as the wind comes up during the afternoon, making it more difficult to paddle.
Night Before Hotels
Before embarking on your paddle boarding journey, it’s wise to get a good night’s rest as the sunshine will drain you. So while it isn’t exactly physically draining due to paddling, it is hot and you may not sleep well, so get some rest. The closest big town to Horseshoe Bend is Page, Arizona, which offers a range of accommodation options. Or you can stay closer to the backhaul service, which would be Marble Canyon, AZ, so depending on how early you have to be at the ferry, you should pick accordinly. We opted to stay in Lee’s Ferry, as it made the morning easier. Here are some suggested options:
- Lee’s Ferry Lodge at Vermillion Cliffs: Book Lee’s Ferry Vermillion Cliffs You can book just your first night, the rooms are clean, ice is free, and the location can’t be beat. This is where we stayed. While it is not fancy, it is serviceable and convenient.
- Marble Canyon Lodge: Can be booked here.
- Lake Powell Resort: Located right on the shores of Lake Powell, this resort provides stunning views and comfortable rooms. And is about 45 minutes from where you get on the ferry. Book Lake Powell Resort.
- Hyatt Place Page/Lake Powell: A modern hotel with all the amenities you need, including a fitness center and free breakfast. Again this resort is 45 minutes away, but is nice and offers amenities you won’t get closer to the ferry.
- Windgate by Wyndham: A nice with clean rooms and a convenient location in Page, near local attractions, and a free breakfast.
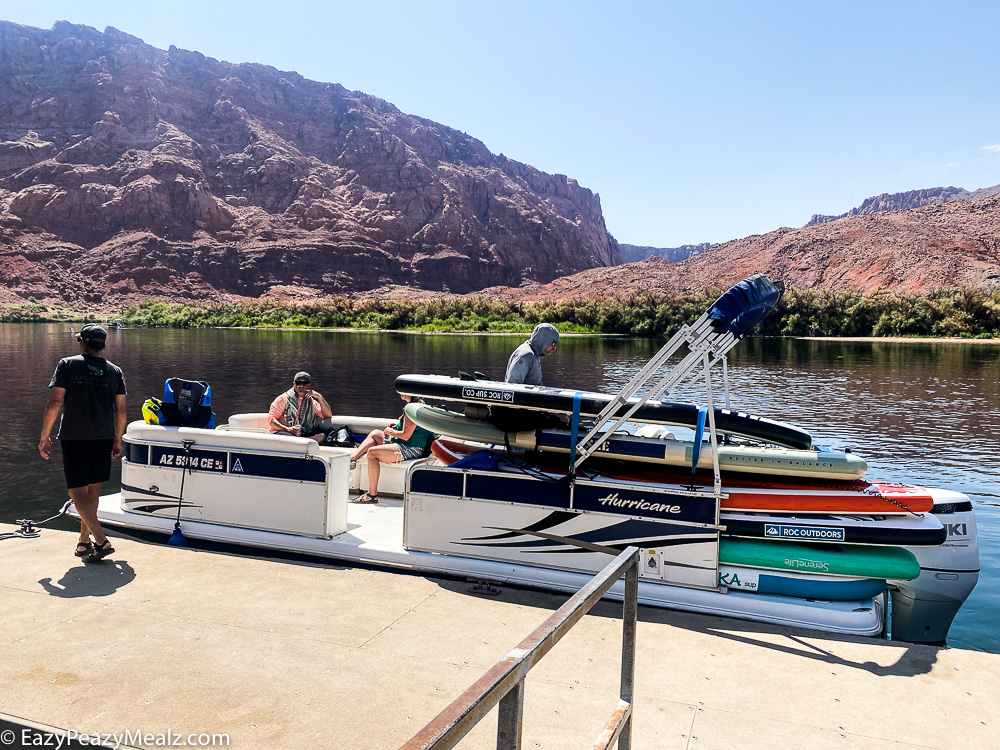
Backhaul Services
To paddleboard Horseshoe Bend, you’ll need to utilize backhaul services to transport you and your gear upriver. These services drop you off at a starting point upriver, which is near the Glen Canyon Dam, allowing you to paddle down to Horseshoe Bend, and then back to the ferry location:
- Kayak Horseshoe Bend: 928-235-8400, to book backhaul service, click here.
- Dig Paddlesports: Offers backhaul services from Lee’s Ferry along with gear rentals.
- Wilderness River Adventures: Provides transportation and can also arrange for rental gear if needed.
What to Pack on Your Paddleboard
Packing wisely is crucial for a successful paddle boarding trip. Here’s a list of essentials, as well as a far more detailed list with links to the specific gear we had and used to make this possible, fun, and comfortable:
- National Parks Pass: Use it to get free parking at Lee’s Ferry. Otherwise plan on about $30.
- Dry Bags: To keep your belongings dry. Opt for a variety of sizes for better organization.
- Portable Shelter: A lightweight tent for camping overnight. A 2 person backpacking type tent worked well for each of us.
- Sleeping Bag and Pad: Ensure they are suitable for the season and weather conditions. We did not need warmth at all, because of the time of year, so a sheet or light weight blanket was better than a sleeping bag. And a sleep pad was critical for comfort.
- Cooking Gear: A portable stove or jet boil, lightweight cookware/mess kit, and utensils.
- Food and Snacks: Non-perishable, high-energy options like nuts, dried fruit, and granola bars, as well as freeze dried meals.
- Hydration System: Carry at least two liters of water and a filtration system (more on this below). A filter that can filter a lot of water for cooking, like the Grayl bottles is awesome. But a life straw or bottle works well for personal drinking.
How to Pack your Paddleboard
I highly recommend doing a dry run for loading up your paddleboard at home before you go. Essentially, you want to put all of your gear in waterproof bags, then you use tie downs to secure it to the board.
Do the following:
- Front of Board: Pack a smaller bag or cooler for the front of your board. It should contain the items you want to get into during your time on the water: chapstick, sunscreen, camera, snacks, cooling towels, water filter, etc. Secure it to your board with carabiners or straps.
- Sides/End of Board: Pack a mesh bag with beverages that you connect to your board rings with a carabiner, and it rests in the water, keeping drinks cold. Do not use too large of a bag, as it can rip.
- Center of Board: Your seat, shade, etc. will sit in the center of the board. These are not necessary. So you can simply leave the center empty to sit on, stand on.
- Back of Board: Use compression straps/tie downs (2 are recommended) to secure dry bags with your tent, sleeping stuff, clothes, food stuffs, mess kit, and the things you won’t be using while on the water. Run the straps over the bags and through the straps, and tighten them, to make sure they stay safe, even if you get over-turned.
Do your best to pack light, only bringing what you need. But also be sure to plan for eventualities, like we needed a hand pump as one of the boards had a slight malfunction with the valve. It was so good we had a pump with us. So make sure at least one person brings a pump, one brings a first aid kit, and one brings a way to cook your food. You can spread the items across the boards in your group so not one person has to carry everything.

Suggested Packing List with Links
This list looks long, but is comprehensive, and packs down quite small. I was able to fit everything into 2 35 L dry bags. So don’t let it intimidate you!
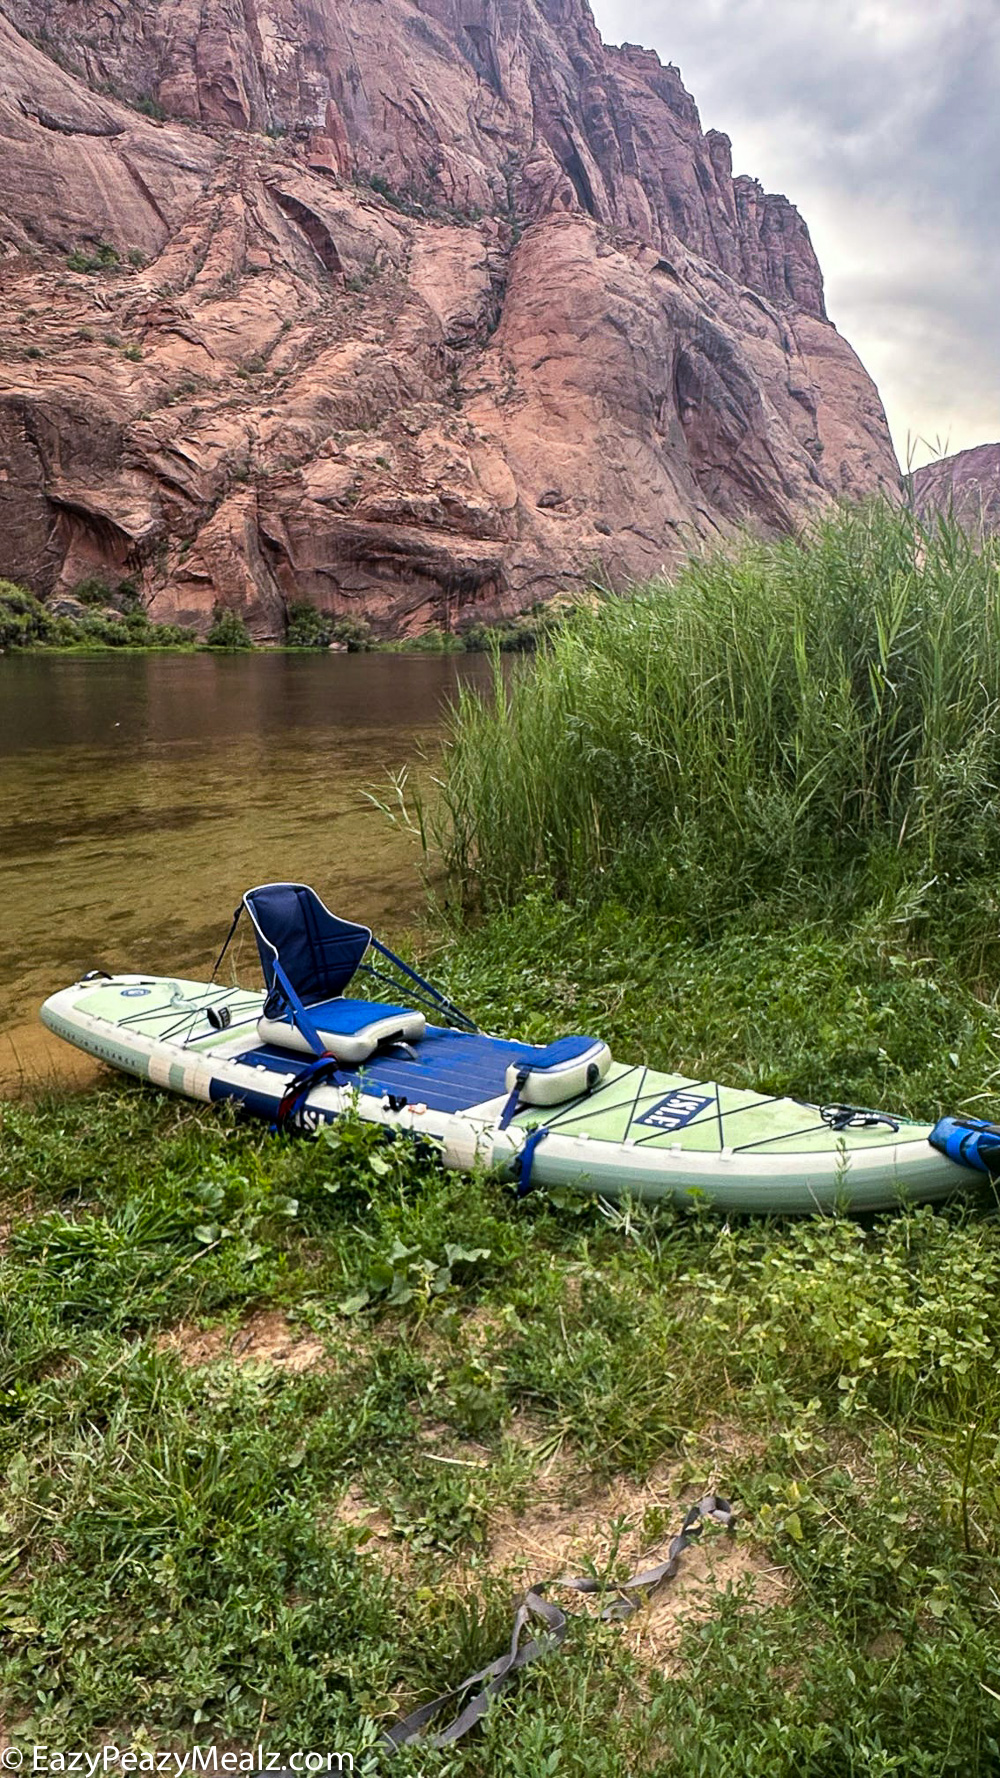
- Paddle board/kayak/canoe: I used the ROC Stand Up Paddleboard, which was awesome. I own 3 different brands of paddleboards, but what I liked about the ROC for this trip is that it has o-rings all along the top of the board, not just in the front, but there are two other sets, which gives you plenty of places to strap items on and connect items with carribeaners. I also liked this Kayak seat attachment, which you can clip right on, and gives you back support should you chose to sit on your paddleboard.
- Oar/paddle: Your paddle board should come with one, but you will want to add a pool noodle around it to keep you from losing it in case you drop it. Otherwise you might be up a creek with no paddle…literally.
- Oar leash: Another option is to skip the pool noodle and use this oar leash, which is super convenient too.
- Bungees to Connect Boards: It is nice to stick together on the river, these cords make that very easy. They have carabiners on the ends that can clip the boards together. Otherwise it can be difficult to stick together, especially if you end up in different currents on the river.
- Life jacket: You don’t have to wear it while on the river but you are legally required to have one on your “boat,” and if you aren’t a strong swimmer, or plan to drink while on the water, it is a great safety precaution.
- Small camp chair : While this is not completely necessary, it does make hanging out around the campsite more comfortable. I’d recommend finding one smaller than the traditional camp chair. This is a super small, easy to use camp chair that is really light weight and high quality. But it is a little expensive with a $109 price tag. For a less expensive option, but a great option, try this one for $30: Small camp chair
- Food: I recommend backpacking dry food because it’s lightweight, easy to pack, and simple to cook. Pre-packed sandwiches also work pretty good, if you have ice packs, or can put them in an airtight container and mesh bag in the water to keep them dry.
- Backpacking camp stove: A jet boil or small camping stove is important, especially if you are using freeze dried meals.
- Mess kit/utensils: I used this mess kit from Amazon, and it worked well and was very compact.
- Water bottle/hydro flask: The water bottle from Life Straw was a great choice, as it served as a water bottle and filtration system.
- Water purifier. There is a natural spring we can fill up at but it’s pretty early on during the first day. And you will want a Hydration Systemthat purifies water so you can drink cold water the whole trip right out of the river.
- Snacks (you pack out what you pack in): I liked having a small cooler with fresh snacks, as well as Chocolate Peanut Butter Protein Balls, candy, and Homemade Granola (Low Carb).
- Sleeping bag/ sleeping pad: You want to try your best to get a good night sleep, so a Sleeping Bag and Pad are so important. It was hot enough we didn’t need sleeping bags, but a sleeping pad that is compact but provides comfort is really important.
- Portable mobile chargers/ battery packs / charging cables: You may not have service on the water, but you will probably want to get pictures and videos of everything, so bring a way to keep your electronics charged. We also loved playing music.
- Pillow: You want a pillow that will compress or fold up really small so it does not take too much room on your board. An inflatable pillow or a compress-able camping pillow is the way to go.
- Backpacking Tent: I’d recommend a light-weight back packing tent if you have one, as you have to strap your tent to your paddleboard.
- Phone or camera/GoPro etc
- Waterproof case for phone or camera: You want one that will float if it falls off your board. You also want to make sure your electronics are protected. I got a case to wear around my neck for easy access to my phone, and a waterproof box to keep all my electronics safe in.
- Chapstick, sunscreen, bug spray: All essential for comfort. Look for a bug spray to keep biting flies away.
- Flashlight (I’d suggest a head lamp): You will want this for at camp. We also found that a blacklight flashlight was very nice to have, it allowed us to easily check our tents and gear for scorpions before we rummaged through it. Though the scorpions really left us alone, it was nice for peace of mind.
- Towel: A microfiber or travel type towel is best, you want to pack small.
- Cooling Towel: I totally recommend the Frogg Toggs ones. The iCool option, or the Chilly Pad are so great. You can just dip them into the water and lay them across your legs, your neck, your shoulders, whatever. It was also helpful at night to sleep, as it was super hot and it helped me cool down.
- Toothbrush/toiletries: You can bathe in the river, so if you want to bring soap and shampoo. But it is cold.
- Carabiners: These are great to attach items such as backpacks, water bottles, cameras, etc to your bungees or straps, or the rings on your paddleboard. I secured everything from my hats and water bottle, to my fishing pole and snacks to my board with carabiners. They are great to have. And really you want at least 6.
- Compression straps/tie downs: these are used to strap down your gear to your paddle board, you will want two for each board.
- Swimsuits: You are on the river for two days so you can wear the same suit both days or one for each day. I also suggest a sun shirt to protect your arms and shoulders.
- Tank top/shirt, shorts, socks, underwear, light jacket, maybe a long sleeve tee: You will be in swimsuits most of the time, but it’s nice to change into dry clothes once at camp or to have something to put on to protect you from the sun/possible gnats. You don’t need a lot of clothes.
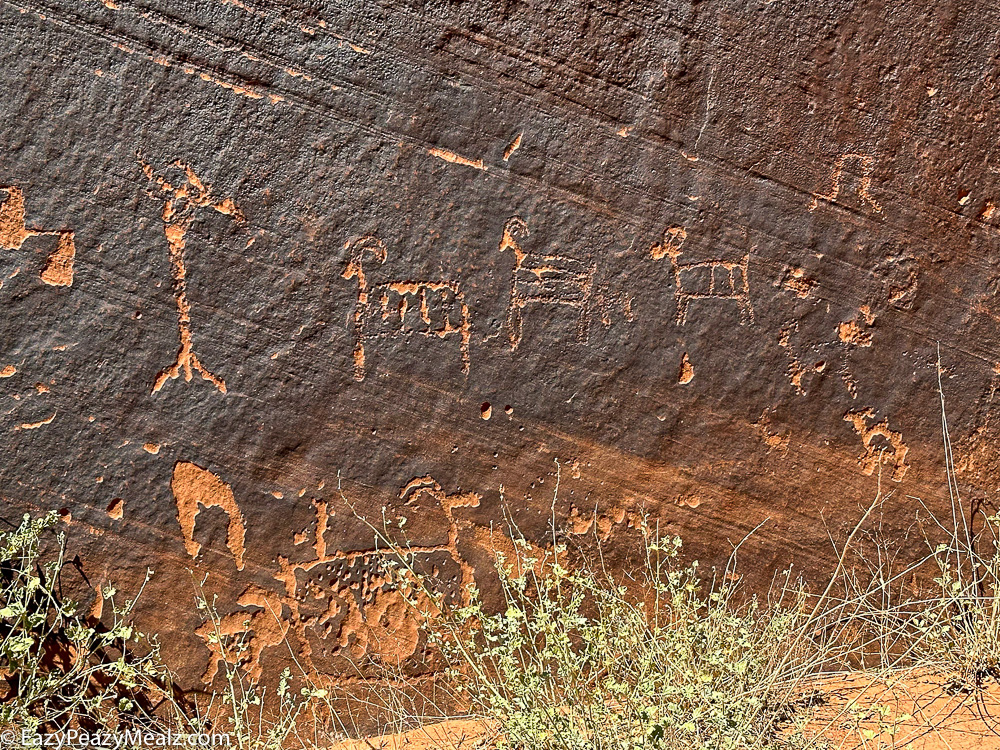
- Water shoes/sandals: These are so nice for getting in and out of the water, as well as for adventuring along the way. There are a couple hikes you can do, as well as a place to walk up to see petroglyphs, so consider footwear you can hike in as well as get wet. I suggest Chacos or Tevas.
- Trash bags: Whatever you haul in, you need to haul out, so bring a trash bag that ties off so you can add cans, wrappers, your food pouches, tissues, wipes, etc. into it.
- Pajamas: Look at the weather to determine what kind would work best for you, but it is nice to have coverage and dry clothes to sleep in.
- Sunglasses: Polarized if you have them. The sun reflects off the water and can be a bit much after two straight days, so you definitely want to bring them, as well as some Chums to keep from losing them in the water if you should tip or fall in.
- Hat: A larger brim to keep the sun off your neck and ears is good. I wore a cowboy hit with a chin strap so I didn’t lose it in the wind. A fishing hat, sun hat, or even a baseball cap is great too.
- Dry Bags: Put all of your stuff in dry bags. I had a dry back backpack that I put my sleeping pad, blanket, tent, chair, and clothes in. And then a large dry bag I added food, mess kit etc. to. Then a few smaller ones to keep my other items safe.
- Water resistant backpacks/cooler/fanny pack for snacks, quick access to electronics, etc.: The majority of your items will be stored in dry bags and strapped to the back of your board, but you will want some kind of containing system for the front of your board to have some snacks, and easy access to items you may need like sunscreen, chapstick, etc. This was awesome for the trip.
- Wet Wipes: While the camp sites have self composting toilets, there is no guarantee they will have toilet paper. Plus wet wipes feel better on your butt when compared to the toilet paper provided in the port-a-potties along the way, especially when you are wet all day. You want flushable, biodegradable, leave no trace type wipes.
- Small mesh bag: I suggest a zippable lingerie laundry bag with a strap. I got some at Walmart in the laundry section for about $1.30 each. We use these to put canned beverages in and then drag them behind the paddle boards in the water to keep drinks cool. It works amazing. Just bring a carabiner.
- Drinks: Canned adult beverages, gatorades, sodas, juices, coffees, protein drinks. Whatever you like to drink, bring, as it will be easy to keep these cold, and a nice addition to your float/paddle.
- Waterproof speaker for music: It is so nice to have this one the water, especially if in a big group.
- Small canopy or shade tent: It can be very hot, so having an easy to pop up shade tent for your group is really nice.
- Tarp: Putting a tarp under the tents helped with heat absorption and kept things cleaner, while not essential, it was nice to have.
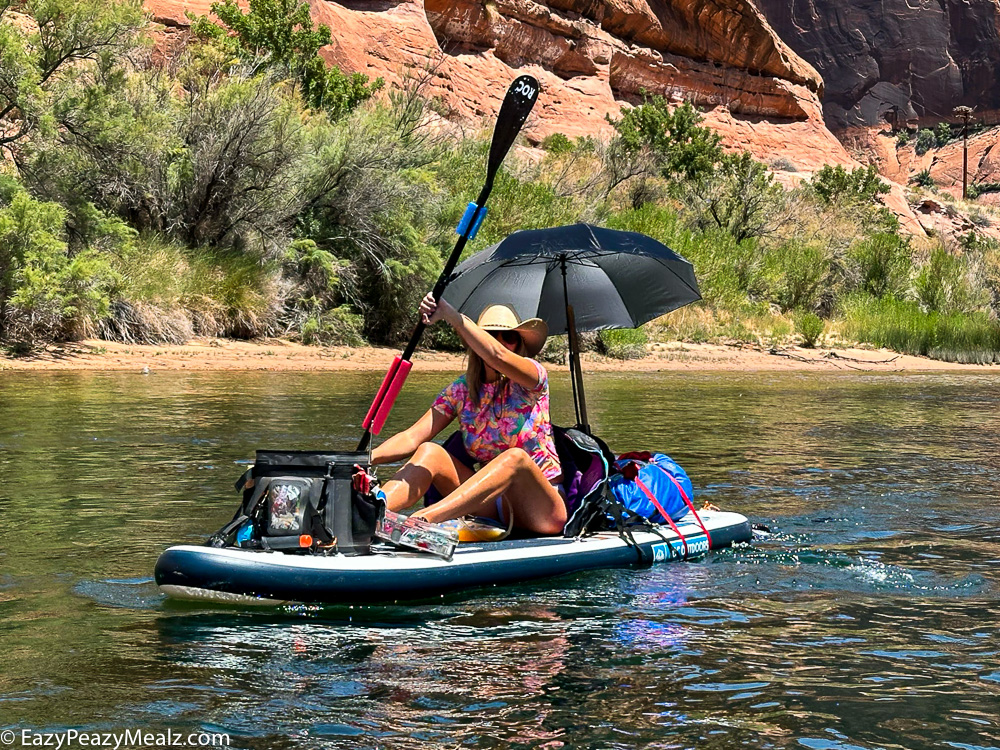
- A shade umbrella: I got one that clamps to a camp chair, then I got a wooden dowel, and use a powerade bottle that I filled with water, and stuck to dowel in, then set on my board and strapped to my chair to keep it secure. It was very much tossed together, but seemed to work well. You could probably figure out a better way beforehand.
Water Filtration Systems
Staying hydrated is crucial. Since you’ll be on the river, bringing a reliable water filtration system is essential, as you won’t have access to clean water, and you will want it for cooking freeze dried meals etc. Luckily there are a lot of good options:
- LifeStraw Personal Water Filter: Compact and easy to use, perfect for solo trips, and for drinking water.
- WaterDrop Gravity Filter Water Filtration System: Lightweight and versatile, and great for camping.
- Katadyn BeFree Water Filtration System: Great for filtering large quantities of water quickly.
Securing Your Items
Keeping your gear secure is vital to avoid losing anything in the water:
- Tie Down Cords and Straps: Use these to secure your dry bags and gear to your paddleboard.
- Waterproof Phone Case: Protects your phone while allowing you to take photos and navigate.
- Carabiners: Handy for attaching smaller items to your board.
- Pool Noodle: Use a pool noodle on your oar so you don’t lose it!
Sun Protection
The Arizona sun can be intense, so proper sun protection is a must:
- Sunscreen: High SPF, water-resistant sunscreen to protect your skin. A combo of spray and lotion, as well as face specific worked well for our group.
- Hat: A wide-brimmed hat for additional shade.
- Sunglasses: Polarized sunglasses to protect your eyes from the glare.
- Lightweight Clothing: Wear moisture-wicking and UV-protective clothing. Wear layers. Be prepared for the weather, based on the season.
- Water Clothes: Water temperature is usually 50 degrees Fahrenheit year-round. So it is easy to cool off in the water, so it is worthwhile to wear a sun shirt or long sleeved water clothes.
Additional Tips
- Leave No Trace: Always pack out all your trash and respect the natural environment.
- Weather Check: Monitor the weather forecast and be prepared for sudden changes.
- Safety Gear: Wear a personal flotation device (PFD) at all times, and carry a whistle and a first aid kit. A life jacket is required, and you could be fined $130 if you do not have one.
Paddleboarding and camping at Horseshoe Bend is an incredible experience that combines adventure, stunning scenery, and the serenity of the Colorado River. With careful planning and the right gear, you’ll create memories that will last a lifetime. Happy paddling!
Check out other adventures like Family Friendly 7 Day Big Island Itinerary Kona, Things to do in Wyoming, Lake Como, Italy Cooking Class!

Leave a Reply