
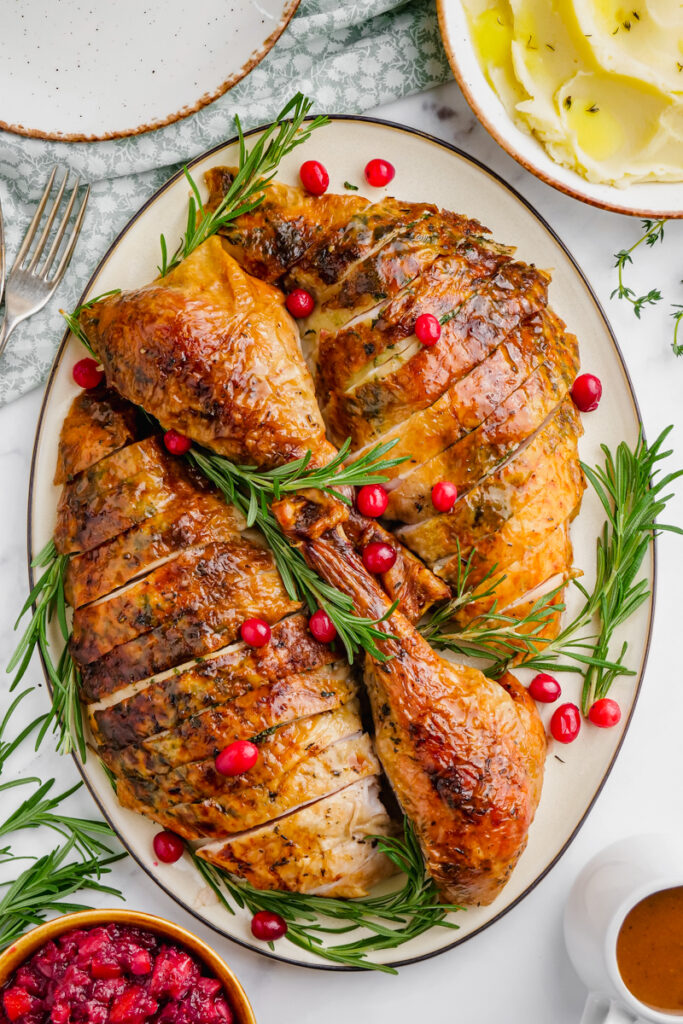
Dry Brine Turkey
Dry Brine Turkey is an easy to make recipe and produces tender pieces of meat for all to enjoy. With just a little seasoning, herbed butter, and patience for allowing time for the turkey to brine in the fridge and then cook in the oven, you will have the most perfect turkey that requires very little effort on the chef’s part.
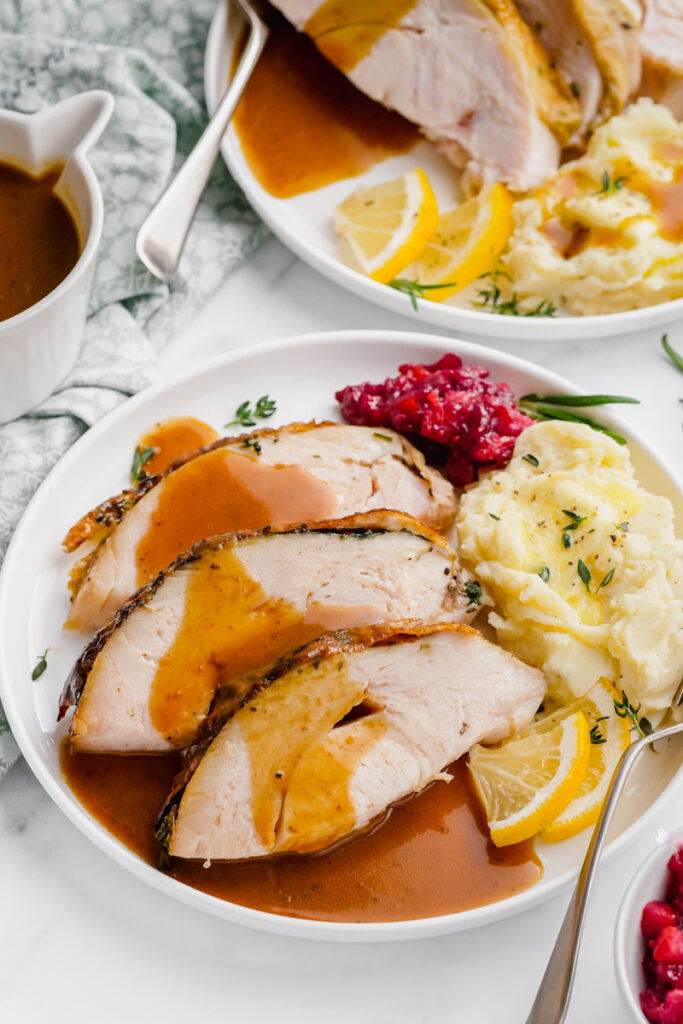
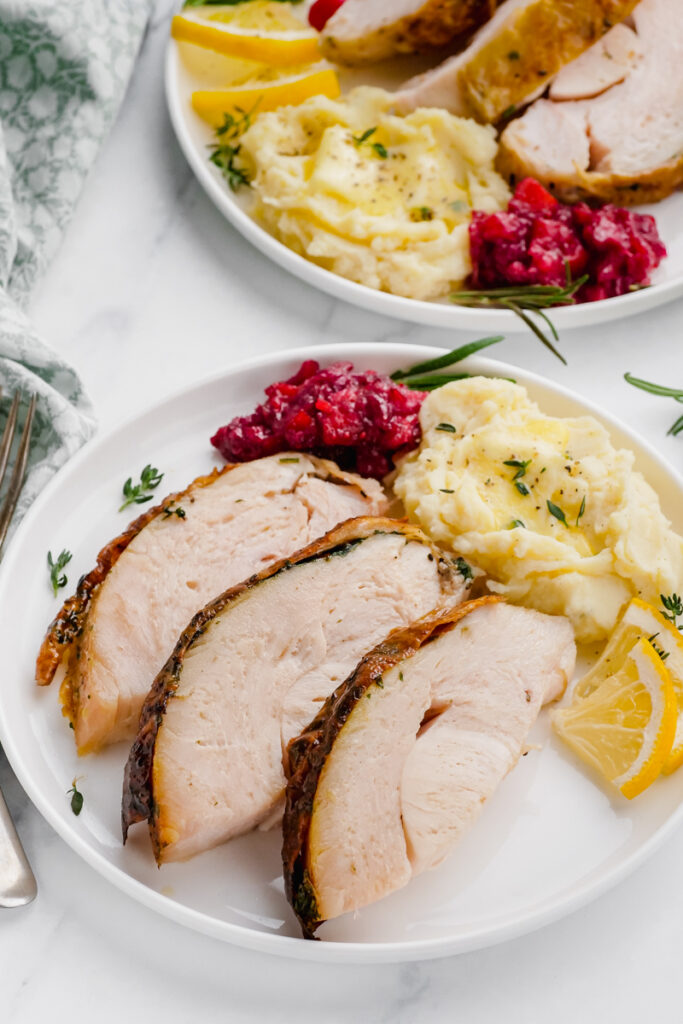
Serve Dry Brine Turkey with homemade Cranberry Sauce and this Easy Stuffing Recipe for a great meal.
Dry Brine Turkey is a favorite because it provides the most tender and flavorful turkey meal. Dry brining is the simple secret that you have all been waiting for that provides that ever so perfect piece of turkey with each and every bite.
While I love a tasty Air Fryer Turkey Breast, sometimes I want just the classic turkey that you crave and think of for those favorite holiday meals. This Dry Brine Turkey definitely delivers that.
Save your carcass for Homemade Turkey Stock!
What You Need to Make Dry Brine Turkey
Let’s get shopping!
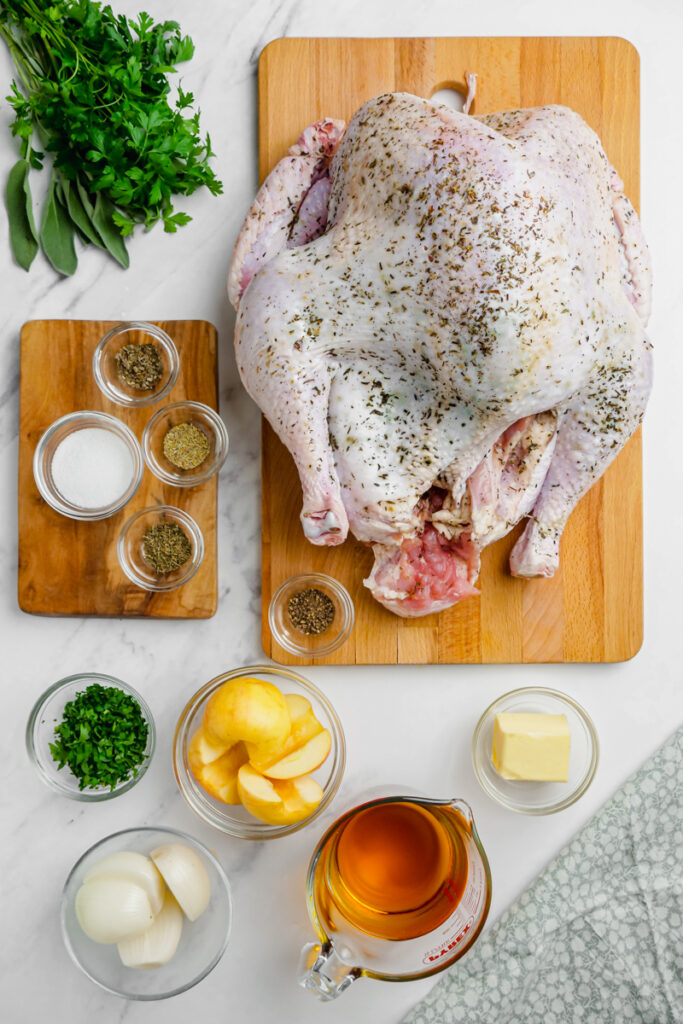
- A 12-16 Pound, not pre-brined, preferably a heritage or pasture raised bird
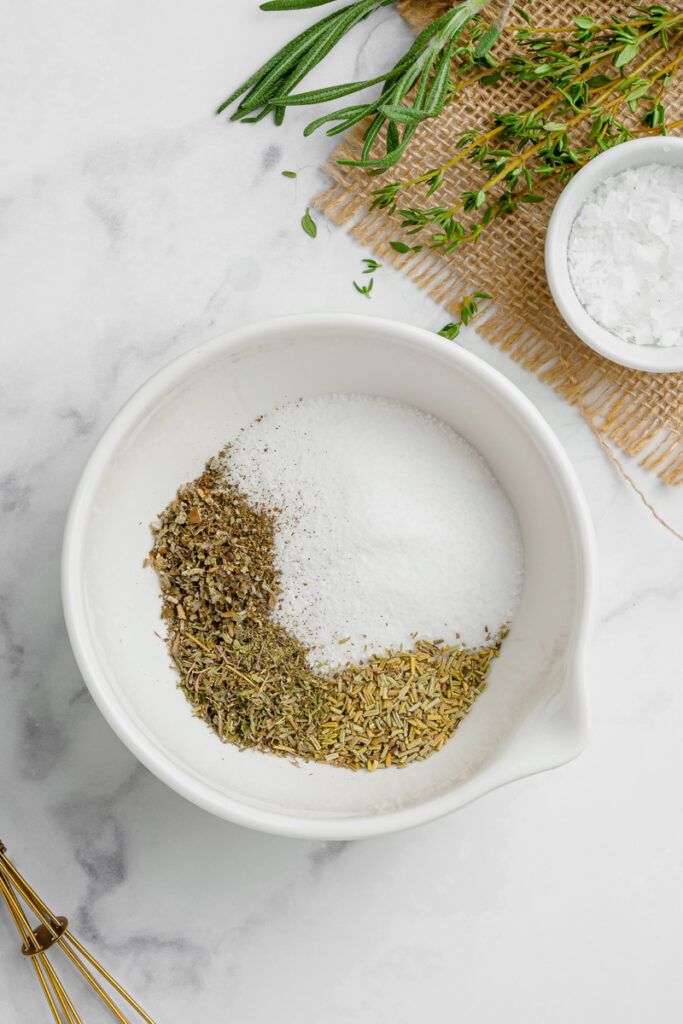
Dry Brine
- Kosher Salt
- Dried Thyme
- Dried Sage
- Dried Rosemary
The Rest
- Flat Leaf Parsley
- Black Pepper
- Small Onions
- Small Apples
- Unsalted Butter, softened
- Apple Juice or White Wine
How to Make Turkey with A Dry Brine
Description: A delicious Dry Brine Turkey recipe that is easy to make, but takes a little bit of planning ahead. Plan for the turkey to sit in the fridge for two nights prior to cooking, then sit out at room temp for a couple of hours ahead of time, and then lastly cook for two and half hours, resting for 30 minutes before serving. Don’t let the time allotment intimidate you. Most of the time you aren’t doing any work. You just need to allow the element of time to do the work.
Step one: Two Days Ahead Remove Extra Pieces from Turkey
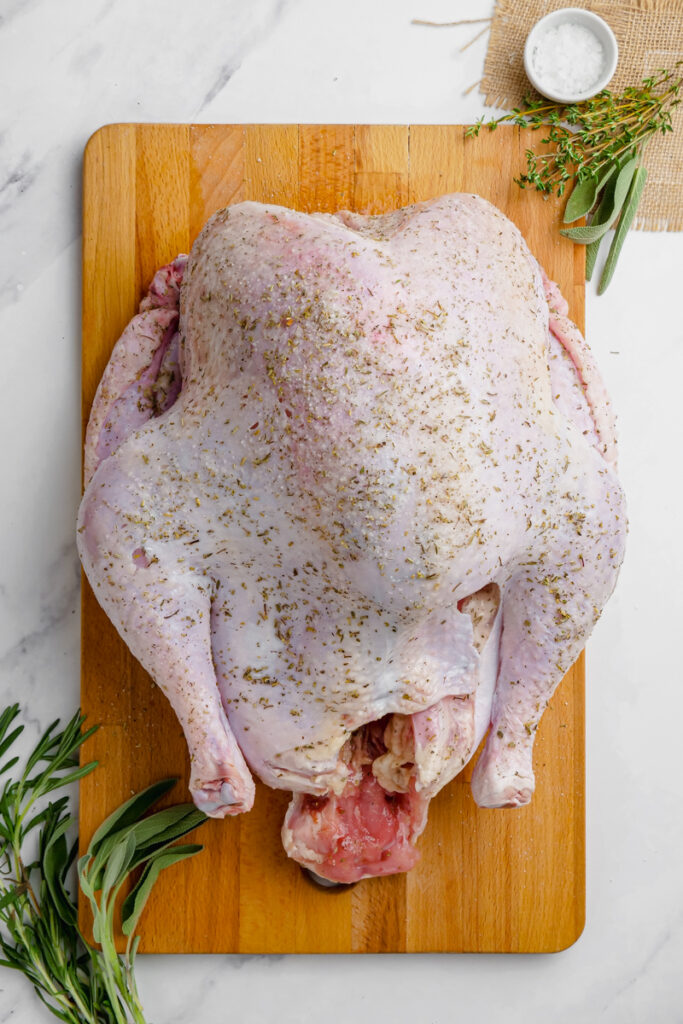
Two days before you want to serve the turkey remove any extra pieces from the neck, giblets, etc. Then rinse turkey and pat dry.
Step two: Prepare Brine Mixture and Rub All Over Turkey.
Mix salt and dried herbs. Rub mixture all over turkey, inside the cavities and under the skin where you can.
Step three: Wrap Turkey Up and Place in Fridge Overnight.
Wrap turkey in plastic wrap or put in a large plastic bag. Place turkey in the fridge overnight.
Step four: Turn Turkey Over and Keep in Refrigerator for Another Night.
Turn the turkey over and return to the refrigerator for another night.
Step five: A Couple Hours Before Cooking, Prep Turkey and Let It Come to Room Temp.
A couple hours prior to cooking, remove turkey from plastic wrap or bag, and pat dry. Then place it on a roasting pan on the counter in order to allow it to come to room temperature.

Step six: Preheat Oven and Prepare Butter Mixture.
While the oven is preheating to 450, mix butter with parsley and black pepper.
Step seven: Distribute Butter All Over Turkey.
Insert herbed butter under the skin and use the remaining butter to rub all over the exterior of the turkey.
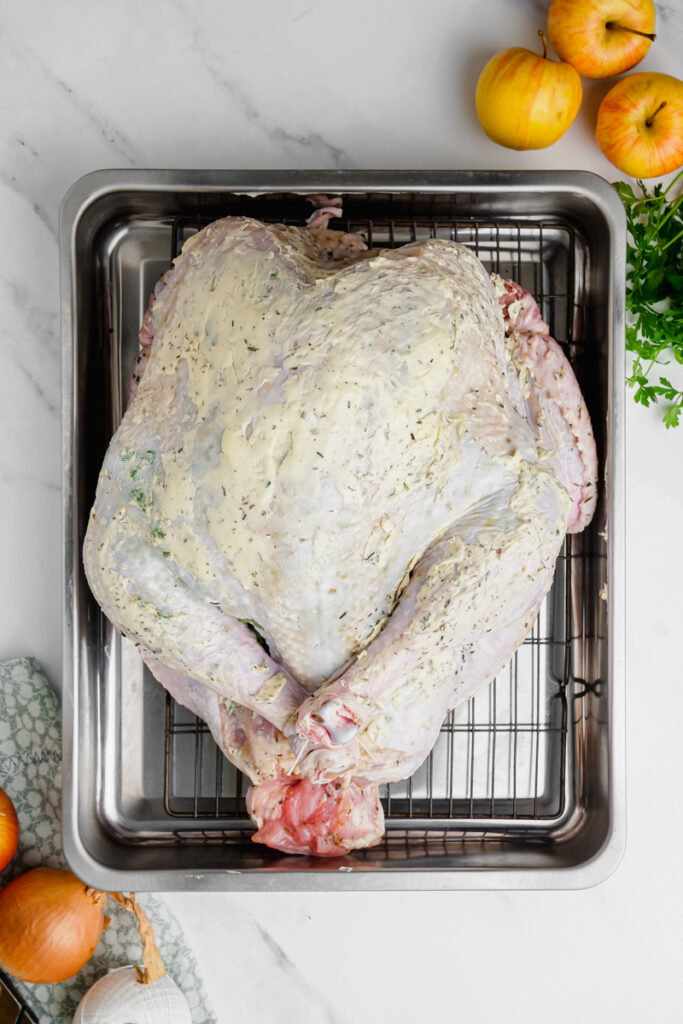
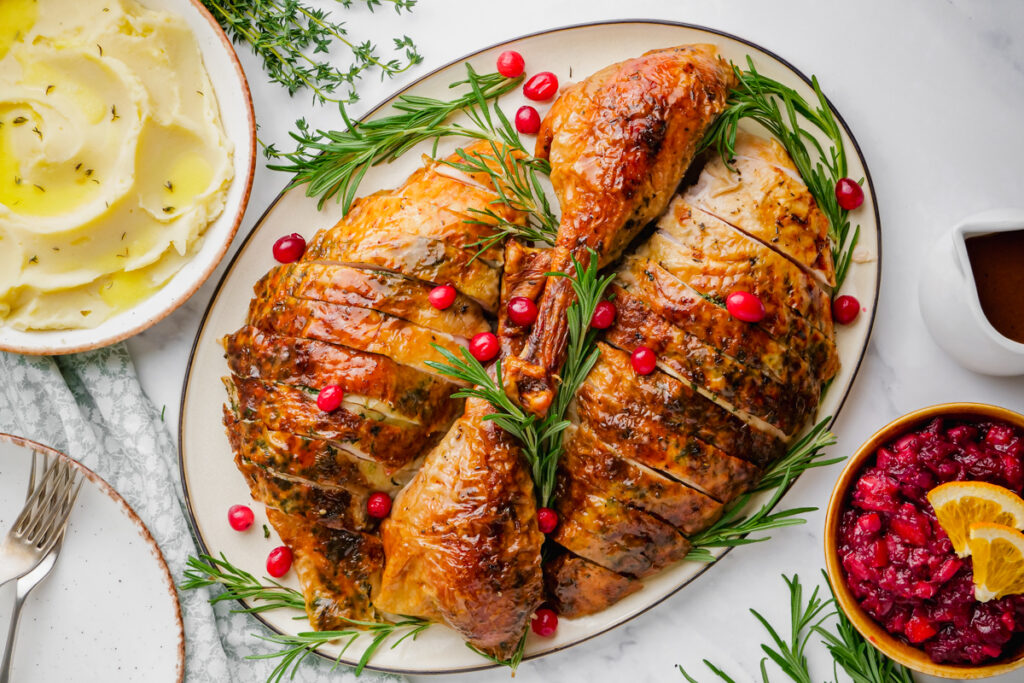
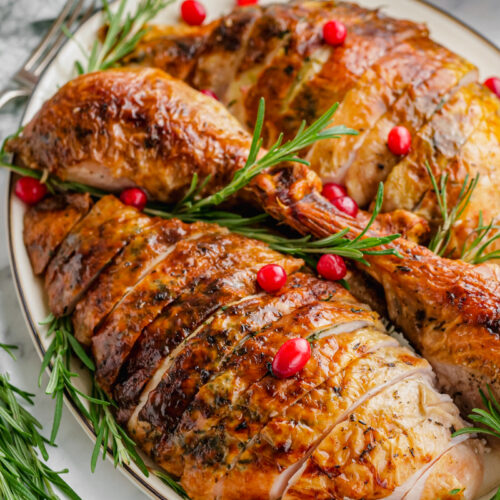
Step eight: Add Onions, Apples, and Remaining Parsley to Turkey and Truss the Legs.
Put remaining parsley, half the onions and apples onto the main cavity of the bird. Then add remaining apples and onions to the neck and truss the legs with kitchen twine.
Step nine: Roast Turkey.
Roast the turkey for 30 minutes.
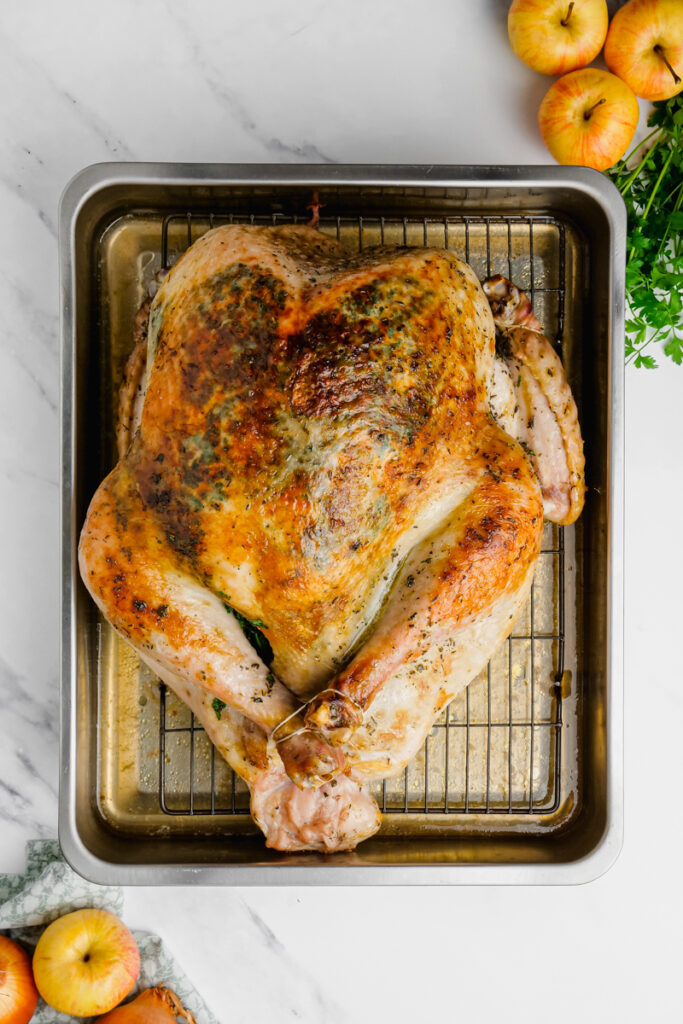
Step ten: Remove Turkey and Reduce the Oven Heat.
Remove the turkey from the oven and reduce the heat to 350.
Step eleven: Prepare Turkey for More Cooking.
Cover breast and wing tips with foil. Add apple juice or white wine to the bottom of the pan.
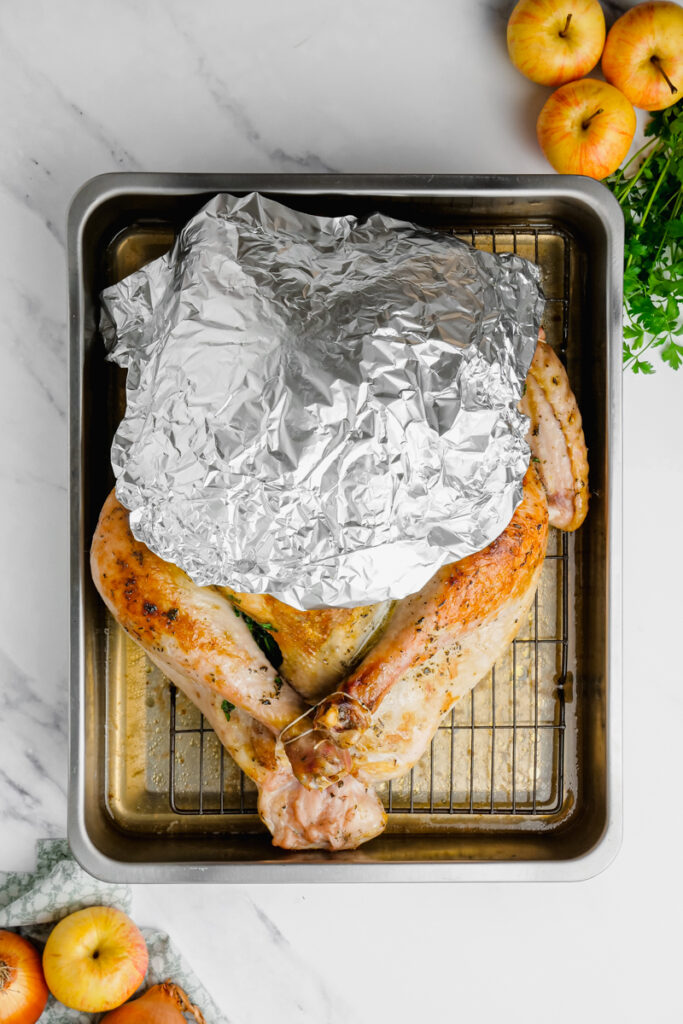
Step twelve: Cook Turkey for About 2 More Hours.
Cook for about 2 more hours (about 12 minutes per pound). For the last half hour remove the foil.
Step thirteen: Test the Turkey Temperature.
Insert the thermometer into the turkey’s thigh to test the doneness. It should read 160 degrees.
Step fourteen: Remove Turkey from Oven and Let Rest.
Remove the turkey from the oven. Dump any juices from the inside of the turkey onto the roasting pan. Transfer turkey onto a serving platter and cover with foil, letting the turkey rest for 30 minutes.
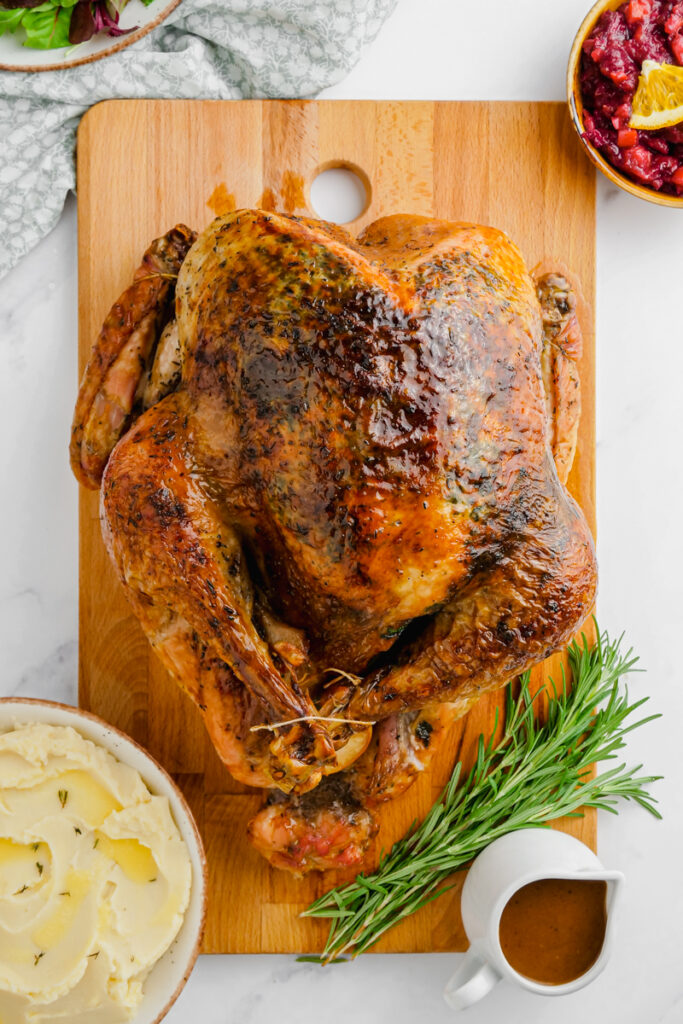
Step fifteen: Serve Turkey and Make Gravy.
Serve turkey and use those extra dripping to make turkey gravy.
Tips and Tricks
Making this recipe is Eazy Peazy…
- Tip One: While you can also wet brine a turkey, the method of dry brining provides a turkey dish with a much greater depth of flavor.
- Tip Two: Dry brine is just basically putting salt or in this case spices too, on the turkey and letting it sit in the refrigerator. Do not shorten the time frame. Time is needed in order to let the tenderizing happen.
- Tip Three: Don’t skip rubbing the meat under the skin with the spice mixture. This is an important part. It will result in a more flavorful, tender piece of meat.
- Tip Four: As already mentioned, you don’t want a turkey that is pre-brined or that has already been salted.
- Tip Five: Never buy gravy again! Make your own easy, homemade Turkey Gravy with the leftover turkey drippings.
Make Ahead and Storage
How to make this recipe ahead of time.
Quality of the meat will be compromised if you freeze it. No freezer friendly option for this recipe.
Fresh is best for this dish. However, of course it will stay good in the fridge for up to 3-4 days though and can be reheated in the microwave.
Other Great Recipes:
- Thanksgiving Leftovers “Turkey” Sandwich
- Not Too Spicy Turkey Stroganoff
- Turkey Noodle Soup
- Roast Turkey Breast
- Crockpot Turkey Breast and Gravy
Dry Brine Turkey
Ingredients
- 16 pounds turkey not kosher, and not pre-brined (1 turkey between 12-16 pounds)
Dry Brine
- 3 Tablespoons Kosher salt
- ½ teaspoon dried thyme
- ½ teaspoon dried sage
- ½ teaspoon dried rosemary
The Rest
- ½ bunch flat-leaf parsley divided
- 1 teaspoon black pepper
- 2 onions small, halved
- 2 apples small, cored and halved
- ½ cup unsalted butter softened
- 1 1/2 cups apple juice or white wine
Instructions
- Two days before you want to serve, remove any extra pieces from the turkey (neck, giblets etc.) then rinse your turkey and pat it dry.
- In a small bowl, mix together Salt and dried herbs. Rub all over the turkey, inside the cavities, and under the skin where you can. You will want about 3 Tablespoons, or 1 Tablespoon per 4 pounds of Turkey. Place more of the brine mixture on the breasts than the thighs, as they are thicker and need more.
- Wrap your turkey in plastic wrap, or put in a large plastic bag, and place in the refrigerator overnight.
- The next day, turn your turkey over, and return to your refrigerator for another night.
- A couple of hours before cooking, remove turkey from plastic wrap or bag and pat dry. Then set out in a roasting pan on the counter to allow to come to room temperature.
- Pre-heat oven to 450 degrees.
- In a small bowl, mix ½ the butter with ½ the parsley, finely chopped and the black pepper.
- Gently lift the skin of the turkey, and use a spoon to insert the herbed butter under the skin, use hands to press it around. Then take remaining butter and rub it all over the exterior of the turkey, specifically onto the thigh meat and breasts.
- Put remaining parsley, half the onions and half the apples into the main cavity of the bird. And remaining apples and onions into the neck. Truss the legs with kitchen twine.
- Roast for 30 minutes in the 450 degree oven.
- Remove turkey from the oven, reduce the oven heat to 350 degrees.
- Use foil to cover the breast of the bird and wing tips.
- Add 1 1/2 cups apple juice or white wine to the bottom of the roasting pan.
- Place bird back in the oven, and roast for another two hours (or for about 12 minutes per pound), and remove the foil for the last half hour.
- After the 2 hours, insert an instant read thermometer into the thigh to test for doneness. It should read 160 degree F when done.
- Remove turkey from oven, and lift from pan, dumping any juices from inside the turkey into the roasting pan.
- Place turkey on a baking sheet or serving platter, and cover with foil. Allow to rest for 30 minutes.
- All of the liquid in the roasting pan and fat drippings can be used to make a great pan sauce or gravy.
Nutrition
Our recipe card software calculates these nutrition facts based on averages for the above ingredients, different brands, and quality of produce/meats may have different nutritional information, always calculate your own based on the specific products you use in order to achieve accurate macros for this recipe.

Leave a Reply