Parker House Rolls
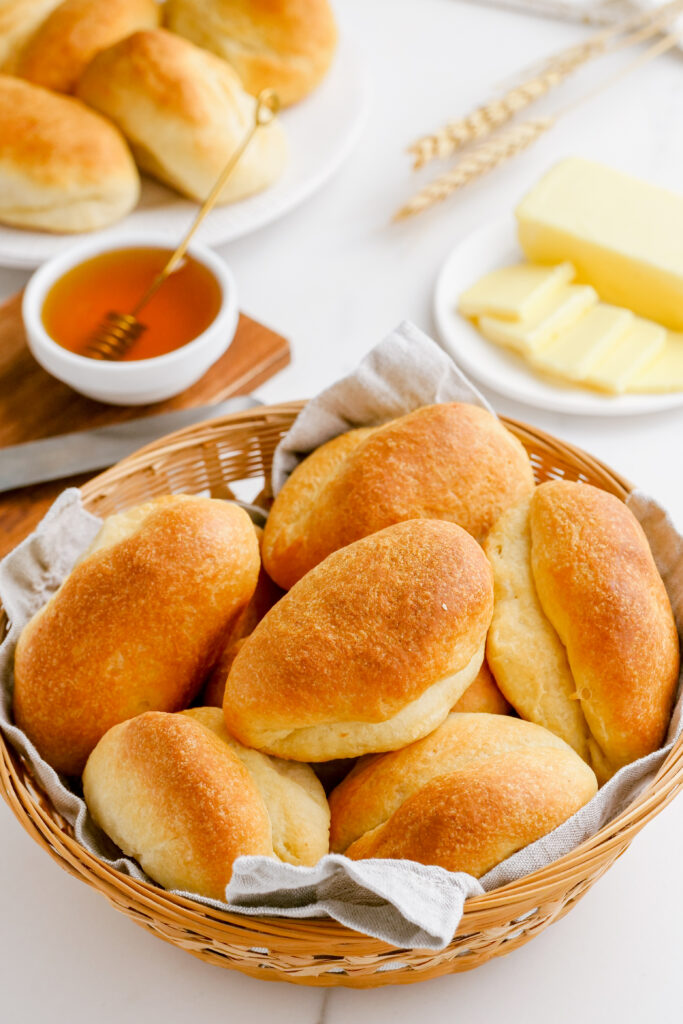
Buttery rolls with a light fluffy center, these Parker House Rolls will become a new must have in your home. Delicious rolls that will elevate any meal are a necessary recipe to keep on hand. The perfect side. Yum!
Serve with Easy Crock Pot Roast and Super Easy Mashed Potatoes for a great meal.
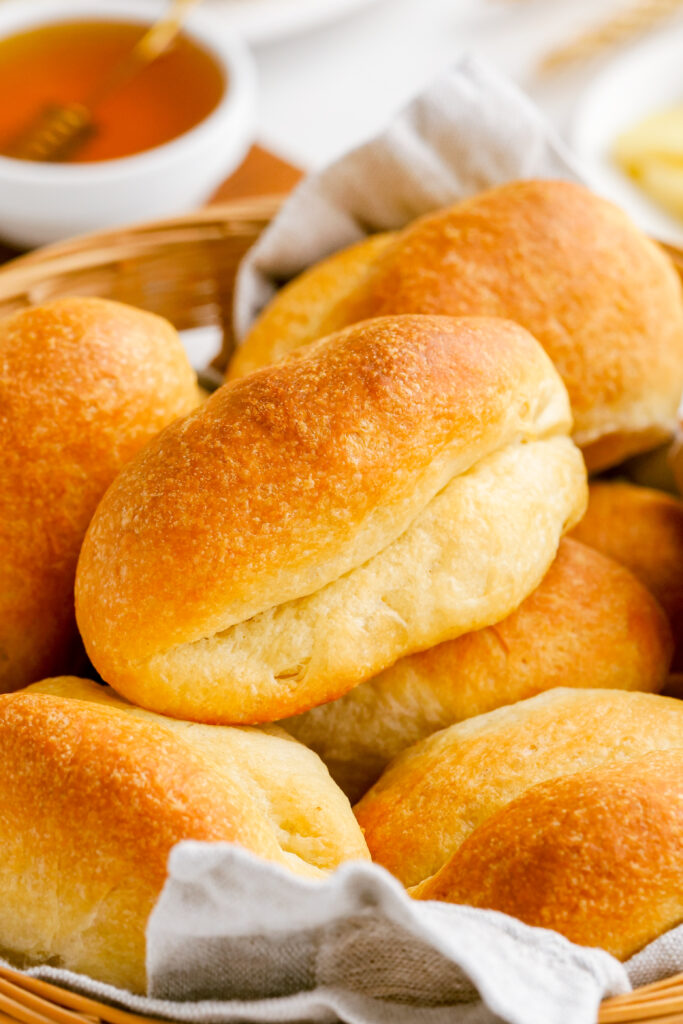
These rolls are next level, Friends. If you want to impress a group or just simply treat yourself, these Parker House Rolls are for you.
While I love a delicious garlic bread recipe like Cheesy Garlic Pull-It Bread, sometimes I want a more universal side bread or roll that will partner well with so many dishes, like Parker House Rolls.
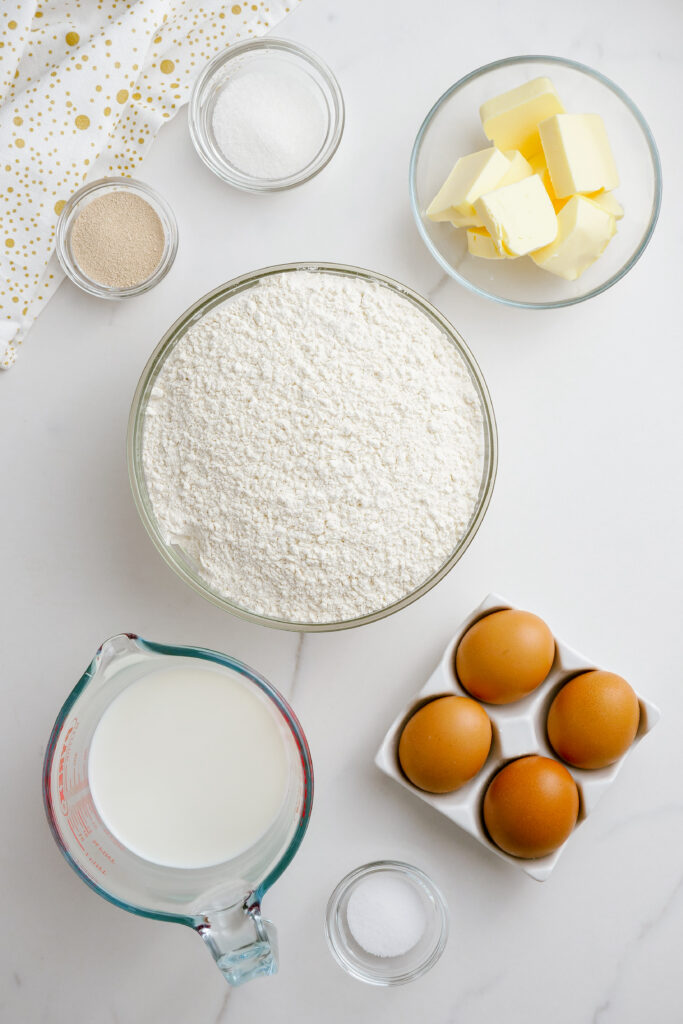
What You Need to Make Parker House Rolls
Just a handful of ingredients, many of which you may already have on hand, these Parker House Rolls you should make a.s.a.p. They are that good. Plus chances are you already have everything you need to make these!
- Whole Milk
- Sugar
- Instant or Rapid Free Yeast
- Large Egg
- Unbleached All Purpose Flour
- Salt
- Unsalted Butter
How to Make Parker House Rolls
Don’t be intimidated by the steps to making parker house rolls. It really is worth it, and not nearly as hard as it seems. Basically It is:
- Prep Oven
- Make Dough
- Knead Dough
- Let Dough Rise
- Shape Dough
- Rise Again
- Bake
- Serve, and most importantly enjoy every bite of goodness.
Step one: Prep Oven For Proofing.
Heat oven at 200 degrees with the oven rack adjusted to the lowest position. Maintain oven temperature for 10 minutes and then turn off the heat.
You do this to make a nice environment for proofing your dough so it will rise nicely.
Step two: Heat Milk and Sugar Mixture.
Combine milk and sugar. Then heat in a saucepan or microwave until lukewarm (100 degrees).
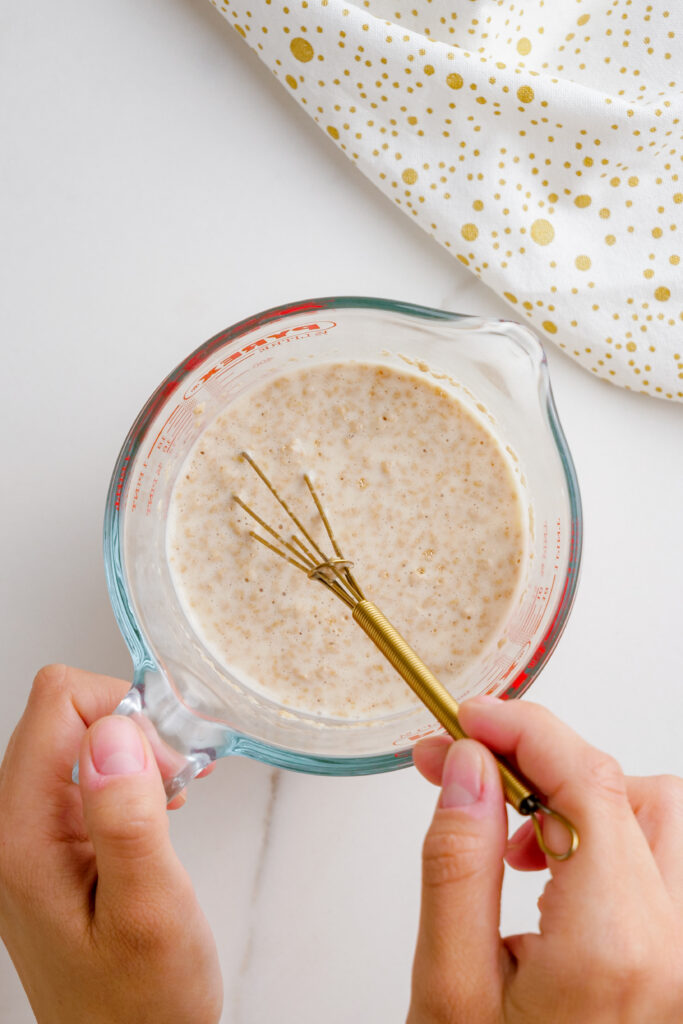
Step three: Add Yeast, Egg, And Whisk.
Add yeast and egg to the milk and sugar mixture, whisking to combine ingredients. Then set aside.
Step four: In a Separate Bowl Combine Flour and Salt.
In a bowl of a stand mixer, combine 4 cups of flour with salt. Mix with a paddle on the lowest speed for fifteen seconds.
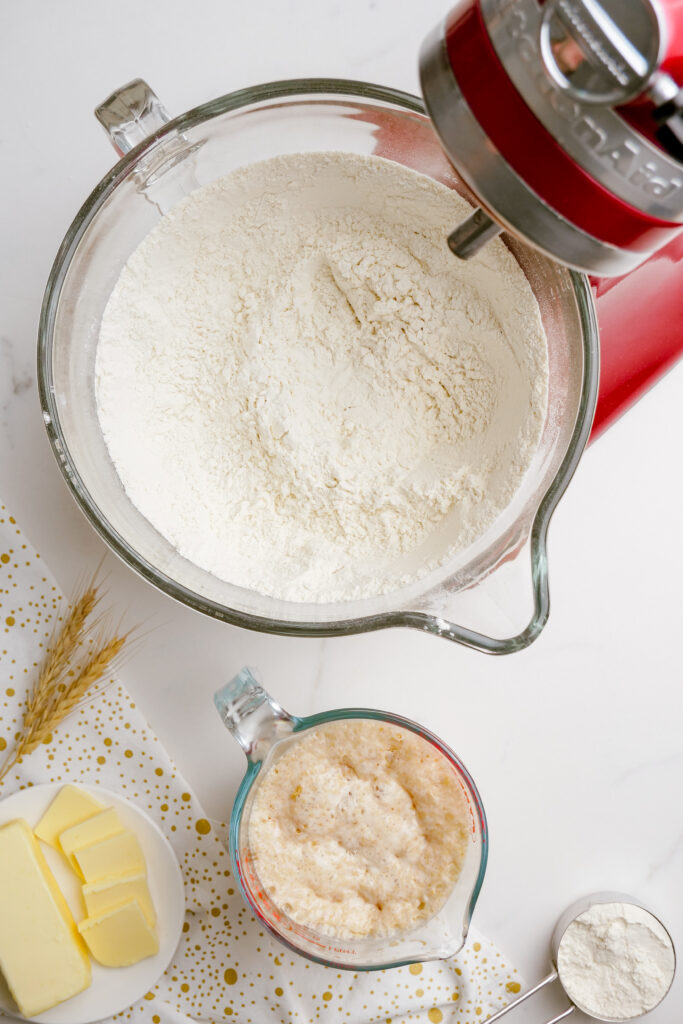
Step five: Incorporate Liquid Mixture and then Butter into Dry Mixture.
While the mixer is running, slowly add the liquid mixture and mix for about 1 minute. Then add 8 TBS of softened butter, 1 piece at a time. Increase the speed to medium for about 2 minutes longer so ingredients will be thoroughly combined.
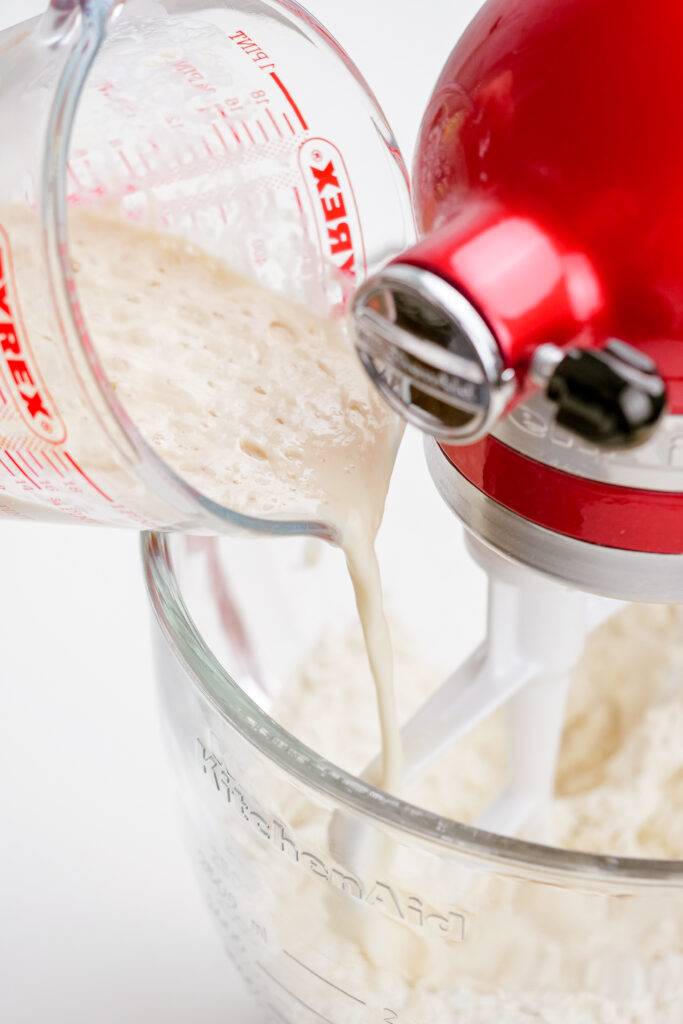
Step six: Knead Dough.
Turn the mixer off and replace the paddle with a dough hook. At medium speed knead the dough until it is smooth but still stick, about 6 minutes. If needed, add more flour, 1 TBS at a time to clear the sides of the bowl.
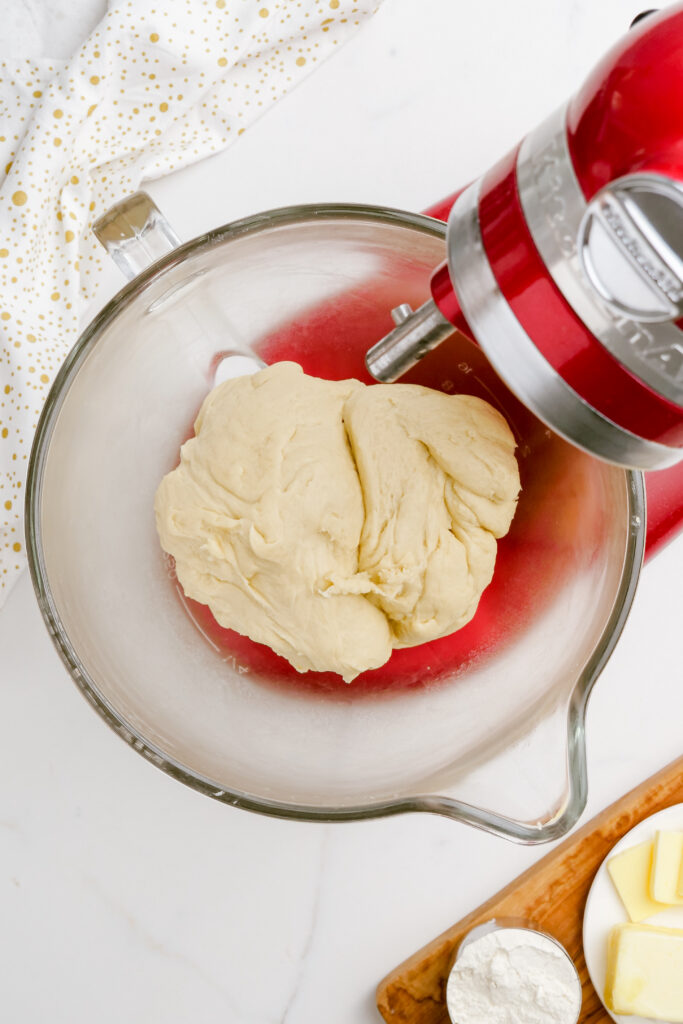
Step seven: Knead on a Floured Surface.
Transfer dough onto a lightly floured surface and continue to knead the dough by hand until it is no longer sticky, but smooth and soft (about 1 minute).
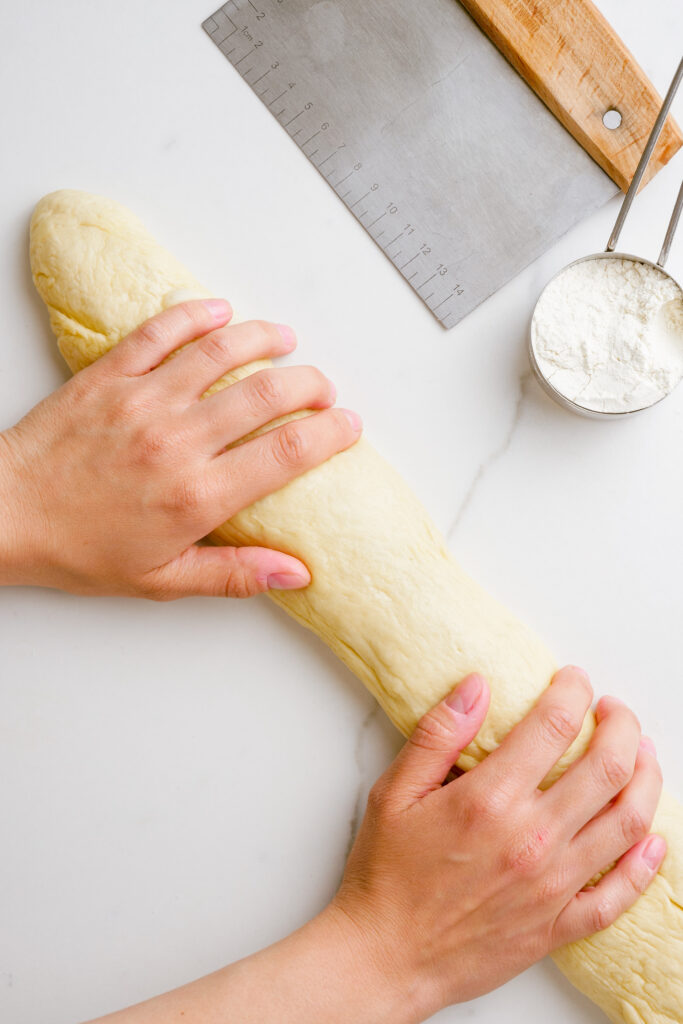
Step eight: Let Dough Rise.
Place dough In a lightly oiled bowl and cover with plastic wrap. Transfer the bowl into the warmed oven until the dough doubles in size, about 45 minutes.
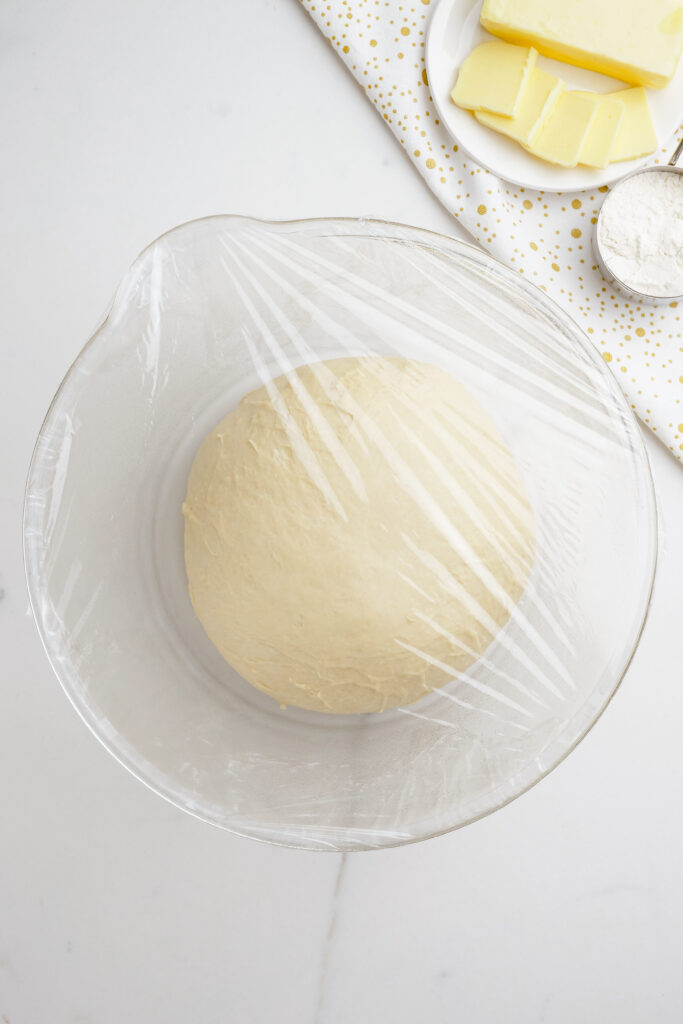
Step nine: Dough Rests.
Press the dough down. Replace the plastic wrap and let dough rest for five minutes.
Step ten: Melt Butter and Brush on a Large Rimmed Baking Sheet.
Meanwhile, melt the remaining 6 tablespoons of butter and brush 3 tablespoons of it on the bottom and sides of a large rimmed baking sheet. Set the baking sheet aside.
Step eleven: Shape Dough and Cut into Pieces.
Divide dough into two equal logs, about 18 inches long and 1 ½ inches across. With a bench scraper, cut each log into twelve 1 ½ inch pieces. Cover with plastic wrap.
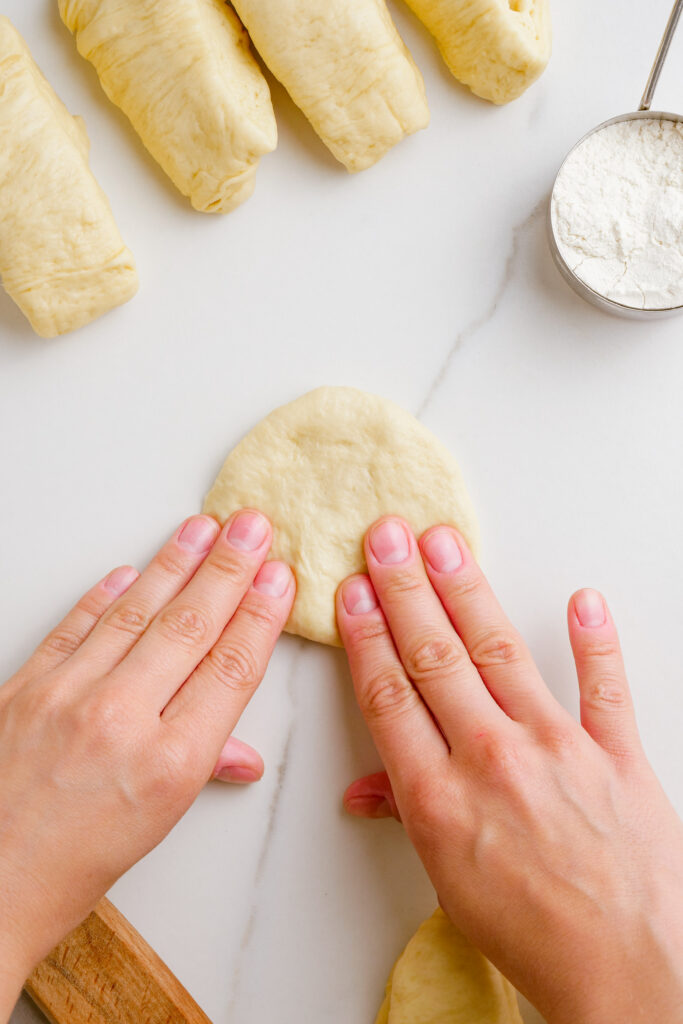
Step twelve: Shape Rolls and Brush with Butter.
- Working with dough one piece at a time, while other pieces remain covered, round and shape the rolls into a smooth tight ball.
- Then press the dough flat so the pieces of dough are ½ inch thick rounds.
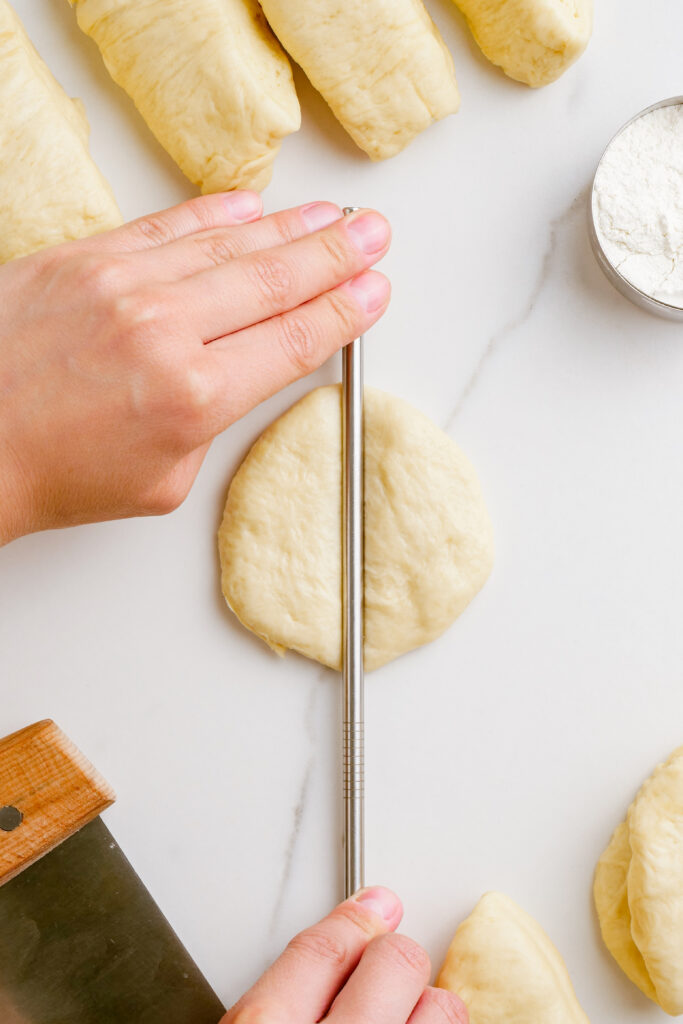
- Using a small wooden dowel, flatten the dough out and shape into an oval. Edges should be a little thicker than the middle.
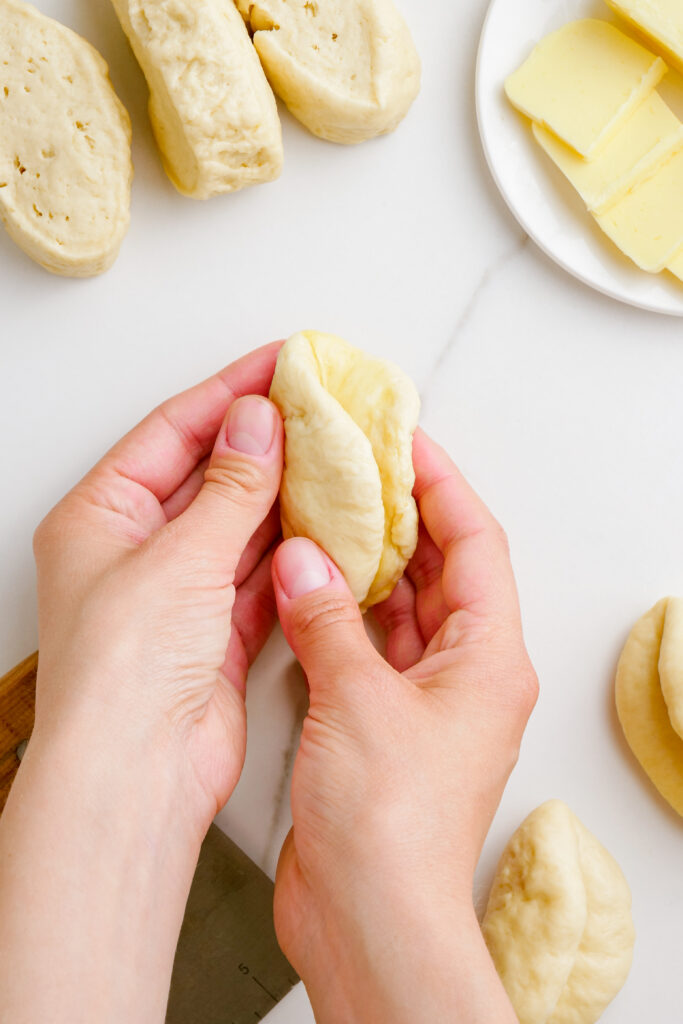
- Brush with butter, fold dough in half to form your roll, and brush tops with butter.
Step thirteen: Let Rolls Continue to Rise.
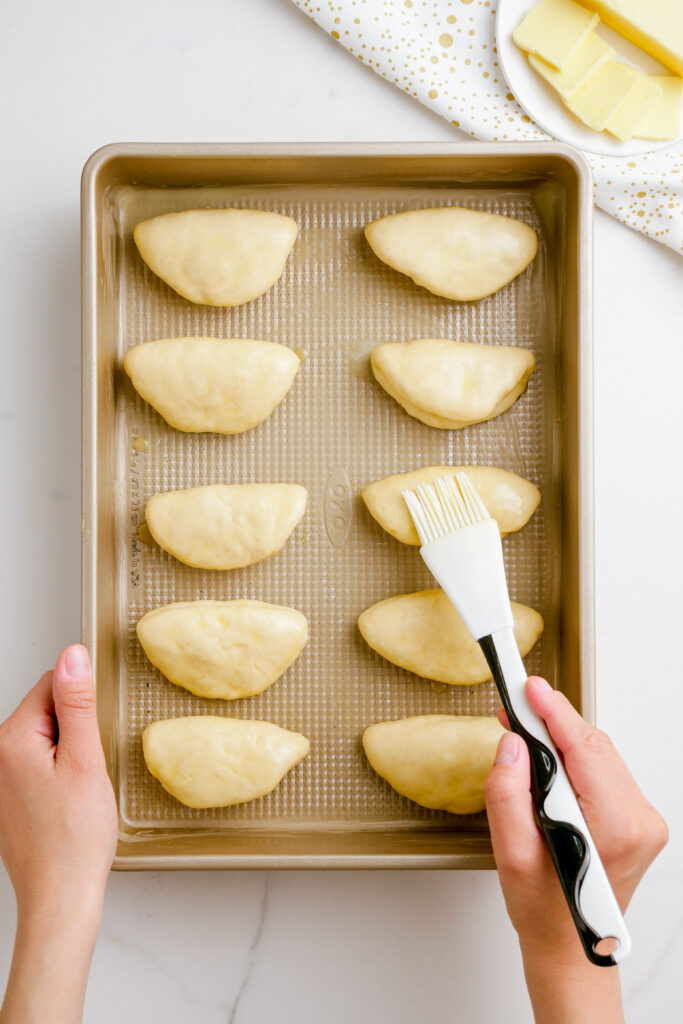
On a prepared baking sheet in three evenly spaced rows, cover dough with plastic wrap, and set the rolls in a warm place. Let them continue to rise until they double in size, about 45 minutes.
Step fourteen: Prepare the Oven.
When rolls are almost fully risen, preheat the oven to 375 degrees with the oven rack placed in the middle position.
Step fifteen: Bake, Cool, and Serve.
Bake rolls until the tops are a dark, golden brown, about 20-22 minutes. Prior to serving, transfer rolls onto the wire rack and cool for 10 minutes.
Tips and Tricks
Making this recipe is Eazy Peazy but here are a few things you should know to get perfect rolls every single time.
- Make sure to keep the rest of the dough covered while shaping the rolls: Don’t forget to keep the remaining dough covered while rounding and shaping the dough to prevent the remaining dough from drying out. You want light, fluffy, beautiful rolls, and if you let them dry out you won’t get that.
- Dough can be made the night before: After transferring the dough into the oiled bowl, it can be covered and refrigerated for up to 16 hours. Just before continuing with the rest of the steps, let the dough sit out at room temperature for 30 minutes. A perfect way to make these for Thanksgiving or another time where you will be cooking a lot and want free up some time by prepping ahead.
- For best reheating results, reheat in the oven: Reheat rolls in a preheated oven set at 350 degrees, until warmed through.
- Make sure to use whole milk: The fat in the whole milk contributes to the decadence of the roll. Don’t use skim or 2 percent milk instead. Whole milk is a must for this one.
- Spice up rolls with a seasoning blend of choice: Follow the recipe as is and the rolls will be great. However for a change, add a favorite seasoning blend to the rolls.
Make Ahead and Storage
Make the Night Before:
Dough will last in the fridge for up to 16 hours.
Leave dough covered in the oiled bowl in the fridge and then when ready to proceed with the rest of the directions, let dough sit out at room temp for 30 minutes before moving onto the rest of the steps.
Make and Freeze:
- Follow the recipe like normal.
- Let the rolls cool completely.
- Wrap the rolls in a double layer of plastic wrap and then in an additional layer of foil.
- When stored properly, rolls will last up to one month in the freezer.
Storage:
Leftover bread can be stored at room temp for up to 3 days. Just simply wrap Parker House Rolls in a double layer of plastic wrap.
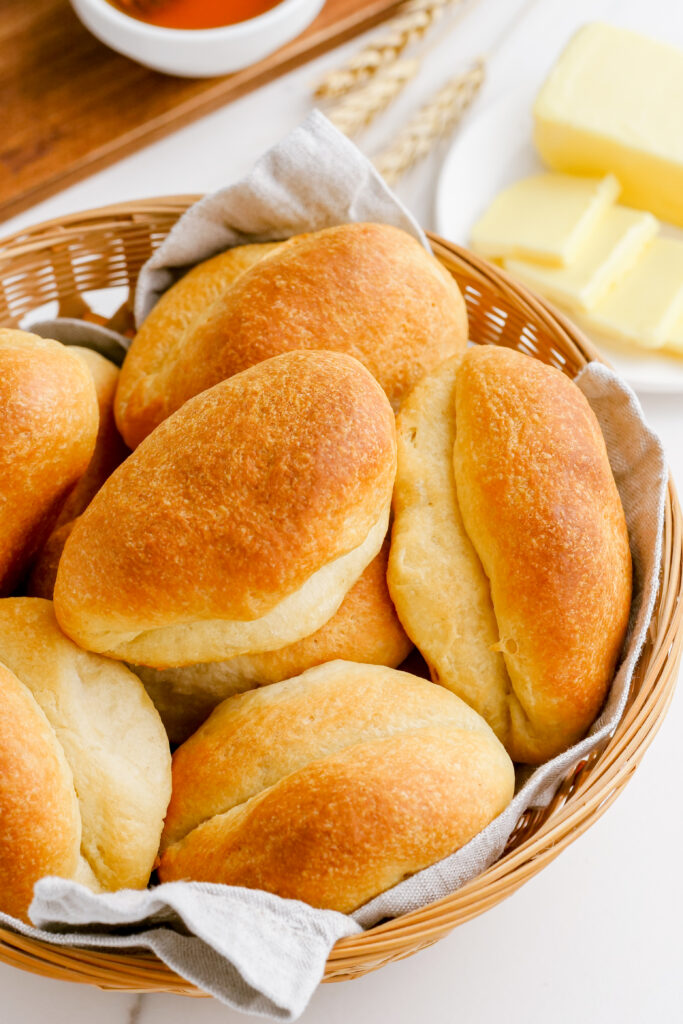
Eat now or later, either way these Parker House Rolls are such a treat!
Other Great Recipes:
- Mom’s Dinner Rolls
- Simple and Quick Dinner Rolls
- No Knead Dinner Rolls
- Cheese Stuffed Garlic Rolls
- Potato Rolls

Parker House Rolls
Ingredients
- 1 ¼ cups whole milk
- 2 tablespoons sugar
- 2 1/4 teaspoon instant yeast Or rapid rise, 1 packet
- 1 egg large, lightly beaten
- 4-41/4 cups unbleached all purpose flour plus extra for dusting
- 1 ½ teaspoons salt
- 14 tablespoons unsalted butter 1 ¾ sticks, , 8 tablespoons cut into 8 pieces and softened
Instructions
- Prep oven for proofing: Adjust an oven rack to the lowest position and heat the oven 200 degrees. Once the oven reaches 200 degrees maintain the oven temperature for 10 minutes, then turn off the heat.
- Combine milk and sugar in a bowl, and heat the milk and sugar together in a small saucepan or the microwave until the mixture is lukewarm--100 degrees. Add the yeast and egg to the milk and sugar mixture, and whisk to combine, set aside.
- In the bowl of a stand mixer, combine 4 cups of the flour and salt. Fit it with a paddle and mix at the lowest speed for 15 seconds.
- Keep mixer running, and slowly add the liquid mixture in a steady stream. Mix about 1 minute. Then, slowly begin to add the 8 tablespoons of softened butter, 1 piece at a time, until incorporated into the dough.
- Increase the speed to medium and beat until the dough is thoroughly combined, about 2 minutes longer.
- Knead Dough: Turn mixer off,and replace the paddle with a dough hook and knead the dough at a medium speed until it is smooth but still sticky, about 6 minutes. You can add more flour 1 Tbs at a time if needed to help the dough clear the sides of the bowl.
- Continue Kneading: After the 6 minutes are up, scrape the dough out of the mixing bowl and onto a lightly floured work surface. Continue to knead the dough, but by hand until it is very smooth and soft, and no longer sticky, about 1 minute.
- Rise: Transfer the dough to a very lightly oiled large bowl. Cover the bowl with plastic wrap and place it in the prepared warmed oven until the dough doubles in size, about 45 minutes. Once the dough has doubled, press it down, replace the plastic wrap, and allow the dough to rest for 5 minutes.
- Meanwhile, melt the remaining 6 tablespoons of butter and liberally brush 3 tablespoons of it on the bottom and sides of a large rimmed baking sheet. Set aside.
- Divide the relaxed dough into 2 equal pieces and use your hands to shape it into logs about 18 inches long and about 1 ½ inches across. Use a bench scraper to cut each log of dough into twelve 1 ½ inch pieces.
- Cover all 24 pieces with plastic wrap.
- Working with one piece at a time, keeping the other pieces covered so they do not dry out, round and shape the rolls by cupping them in your palm and rolling into a smooth tight ball. Then press them flat, so they are about ½ inch thick rounds. Use the handle of a wooden spoon, or a small wooden dowel to flatten the dough out and shape into an oval, leaving the edges a little thicker than the middle. Brush with butter, then fold the dough in half to form your roll. Lightly brush the tops with the remaining melted butter.
- Place the rolls on the prepared baking sheet in three evenly spaced rows. Cover them with plastic wrap and set them in a warm place, let them rise until almost doubled in size and touching each other, about 45 minutes.
- When the rolls are almost fully risen, preheat oven to 375 degrees, and adjust the oven rack to the middle position.
- Bake for 20-22 minutes until the roll tops are dark golden brown. Then transfer rolls to the wire rack and let cool for 10 minutes before serving.
Nutrition
Our recipe card software calculates these nutrition facts based on averages for the above ingredients, different brands, and quality of produce/meats may have different nutritional information, always calculate your own based on the specific products you use in order to achieve accurate macros for this recipe.
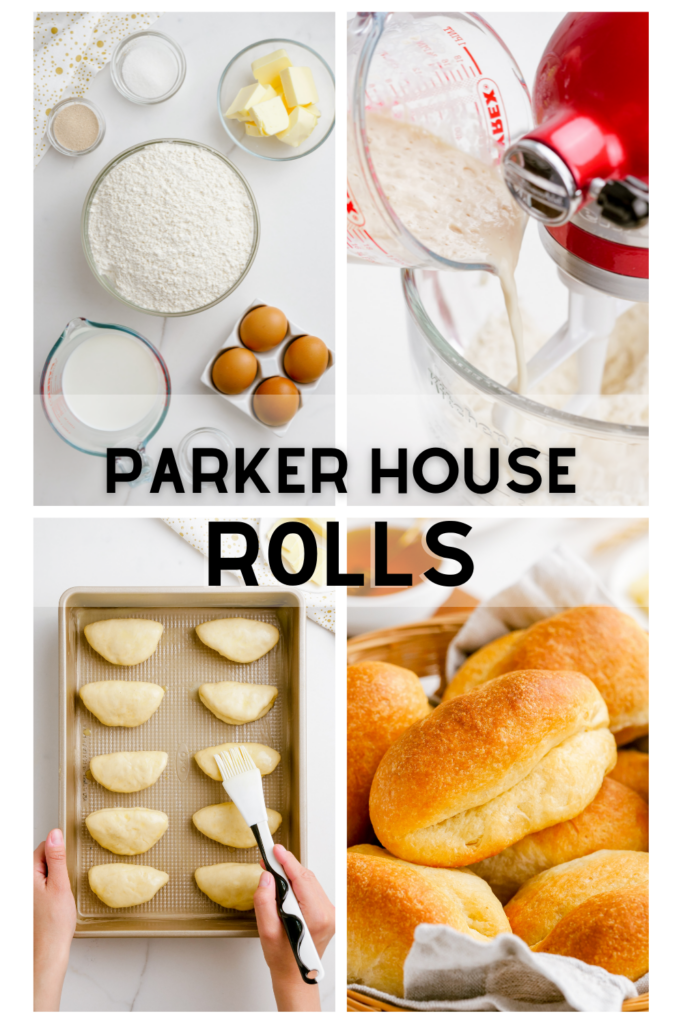
Pin to your Rolls board on Pinterest:


Leave a Reply