This post is sponsored by Ibotta, all opinions are my own.
Caramel apples are one of Fall’s greatest pleasures. Crisp apples, sweet caramel, fun Halloween goodies. Not only are they easy to make, they’re also super fun to personalize! So this Halloween, let’s eat, drink, and be scary with these super easy caramel apples, and screaming deals from Ibotta.
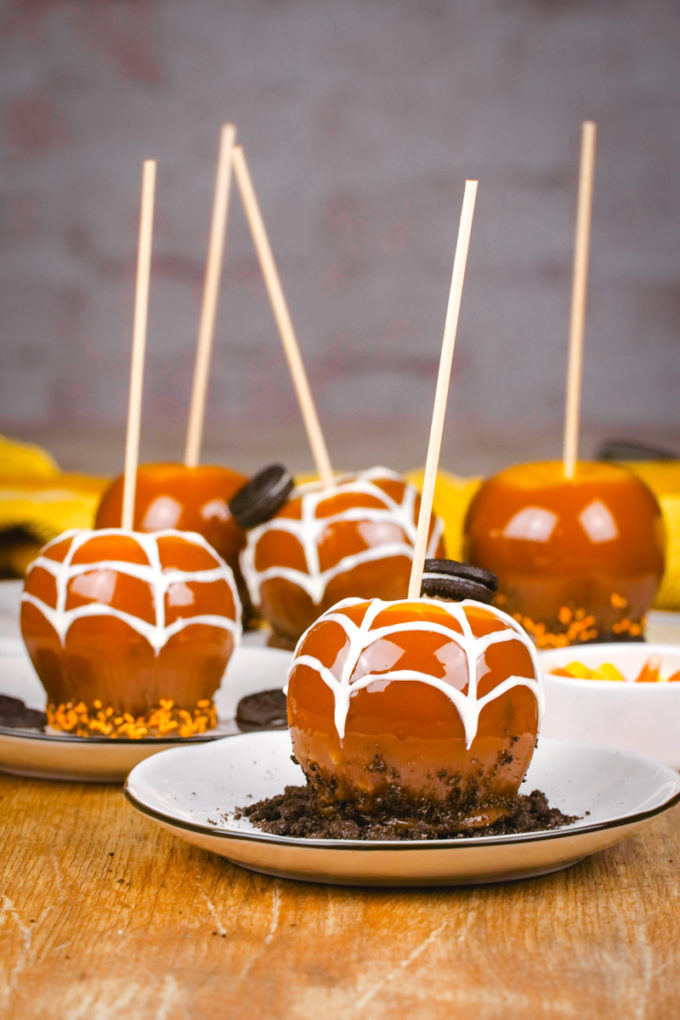
These fun caramel apples can be decorated to look like spider’s webs, or with fun Halloween sprinkles and candies to create a deliciously spooky treat for Halloween.

Caramel Apples have been a classic Halloween or Fall recipe for as long as I can remember. But they always intimidated me. I felt like it would be easier, less expensive, and less messy to just purchase them already made. But like most things, that is not the case, and they just taste better when they are homemade.
Well after years of trial and error, and making sticky messes, I have finally figured out all the tricks and tips, and perfected my caramel apple making. And you guys, I am keeping it easy. No complicated recipe, this is more about the process. Caramel apples are so much easier to make than you think.

I’m sharing everything you need to know for perfectly coated, easy to make, super fun, and of course scarily delicious caramel apples, as well as tips for earning gobbs of cashback this Halloween with Ibotta. Don’t make these caramel apples without downloading the app first, you can start earning today when you purchase everything you need to make these apples.
There is no limit to the ways you can earn cash back with Ibotta and make this holiday a total scream!
How does Ibotta Work?
Before we get into the tips and tricks for great caramel apples, let’s chat about how every ghost and ghouls alike can earn cashback this Halloween when they use Ibotta for their purchases!
Ibotta is a cashback and rewards app that helps you save time and money when you shop. No matter what you are buying, or whether you are buying in store or online, you can find ways to save and earn.
4 easy steps for using Ibotta:
- Start by downloading the Ibotta app (link), it is 100% free to use, no subscriptions or fees
- Then add your favorite offers. They have hundreds of partners like Walmart, Target, Amazon, and Costco, and new offers every week.
- Shop, and buy what you need.
- Redeem those offers for cashback.
And what I love is there are multiple ways to redeem:
- Sent receipts- redeem after the fact by scanning your receipts.
- Link a loyalty card
- Mobile in-app purchases- start in the app if purchasing something online through your mobile device.
100% of your Ibotta earnings can be transferred to PayPal or Venmo as soon as you’ve earned $20. But, if you’d rather convert your earnings into a gift card, you can do that, too. It is eazy peazy, and a great way to save.
If you aren’t using Ibotta already, start saving today with these tasty caramel apples.
What do You Need for Caramel Apples?
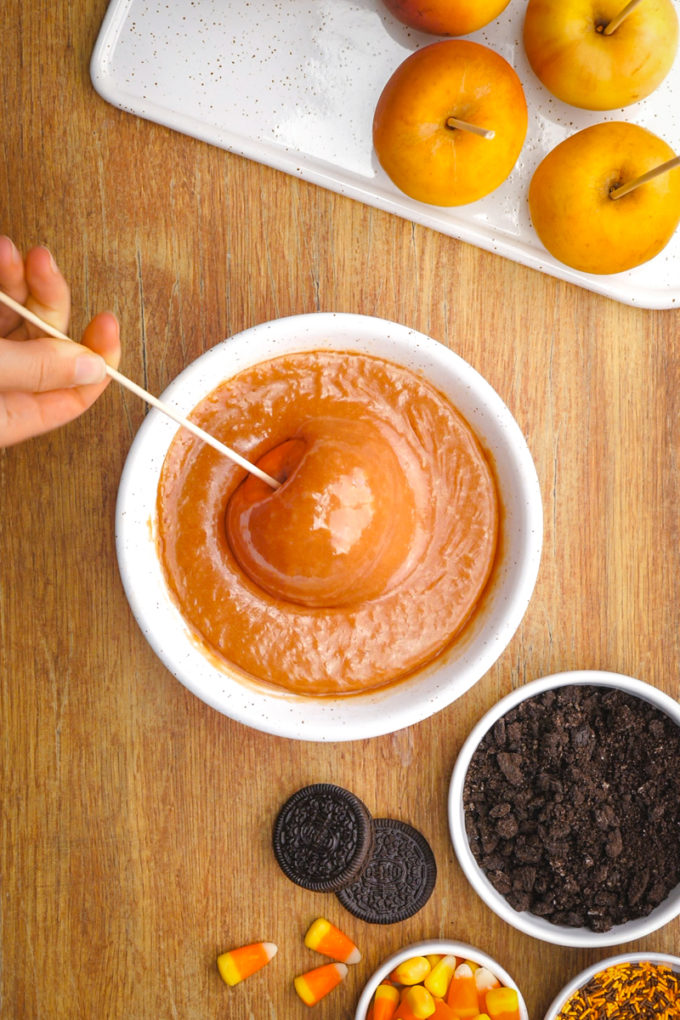
All you need is a few simple ingredients for easy caramel apples, and then whatever extras sound fun to you– chopped nuts, sprinkles, chocolate drizzle, candy and more:
- Apples
- Caramels, unwrapped
- Milk
- All the fun decorations: Candy corn, M&Ms, Halloween sprinkles, OREO cookie crumbs and other small candies
- Water for boiling
- Paper Towels to wipe the wax off the apples
- Craft sticks or skewers
- Wax paper lined baking sheet
- Oil cooking spray or butter to line wax paper
For these easy caramel apples, I took advantage of these spooky steals through Ibotta to earn cashback on stuff I was already planning to buy:
- $0.50 back on any item from Smith’s– I used on the apples
- 3% cash back from Amazon Grocery — I used for the Halloween sprinkles and decorations
- $0.50 back on any item from Walmart — I used for the sticks for the apples
*All offers were valid as of publish date. Don’t forget to check your app for details as offers change frequently and may not be available in all areas
How do you make caramel for caramel apples?
Let’s skip the fuss of a homemade caramel for these apples, and use those individually wrapped caramels, and simply microwave them. I use a little milk to get the right consistency, and simply heat the caramel. I love this method because it means no candy thermometer or stress of messing up. And you get a great consistency every time.
More Apple Recipes:
- Crock Pot Apple Crisp
- Warm Mulled Cranberry Apple Cider
- Apple Spinach Salad with Balsamic Vinegar Dressing
- Apple Pear Crisp
What are the best apples for caramel apples?
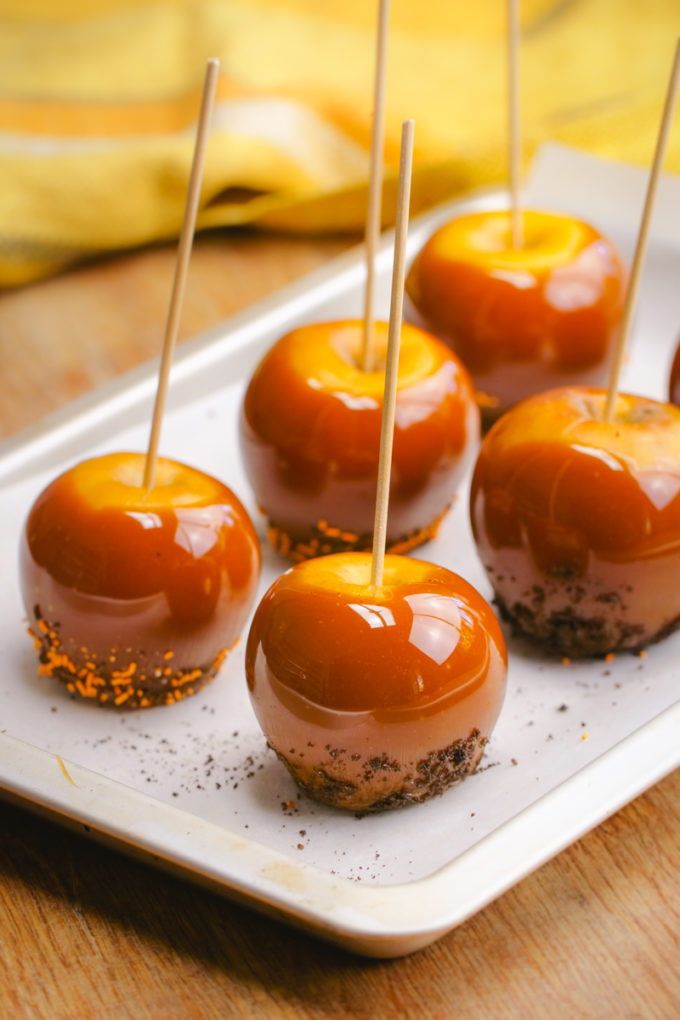
The toughest part of making caramel apples is selecting which apples you want to use. My rule of thumb is to pick whatever variety you like best, but opt for something that is tart and firm. The tartness will help offset the sweetness of the caramel and extra goodies, so it isn’t too sweet. And the firmness will allow the apples to have a nice crisp bite, giving you variety in texture.
A few of my favorite varieties:
- Granny Smith: Tart flavor and firm. This is my top choice because it is a firm enough apple with enough tartness that you can layer on the toppings. When I was making my caramel apples, the options for Granny Smiths weren’t looking too great, so I went with a different varietal. So while this is my favorite, it is by no means the only option.
- Haralson: Tart flavor. Another great choice.
- Jazz: This apple is a cross between a Royal Gala and a Braeburn. Crunchy and oh so tart but also sweet. This might be my kid’s favorite option for caramel apples because they are a little sweeter.
- McIntosh: Mildly tart flavor.
- Empire: Mildly tart flavor, with some sweet undertones, and a nice firmness.
Do you put caramel apples in the fridge?
Yes, caramel apples can be kept in the fridge, but beware this could cause the extra goodies like cookie crumbs to get a little soggy. I always recommend eating your apples fairly soon after making them.
Top Tips for Easy Caramel Apples
- Apples need to have wax removed before they are dipped in caramel or the caramel won’t stick well. Do this by dipping in boiling water for a few second or just purchase non waxed from your local farmer. The idea is not to cook your apples, as they won’t be nearly as good if you do. But by taking the time to remove the wax, you get a far better experience, and even coating of caramel.
- Apples should be very cold to help set the caramel. After you remove the wax, refrigerate overnight or put the apples in the freezer for 15 minutes before dipping. This will help you have a nice even coating, and not have all your caramel run off the apple onto the tray.
- Have your apples ready with the stick in before you melt your caramel. You want to work quickly once the caramel is melted, which means you need to have everything else ready to go. Bowls of extras ready for use, sticks in, apples chilled.
- Don’t overheat your caramels. Place caramels and milk in a microwave safe bowl, and microwave for 1 minute, stir, then microwave for another minute. But if your microwave runs hot, just pay attention, you want it to melt, but not be boiling over your bowl. Stir until you get a nice smooth consistency that is not too runny, nor too hot, but that is thin enough to dip your apples into it. Then let it cool for a couple minutes so you don’t have hot caramel running right off your apples. It is all about timing, look for caramel that is easy to stir, but not too runny or too hot. Reheat a little if you wait too long or if the first apple is difficult to dip.
- Rotate your apples while you dip, and after you get the apple covered. The trick is to hold to the apple up above your bowl and slowly rotate to allow the caramel to make an even coat, and allow it to start to cool and form onto the apple so it doesn’t run off thanks to gravity when you set it down on your tray.
- If decorating your apples, set your apples in a deep dish of sprinkles, or chopped OREOs, etc. while you dip the next apple, and gently press the treats into the caramel. Don’t roll it or push it into the toppings as this can push the caramel away from the apple and can be very messy.
- Spray the wax paper with cooking oil or spread butter over it so you don’t have to pick wax paper off the bottom of your apples. And once coated and rotated, and decorated, set on the tray.
- DO NOT wrap your apples in any type of clinging wrap. Even after they’ve firmed up. It will stick.
- Run a knife edge at the bottom of the apple to get all the excess caramel off.
Now you know all the tricks for earning cash back with Ibotta and making the perfect caramel apples. How will you decorate your apples for Halloween?

More Delicious Recipes
- Lemon Chicken Pasta
- Creamy Tuscan Chicken Penne
- 3 Ingredient Peanut Butter Cookies
- Healthy Lemon Skillet Chicken
- Caprese Salad

Ingredients
- 6 apples choose a tart, firm apple like a honey crisp or granny smith
- 1 14 ounce package individually wrapped caramels, unwrapped
- 2 tablespoons milk
- Candy corn M&Ms, Halloween sprinkles, OREO cookie crumbs and other small candies
Other
- Water for boiling
- Paper Towels
- Craft sticks or skewers
- Wax paper lined baking sheet
- Oil cooking spray or butter to line wax paper
Instructions
- Bring a large pot of water to a boil. Dip apples into boiling water briefly, using a slotted spoon, and let sit in water for 20-30 seconds.
- Remove from water, and use a paper towel to wipe off any wax that may be on the apples (or buy direct from an orchard so they are wax free).
- Wipe apples dry, and refrigerate 1-2 hours, or overnight. If in a hurry, place in freezer for 15 minutes before dipping into the caramel so they are chilled and will help the caramel set.
- Remove the stem from each apple and press a craft stick, fork, or sucker stick into the top.
- Butter some wax paper, or spray it with cooking spray, and line a baking sheet with it.
- Place caramels and milk in a microwave safe bowl, and microwave for 1 minute, stir, then microwave for another minute.
- Stir until milk is fully incorporated and caramel is easy to stir, but not too runny or hot.
- Allow to cool briefly, about 3-4 minutes. Especially if the caramel is too hot. As it will run off the apple if it is too hot. But don’t wait too long, as you want the caramel to be able to coat the apples. Reheat a little if you wait too long.
- Remove apples from refrigerator or freezer, and roll in the caramel sauce.
- Roll each apple quickly in caramel sauce until well coated. Rotate your apples while you dip, and after you get the apple covered, hold it up above your bowl and slowly rotate to allow the caramel to make an even coat, and allow the caramel to begin to set up before you place it on your prepared sheet. This will reduce puddling at the bottom of the apple.
- If decorating your apples, set your apples in a deep dish of sprinkles, or chopped OREOs, etc. while you dip the next apple, and gently press the treats into the caramel. Don't roll it or push it into the toppings as this often pushes the caramel away from the apple and can be very messy.
- Place on the buttered or oiled wax paper on the baking sheet, and let set up.
- Decorate further if desired.
Notes
Our recipe card software calculates these nutrition facts based on averages for the above ingredients, different brands, and quality of produce/meats may have different nutritional information, always calculate your own based on the specific products you use in order to achieve accurate macros for this recipe.
Pin to your Halloween treat board:



Kara says
Caramel apples are one of the best things about fall! I have a homemade caramel recipe that I love, but this version would be great when I’m pressed for time. I love mine rolled in toffee bits. So good!
Jamielyn says
These are SO fun! Love the spider web version. My kids would go crazy over them!
Jessica says
Nothing better than a caramel apple in the fall!
Krissy Allori says
I saw your video on FB and loved it. I never knew about the wax trick. Can’t wait to make these for Halloween!
Kelly Dixon says
These are amazing! Can’t wait to try
April says
Caramel apples are one of the best treats of fall! I look forward to them all year long!
Also…Ibotta is AMAZING. Love that app!!
Beth says
Thanks for all the great tips. I’ve had the caramel slide off of apples before because the wax wasn’t removed. Dipping them in boiling water works great.
Jennifer says
OMGosh – these are SO cute!
Emily says
these are the most fun apples ever!!! YUMMY!!
Angie says
I love these so much! Caramel apples are my favorite!
Katie says
An absolute FAVORITE fall treat around here! We love how easy and delicious these are.
April says
These are delicious! My kids had tons of fun dipping them into all sorts of things.
Stephanie says
These are so adorable! I made these with my kids over the weekend to take to their class Halloween party and they had so much fun!
Becky Hardin says
So fun!! Caramel apples are the best anytime but these are perfect for fall activities.