Crispy Beer Battered Fish
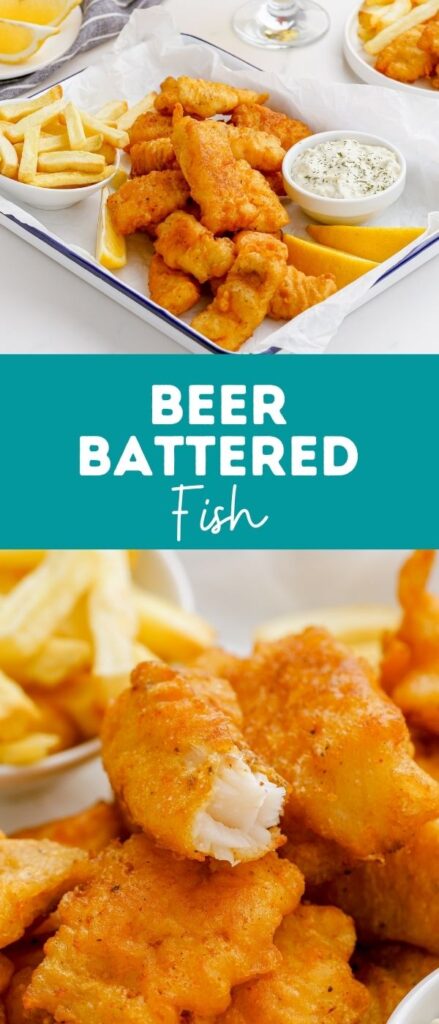
The crispiest beer battered fish, a light crispy coating over flaky white fish, fried to perfection in a dutch oven. Serve it with Oven Baked Steak Fries and Coleslaw for the perfect pub food!
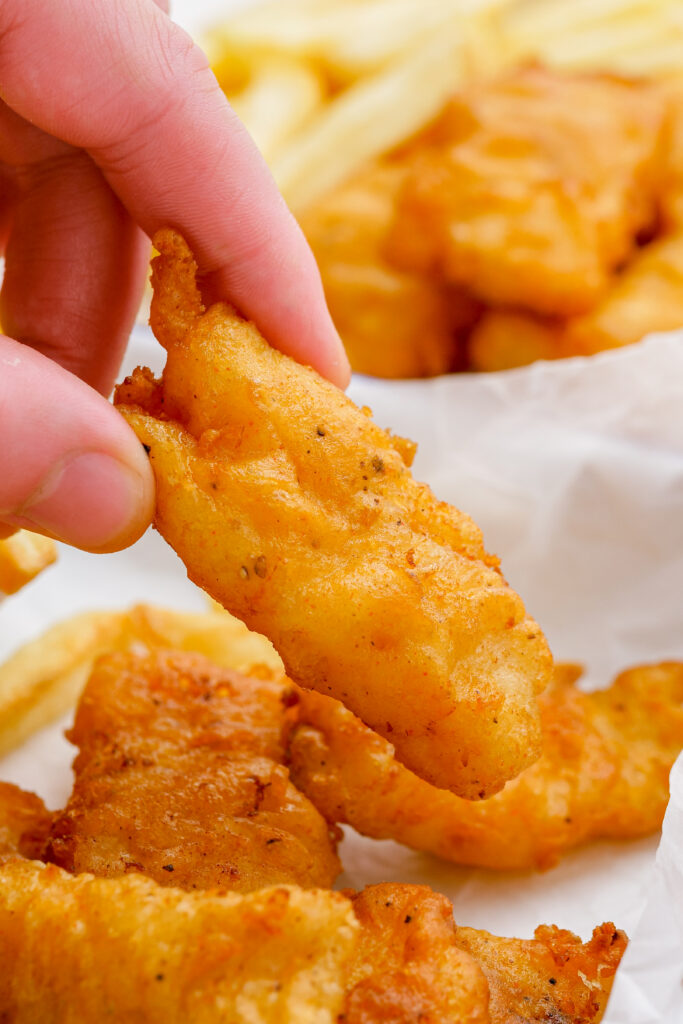
This method produces the best ever battered fish for things like fish and chips. The beer batter and method gives you a light, crispy, coating that isn’t soggy, while maintaining a tender, delightfully flaky fish on the inside. Trust me, you will never want to make it any other way again.
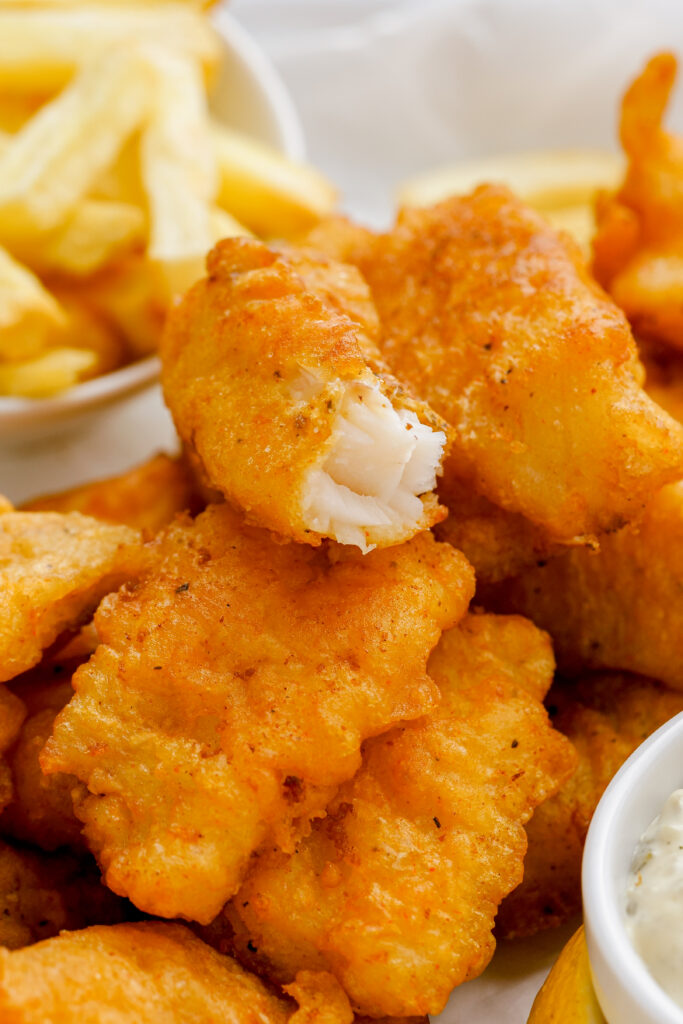
When it comes to a fried fish recipe, a crispy beer batter is the way to go. I don’t even like beer, and have never been a beer drinker, and I LOVE this recipe for beer batter fish, because the beer in the batter is not just flavor, it is what helps make it ultra light, puffy, and crispy, giving you that fish shack, fish and chips, result that you will want again and again.
The goal for a battered fish recipe is to get a thin, light, crispy coating, not a thick, greasy, soggy one. And after a lot of trial and error, and effort, I have found this is how you do it!
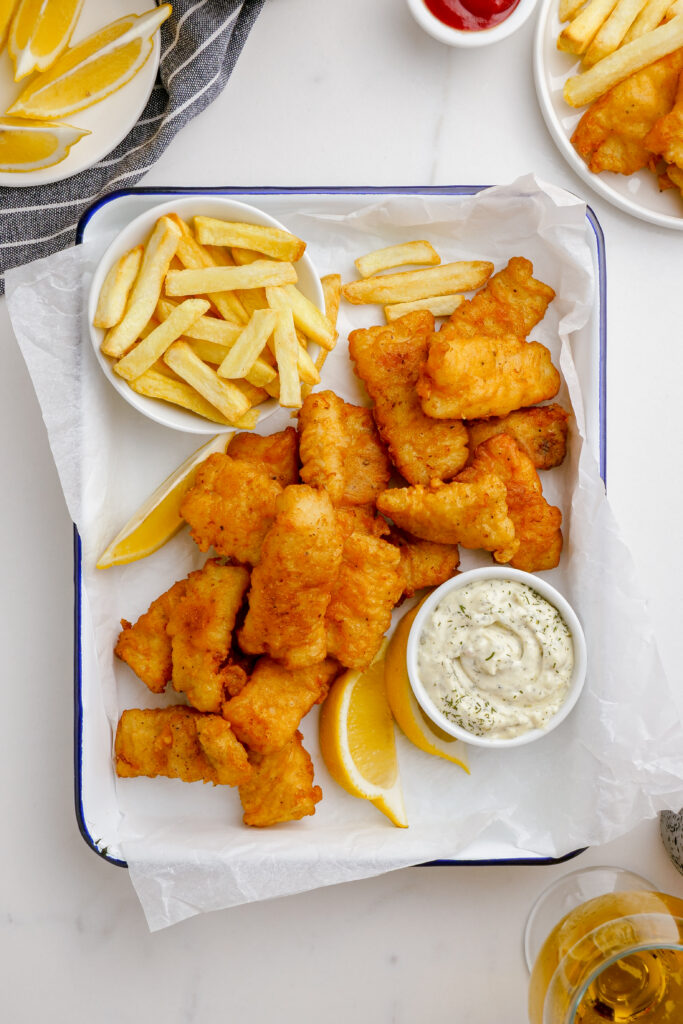
What You Need to Make Beer Battered Fish
Making this beer battered fish is really quite simple, and you will get great, crispy fried fish results with these easy to find ingredients.
- White fish: halibut, cod, or tilapia is recommended. More on why you want to pick a white fish below, but let’s just say, for this method a cod, halibut, or tilapia is your friend here!
- Kosher salt: Not to be confused with iodized or table salt.
- Black pepper: Fresh ground is always recommended
- Canola oil for frying: A vegetable oil would work too, or tallow.
Beer Batter Recipe:
- All purpose flour: The base of your batter.
- Cornstarch or rice flour: Mixed with the all-purpose flour, this is what helps it get and stay crispy when combined with the beer.
- Seasonings: garlic powder, onion powder, paprika, and red pepper. These are all optional. I like a little extra flavor on my batter, but sometimes it is nice to just let the fish flavors shine, so feel free to omit.
- Salt and black pepper: Again, adds flavor.
- Egg: You want it lightly beaten, you might be asking why your batter needs an egg, after testing this recipe several times, I found the egg helped give it that light, fluffy, puffy aspect I wanted.
- Beer: You want it to be very cold, light colored, this is what helps to create that thin, crispy coating that is totally drool-worthy! The yeast and carbonation are a part of what makes the coating light, airy, and puffy! If you have a favorite beer, use it for your beer batter recipe, as you know you like how it tastes!
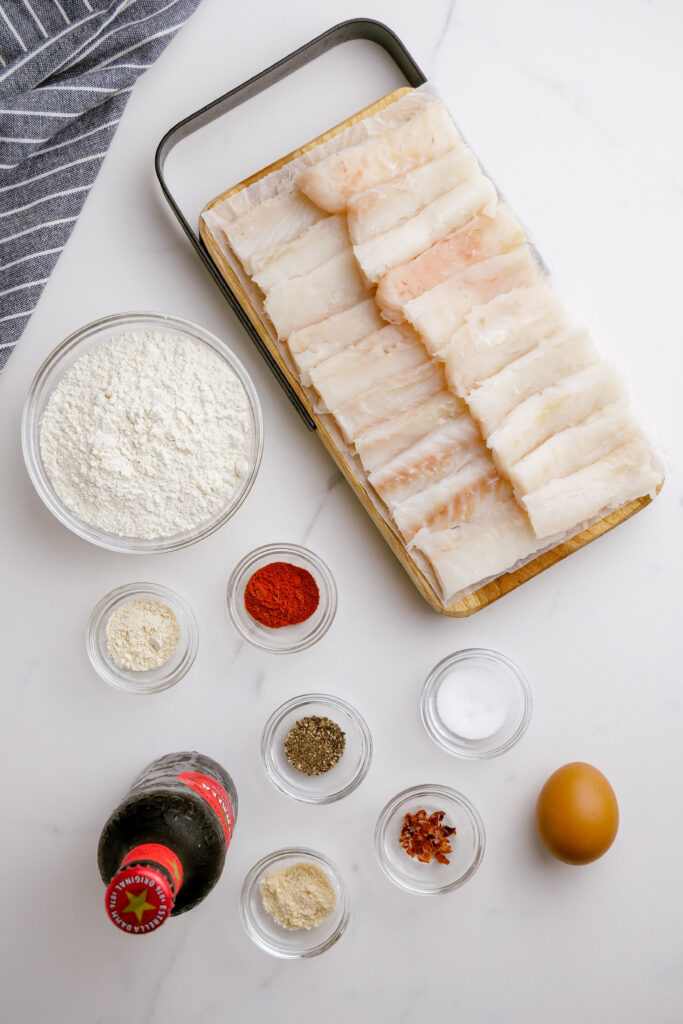
Best Fish For Frying
Ok, let’s talk about the fish more in depth for a minute. When it comes to making beer battered fish you can honestly use any white fish fillet you would like: snapper, barramundi, cod, halibut, flathead, tilapia, hake, haddock, whiting and ling. But they will all behave a little differently when battered and fried. So here is what I suggest.
I recommend using:
A thicker cut white fish that will not dry out while frying. The best options include:
- Cod
- Halibut
- Tilapia
- Haddock
Simply put, they are the best for this recipe. But if you don’t have one of these, here is what to keep in mind when selecting a fish for beer battered fish.
I recommend avoiding:
- Fish that dry out easily when cooked : Even if the fish is light colored, some fish, like tuna, or marlin will dry out when fried. And the results won’t be up to par. Fish like swordfish, tuna, kingfish, bonito are best raw in things like poke bowls, or with a quick sear. Avoid frying when possible.
- Delicate fish: You want a fish that is going to flake, but not fall apart when you fry, a fish that is too thinly filleted, or delicate may be delicious, but isn’t thick enough to fry. Avoid flounder or sole, or too thin of fillet of any other fish.
- Oily fish: Most white fish is not oily, so stick with a white fish and you should be fine. Fish like salmon, trout, and sardines are a no. The batter, the oil for frying, just makes them too heavy and rich to enjoy. You CAN do it, but you shouldn’t.
How to Get it Crispy Every Time!
We all love beer batter fish, but only when it is crispy. Soggy fried fish is a big no. Ok, now that you know what kind of fish to use, and what to avoid, let’s talk about how to get your fish nice and crispy.
- Use Beer: Even if you do not like beer, this is one ingredient that is non-negotiable in this recipe. The beer is the perfect ingredient because the yeast and carbonation act amazing in this recipe, giving you the puffy, thin, crispy coating you want in fried fish.
- Make Sure it is Cold: You want that beer to be ice cold, this will make your batter nice and cold, and something about a cold batter hitting hot oil reacts to make an even crispier coating. PRO TIP: Put the batter in the fridge between frying pieces to keep it nice and cold.
- Pat Fish Dry: One of the best ways to get a crispy exterior or coating is to pat the fish down with paper towels after salting it and before battering it. This will draw out excess moisture and allow you to remove it so you get a crisp fry instead of steaming the coating.
- Get Oil Temp Right: What temperature should you fry beer battered fish at? You want your oil to be hot enough, it if isn’t, the fish will soak more of it up, and you will get a soggy, greasy result. It it is too hot, you get undercooked interior, and overcooked exterior. Also unappetizing. So use a fryer, or keep a cooking thermometer in the oil to make sure it stays constant at 375 degrees F. Use a few test pieces to make sure your oil will maintain temp, before frying.
- Fry a Few at a Time: You do not want to overcrowd your pan. Not only will this cause the temperature of the oil to drop too much, but will not allow the fish the space to get an even frying on all sides. So work in batches, frying a few pieces at a time.
- Use a Rack: When you remove the fish from the oil, place it on a mesh rack, or at the very least on paper towels (although a wire rack is way better) to let the excess oil drain off, and keep the fish crispy while you finish frying the other pieces.
Recommended Equipment
How to Make Beer Battered Fried Fish
Making beer battered fish into crispy deliciousness is not as hard as it may seem. Yes, you are working with hot oil, and want a cold batter, but here are the simple steps for getting it right:
Step One: Heat Oil
- Add Canola oil to a large, heavy bottomed pot, about 3 inches deep. Heat oil to 375 degrees F. Or use a deep fryer, and heat to 375 degrees F. Be sure to use a Deep Fry Thermometer, so you know your temperature is correct, as this is key to Crispy Beer Battered Fish. A heavy bottom pot or dutch oven is also best, as it will help maintain oil temperature better. I recommend Staub or Le Creuset brands, as they are consistently the best. Expensive, but worth the investment.
Step Two: Prepare Fish
- While the oil heats you want to prepare the fish. Cut your white fish for beer battering into pieces about 1 inch wide and 3 inches long.
- Season with salt, and let sit about 5 minutes, then pat fish dry with paper towels until completely dry, as this will help the beer batter adhere better. Season with a little more salt and pepper on all sides.
Step Three: Prepare Beer Batter
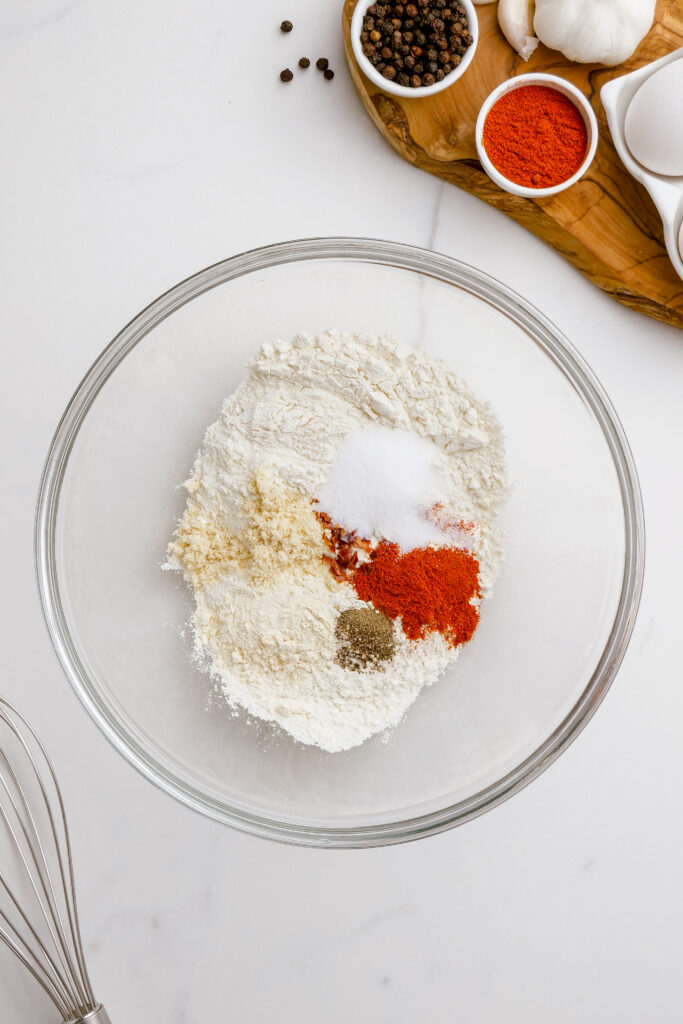
- Make the beer batter by whisking the flour, corn starch garlic powder, onion powder, paprika, salt and black and red pepper together, then stir in the lightly beaten egg.
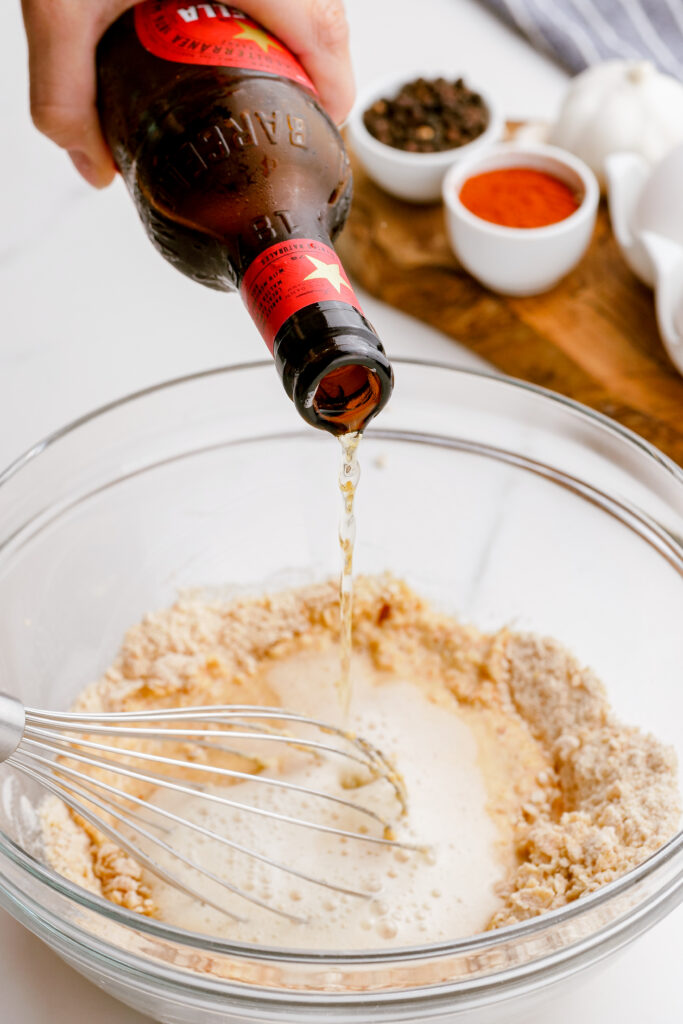
- When oil is ready, and you are about to start dipping for frying, gradually whisk cold beer into the batter until it is no longer lumpy. You want the consistency to be slightly thick, so reduce amount of beer as needed to achieve a batter similar to thick heavy cream, and slightly less thick than pancake batter.
Step Four: Batter and Fry The Fish
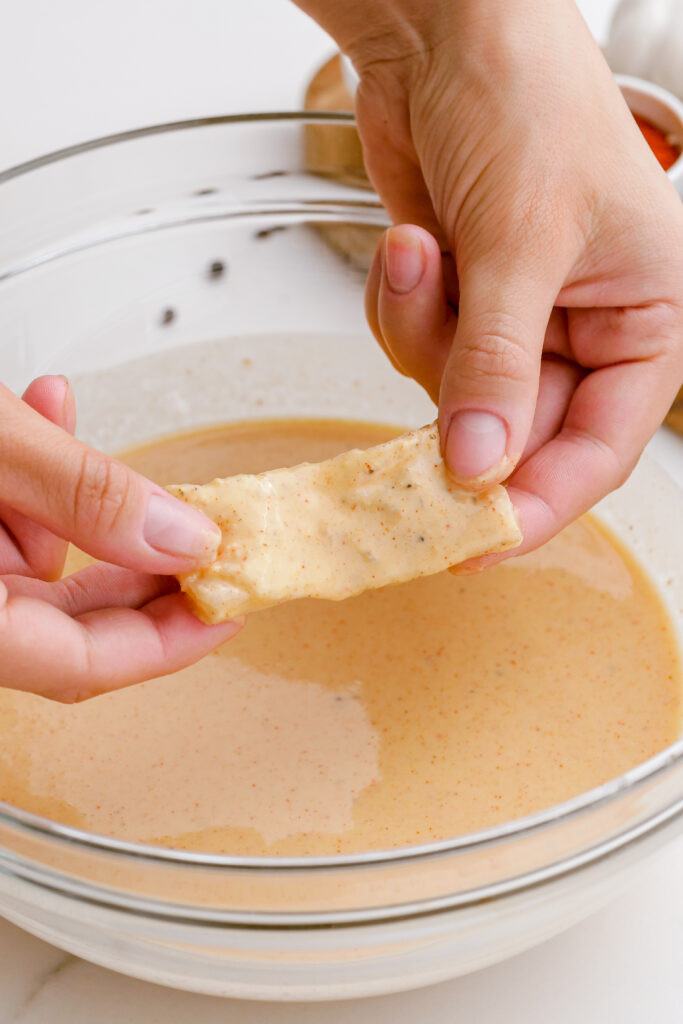
- Dip the dry fish one piece at a time into the cold batter, then place in the hot oil. Make sure oil is at the proper temp.
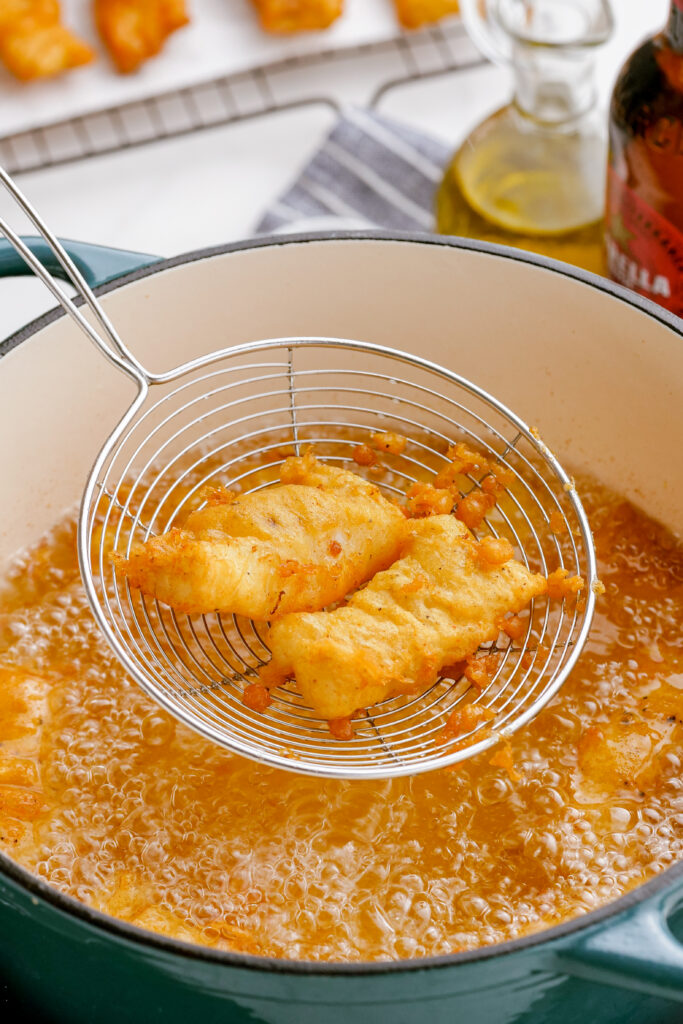
- Cook for 3 to 4 minutes, until the fish is a nice golden brown. Remove from oil, and place on a wire rack to let the excess oil drip off.
Step Five: Eat and Enjoy
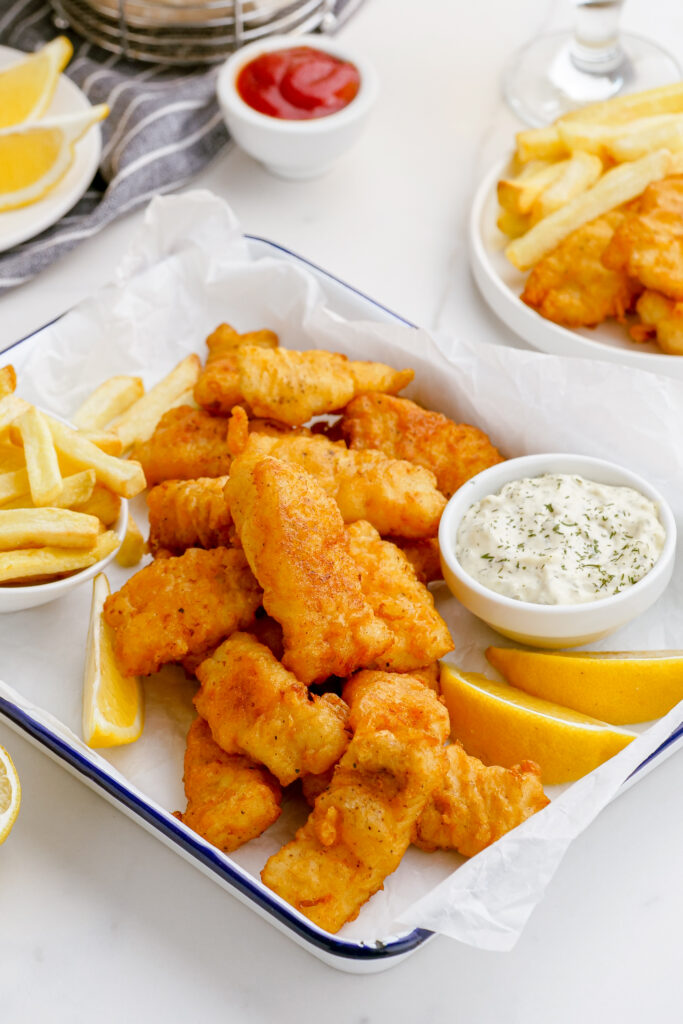
- Enjoy while hot with tartar sauce.
Serve With
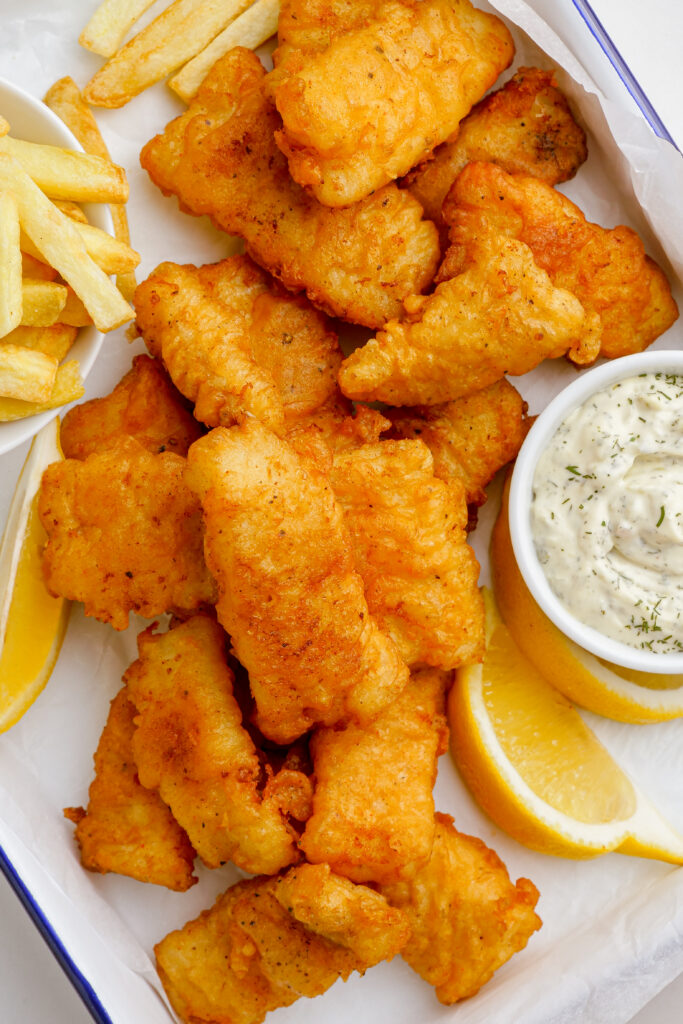
This recipe is so perfect for a nice family meal, or fun lunch. It is so light, crispy, and flavorful, and doesn’t take too much work. I love pairing it with:
Tips and Tricks
Making this recipe is Eazy Peazy…
- Dutch Oven: For safety, use a Dutch oven with at least a 5.5-7-quart capacity. Or a fryer.
- Best Beer: Using the beer batter allows you to coat and protect your fish while getting crispy, delicious results. You can use any beer you want in this recipe, even a non-alcoholic one, as long as it is pale-colored, and super cold. Avoid dark stouts and ales. They have too much flavor. And the best rule of thumb is to chose a beer you like.
- Cold is Best: To get that crispy coating, make sure your beer is extra cold, like refrigerated at least 2 hours, and pop in freezer 20-30 minutes before using for even colder. Also, refrigerate your batter between frying as it has to be done in batches.
- Rest Batter: You want the batter cold, so you can pop it in the fridge, but one thing I have found is the batter gets crispier and is even better if you let it sit for about 10 minutes in the fridge before dredging, it lets the carbonation and yeast in the beer do their magic.
- Dry is Best: Before making the beer batter, an easy way to make your fish even better is to sprinkle some salt and pepper over the fillets and put them in the fridge for 10-20 minutes. This will help draw out the moisture, then you can pat them down with a paper towel, and dredge.
- Salt Matters: Be sure to use KOSHER SALT, as the results will be far different with other salt types.
- Fillet Thickness: You do not want too thin of a fillet, but too thick will ruin the results too. So if your fillet is more than about 3 centimeters thick, consider slicing it horizontally to make thinner pieces, allowing you to have it cooked through by the time the batter is that nice golden color.
Make Ahead and Storage
How to make this recipe ahead of time:
Because this is fried food, you really can’t make it ahead. But when cooking for a large group, you want everything to be done around the same time, and come out hot and delicious. So there is a method you can use to achieve this. This is the double fry method. Here is how it is done:
- First fry: Cook fish until golden and crispy, but not that deep golden brown, so instead of 3-4 minutes of cook time, only cook the fish for 2½ minutes. Then remove and let drain on the wire rack, while you cook the remaining fish;
- Second fry: Once all the fish have had their first fry, turn your heat of your oil up to 390 degrees F. Now, add your fish to the oil, and fry an additional minute to take that color to the deep golden brown. You can crowd the oil a little more on this second fry than you should for the first fry, allowing you to cook more fish faster, and cook all of your fish in 2-3 batches as opposed to 4-5. Once removed from the oil, drain on the wire rack while you do the next batch, and everything should be nice and hot and ready to serve.
Sauces for fried fish
When it comes to serving your fried fish, there are tons of options for what you can dip it in, or you can eat it just as it is. Here are a few of my favorites:
- Lemon wedges – Just a simple squeeze of lemon to help bring out the flavors of the fish.
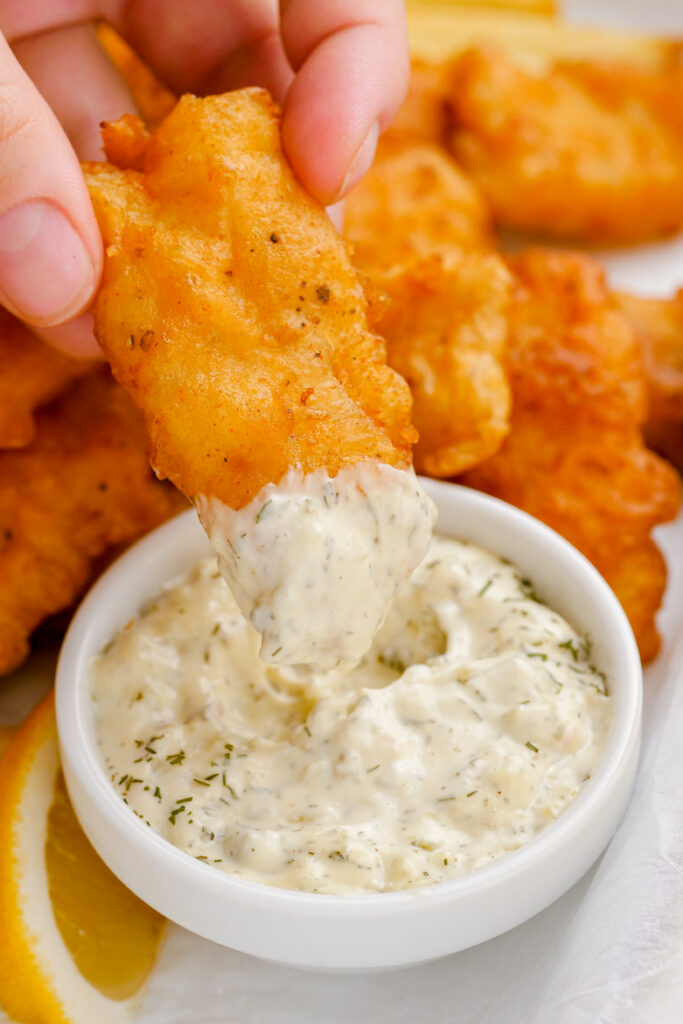
- Tartar sauce – homemade tartar sauce or from a jar, just pick your favorite and dip away.
- Ketchup – If you are a ketchup lover, fried fish is great in ketchup
- Malt vinegar and salt – The British way to eat a beer battered fish.
- Sriracha or Hot Sauce – IYKYK!
Dipping isn’t necessary, but it sure tastes good!
Things to Keep in Mind For Fried Fish
You will likely have excess batter: This is not a recipe error, you want to make sure you have enough to dredge all the fish, so you are going to make too much. Just toss the excess. Or try tempura veggies!
Pick your favorite fish: White fish fillet is best, cod is what is typically used for fish and chips. I like halibut personally.
Use the cornstarch: If you only use all-purpose flour it will not stay as crispy. You want to make sure to add rice flour or corn starch to the mixture.
Can you taste the beer? When you use a light colored beer you will not really taste it in the batter. But if you use a stout or dark ale you will.
Non alcoholic sub for beer: If you really do not want to use beer, you can substitute it with soda water and baking powder to get similar results. Use the equivalent amount of soda water and ¼ tsp baking powder.
Batter thickness: Add more or less beer to get the batter consistency right. You want a slightly thinner batter to get a crispier end result. Think heavy cream. Do not over mix the batter, as this will activate the gluten in your flour, and make your batter thicker and chewier instead of light and crispy.
Can You Air Fry Instead of Fry this Beer Battered Fish?
This is a hard one, but you can try it with a few modifications. Battered foods are hard to air fry because by nature the batter is wet, runny, and will run off the food in the air fryer and through the little holes in the bottom.
So the rule of thumb is no, you won’t get the same results.
However, you CAN air fry this fish, you will just have a thicker batter and coating, so it won’t be exactly the same, or as good, but it will be healthier.
Here is how you do that:
Make fish as directed. But after battering the fish, dredge it in a mixture of 3 parts flour to 1 part cornstarch. By dredging it in flour again, you create a coating that will stay put when you air-fry
Use slightly thicker fillets for air frying, as you want to make sure you do not overcook it while getting that golden brown exterior.
Once you have coated your fillets with the batter, then the flour mixture, you will need to spritz the coated fish generously with oil so there isn’t dry flour. It may feel like a lot, but it is still less than frying.
Then, air fry for 12 minutes at 400 degrees F. Or until exterior is golden brown.
Other Great Recipes:
- Fried Chicken Recipe
- Baja Fish Tacos
- Oven Fried Chicken
- Oven Fried Fish
- Grilled Fish Tacos
WANT MORE EZPZ? Subscribe to my newsletter and follow along on Facebook, Pinterest and Instagram for all of the latest updates.
Ingredients
- 2 lbs white fish halibut, cod, or tilapia
- 1 teaspoon Kosher salt
- 1/2 teaspoon black pepper
- Canola oil for frying
Beer Batter
- 3/4 cup all purpose flour
- 1/4 cup cornstarch or rice flour
- 1/2 Tablespoon garlic powder
- 1/2 Tablespoon onion powder
- 1/2 Tablespoon paprika optional
- 1 teaspoon Kosher salt or less depending on salt preference
- ¼ teaspoon black pepper
- ¼ teaspoon red pepper optional
- 1 large egg lightly beaten
- 1 1/3 cups beer very cold, light colored
Instructions
- Add Canola oil to a large, heavy bottomed pot, about 3 inches deep. Heat oil to 375 degrees F. Or use a deep fryer, and heat to 375 degrees F.
- While oil heats, prepare fish. Cut into pieces about 1 inch wide and 3 inches long.
- Pat fish dry with paper towels until completely dry, as this will help the batter adhere better. Then season with salt and pepper on all sides.
- Make the beer batter by whisking the flour, corn starch garlic powder, onion powder, paprika, salt and black and red pepper together, then stir in the lightly beaten egg.
- When oil is ready, and you are about to start dipping for frying, gradually whisk cold beer into the batter until it is no longer lumpy. You want the consistency to be slightly thick, so reduce amount of beer as needed to achieve a batter similar to thick heavy cream, and slightly less thick than pancake batter.
- Dip the dry fish one piece at a time into the cold batter, then place in the hot oil.
- Cook for 3 to 4 minutes, until the fish is a nice golden brown. Remove from oil, and place on a wire rack to let the excess oil drip off.
- Enjoy while hot with tartar sauce.
Notes
Our recipe card software calculates these nutrition facts based on averages for the above ingredients, different brands, and quality of produce/meats may have different nutritional information, always calculate your own based on the specific products you use in order to achieve accurate macros for this recipe.
Pin to your Dinner board on Pinterest:


Leave a Reply