
How to cook a perfect turkey:
Everything you need to know to get a perfect turkey, fool proof, and delicious. This turkey is tender, juicy, golden, and easy to make, with lots of flavor and crispy skin.
This method has been tested by me over 100 times, and has been made by 300k+ people. I will help you avoid mistakes and get the perfect bird, no matter your skill level in the kitchen.
Each year we place this large bird at the centerpiece of our Thanksgiving meal. And we eat it. So why are we not making it the best turkey ever?
Today we are done with dried out turkeys, scalded hands, and grease fires. Today, I will teach you how to perfectly roast a turkey, in your oven. Even a novice can follow these steps and achieve turkey perfection. Crispy skin, moist and flavorful turkey, and it is easy too!

We love to pair this turkey with Make Ahead Mashed Potatoes and Moms Dinner Rolls, plus all the other fixings, but is is seriously such a highlight. And of course I always use the bones of the turkey after we have picked it clean to make Turkey Stock.
How to cook a turkey for Thanksgiving
Step One: Pick the Right Turkey
(Buy at least 5 days before)
What size turkey do you need?
The rule of thumb to follow is to buy 1 pound of turkey per person you are feeding.
This might sound like a lot, but when you buy turkey on the bone, this is going to give you just the right amount of turkey for each person to enjoy dinner, and have a little bit leftover.
Because aren’t leftovers one of the best parts of Thanksgiving?
This method for cooking turkey works great for frozen or fresh turkeys. So you can get either. But for convenience sake, get a frozen turkey.
And don’t forget while shopping for your turkey, get what you need for corn casserole, sweet potato casserole, green bean casserole, and easy stuffing so you can get those started early too.
Step Two: Thaw Your Turkey
(Thaw at least 4 days before, depending on size)
Your turkey needs to completely thaw before cooking.
Most turkeys are frozen when you purchase them. This means, do NOT purchase your turkey the day you plan to cook it. There are ways to cook a turkey from frozen, but for the perfect turkey, thaw first!
To thaw:
In fridge: Place your turkey in the fridge, let it defrost for approximately 24 hours for every four to five pounds of turkey. This means a 15 pound turkey needs 3-5 DAYS to thaw, so plan ahead.
In cold water: You can thaw it a bit quicker by putting in a bath of cold water, and changing the water every 30 minutes until it is thawed. If you do this, keep an eye on it, and make sure the water stays cold to the tough, as you don’t want to let bacteria grow on your turkey.
The USDA has provided this guide for safely thawing a turkey.
Step Three: Brine Your Turkey for a perfectly moist bird
(Brine 1 day before)
Brining has become very popular, and when done right, it produces a turkey that is perfectly moist, beautifully seasoned, and has equally tender and flavorful dark and white meat.
It is a thing of beauty.
You should plan on 24 hours for brining. However, it can be done faster. Give yourself at least 8 hours for best results.
What is a brine?
A brine is basically a mixture of kosher salt, water, citrus, and herbs that you soak your turkey in, and that helps flavor the meat.
What I do:
- Place the turkey in an oven bag.
- Pour the brine in.
- Seal the bag.
- Place the turkey in a refrigerator, or into a cooler and cover it with ice.
- After the 24 hours is over, dump the brine, and rinse the turkey.
- Pat it dry with a paper towel, and move to the next step.
My FAVORITE brine recipe can be found HERE.
Step Four: Rub herb butter between the meat and the skin.
(Herb butter rub is done day of roasting)
This next step is probably the trickiest part of getting the perfect turkey, but I have done it hundreds of times and will show you how to do it right so you get the butter where it needs to be, but not tear the skin.
When done properly, the herb butter rub gives your turkey a whole lot of flavor, and the skin will get crisp, and flavorful too. You will be in absolute heaven.
Trick for Getting the butter between the skin and the meat:
- Place your turkey on the rack of your roasting pan.
- Now, go to the back of the bird, where the tailbone is, and gently work a finger or spoon under the skin between the skin and the meat. Lift the skin.
- Gently pry the skin from the meat, starting at the back, and working your way up to the neck.
- Apply the herb butter into the space between the skin and the meat of the bird you just created, and gently rub it all over the bird.
- When you have finished, rub your buttery hands on the outside of your turkey as well. If you don’t have enough butter to rub the outside, feel free to rub with canola oil as well. This will help it crisp up!
You can make your own herb butter, or get the recipe here: Juicy Roast Turkey!

Step Five: Fill the Bird Cavity
(4 hours before serving)
There are so many opportunities for adding flavor to your turkey. And one that is often overlooked, or used for a bread stuffing is the bird cavity.
Instead, make your stuffing elsewhere, and fill that bird cavity with steeped herby aromatics. It will flavor the turkey from the inside, and slightly sweeten the savory meat.
Get a recipe for herb steeped aromatics at TangledwithTaste.com
You can make this ahead of time to be ready for the big day and cut down on the chaos.
Step Six: Roast for 30 minutes at 500 degrees Fahrenheit
(3.5 – 4 hours before serving)
To cook the perfect turkey, you want to preheat your oven to 500 degrees Fahrenheit.
Don’t worry, you won’t be cooking it at this temperature for long, you just want to cook it for 30 minutes at this super high temperature to brown the skin and crisp it up. This will seal in juices, and crisp up the skin, giving you that super golden beautiful outside you want.
Then you will turn the temperature down to let it finish cooking.
- Put your rack on the lowest place it will go in the oven so there is room for your bird.
- Set temperature to 500 degrees F and preheat.
- Roast for the 30 minutes: You will roast breast side up.
A lot of people think you should turn the bird part way through so the breast doesn’t dry out, but we have a trick for avoiding trying to turn a big, sizzling, heavy bird, and still get moist and tender breast meat. So save yourself a few burns, and move to step seven.
Step Seven: Foil Hat and Turn the Oven Down
(3 hours before serving)
After you have roasted your turkey for 30 minutes at 500 degrees, turn your oven down to 350 degrees.
The skin should be a pretty golden brown at this point, but the turkey is not cooked through, so you want to turn down the heat so it can roast slowly and cook through.
Remove your turkey from the oven, and make him a great looking hat out of foil!
Basically, take a piece of foil, and fold it over the breast, and place it on the turkey breast for the remainder of your cooking time.
This will help it cook at a lower and slower rate than the rest of the turkey, which means perfectly cooked dark meat and white!
Pro Tip: Make your turkey foil hat BEFORE you do the initial 30 minute roast time so you aren’t having to touch a hot bird, and can simply place the foil over the breast.
This video will show you how easy it is:
Step Eight: Let it Cook to 161- 165 degrees Fahrenheit
(3 hours before serving for a 14-16 lb bird)
Everyone wants to know how long to cook a turkey for. The answer is it depends. You want to cook that turkey until a meat thermometer reads 161-165 degrees Fahrenheit in the thickest part of the turkey.
Every turkey is a different size, and every oven is different, so it is hard to say how long exactly to cook your turkey, which is why a meat thermometer is a good idea.
Of course, if you do not have one, you can rely on the little plastic ones that come with the bird. Though it is not recommended, as they will often only pop out when half the turkey is over-cooked.
How long should you plan for?
Typically a 14-16 pound turkey cooked with this method will take about 2.5 hours to cook fully.
Step Nine: Rest your Turkey
(30 minutes before serving)
Pull that beautifully golden brown turkey out of the oven, and cover it completely with foil.
Then let it rest for 30 minutes.
I know you are worried it will get cold, but those 30 minutes are important because they give the juices a chance to be re-absorbed, and the meat a chance to firm up.
Which means your turkey will be easier to slice and be juicer and tastier.
Also, if you pull the bird out at 161 degrees, know that it needs to be at 165 degrees for safety. The rest time is where that temperature rises to the safe zone, and stays juicy.
So use those 30 minutes to finish your Thanksgiving Yams, bacon wrapped green beans, easy buttermilk biscuits, or sweet potato casserole recipe!
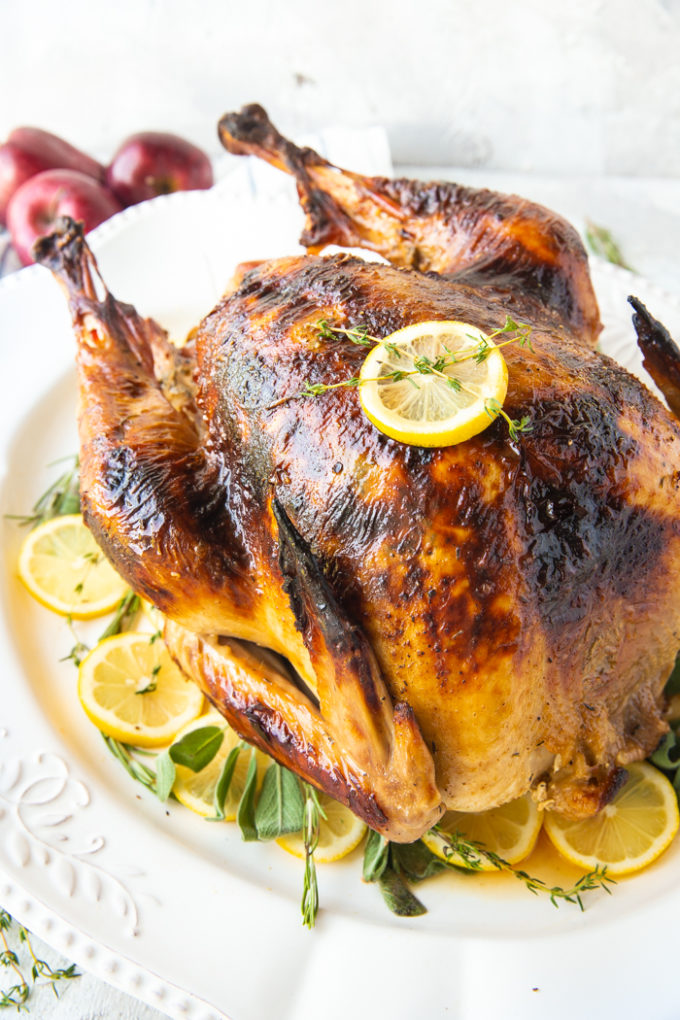
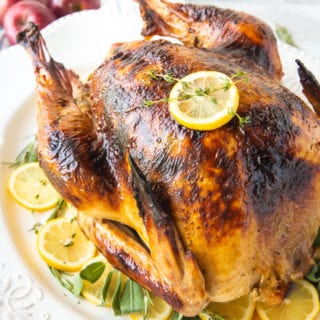
And if you do all of that, your turkey will look like this, and taste amazing.

I can’t take all the credit for this moist and delicious bird. I have partnered with my sister Juli, from Tangled with Taste, to develop this recipe and bring you the best turkey you will ever eat.
Step Ten: Eat the Turkey
Now you get to dig in. Here are some of our favorite Thanksgiving recipes to eat this turkey with:
- Candied Yams
- Beet Salad
- Cranberry Orange Sauce
- Pumpkin Pie (Classic)
- Garlic Green Beans
- Herb Butter Mashed Potatoes
How to Cook a Perfect Turkey
Ingredients
Turkey- 14 lbs
Turkey Brine
- 1 recipe brine
Herb Butter
- 1 recipe herb butter
Herby Steeped Aromatics
- 1 recipe Steeped Aromatics
Foil Hat
Instructions
- Thaw Your Turkey: To thaw, place your turkey in the fridge, let it defrost for approximately 24 hours for every five pounds of turkey.
- Brine Your Turkey: This produces a bird that is perfectly moist, beautifully seasoned, and has equally tender and flavorful dark and white meat. It is a thing of beauty. You should plan on 24 hours for brining. However, it can be done faster. Give yourself at least 8 hours for best results.
- Rub herb butter between the meat and the skin: Place your bird on the rack of your roasting pan. Now, go to the back of the bird, and lift the skin. There you will find a place where you can gently lift the skin from the meat. You will need to gently pry the skin from the meat, starting at the back, and working your way up to the neck. Apply the herb butter into the area you just created, and gently rub it all over the bird. When you have finished, rub your buttery hands on the outside as well. If you don’t have enough butter to rub the outside, feel free to rub with canola oil as well. This will help it crisp up! You can make your own herb butter, or get the recipe for the one we use at FlirtingwithFlavor.com
- Fill the Bird Cavity: Fill that bird cavity with steeped herby aromatics. It will flavor the bird from the inside, and slightly sweeten the savory meat.
- Roast for 30 minutes at 500 degrees Fahrenheit
- Create A Foil Hat for the breast and Turn the Oven Down to 350 degrees.
- Let it Cook to 161 degree Fahrenheit. Approximately 13 minutes per pound. Typically a 14-16 pound turkey cooked with this method will take about 2.5 hours to cook fully.
- Rest your Turkey: Pull that beautifully golden brown turkey out of the oven, and cover it with foil. Then let it rest for 30 minutes.
- Enjoy!
Notes
Adjust the brine as well. You pull the turkey out at 161 degrees, and it will continue to cook and reach 165 degrees during the 30 minute rest time. This is for a 14 pound turkey, which means it serves 14 people, the nutrition info will change based on the size of turkey you purchase.
Nutrition
Our recipe card software calculates these nutrition facts based on averages for the above ingredients, different brands, and quality of produce/meats may have different nutritional information, always calculate your own based on the specific products you use in order to achieve accurate macros for this recipe.
Pin to your Thanksgiving or Holiday board:


Nicole says
Do you set the oven to convection or bake for this recipe?
Rachael says
Nicole,
If I have a large turkey I like to use convection for the air circulation. But either works. Just be sure to pay attention to the temperature of the turkey, and pull it out once it hits 165 so it doesn’t dry out.
Nicole says
I have a 15lb turkey. Would you recommend convection?
Rachael says
Yes, but keep an eye on the internal temperature because it may cook faster. Cook to 165 degree so it does not end up too dry.
Cassie says
I’m cooking an 18 pound turkey and trying to get my timing right! I know you had before mentioned 4 hrs for cooking time… is that including rest time and the 1/2 at 500 degrees?
Rachael says
The best option would be to use a meat thermometer and cook it to 165 degree internal temp. It is so hard to give an exact time since every bird and every oven is different. You can usually estimate 13 minutes per pound. The 4 hours does include the initial 30, but not the rest time.
Rachel Sherk says
Hello, most of my family has always cooked the turkey in the bag, it doesnt look like the instructions tell you to place the turkey back in the bag, is that correct? THAnks!!
Rachael says
Rachel,
That is correct. If you want that golden crispy skin, and juicy interior, no bag! But if you did not brine it, and don’t do the butter rub, bag it up because it will need some extra juice.
Sonia Perry says
Can you do the bag and the herb butter and no brine?
Rachael says
I have not tried this, but you won’t get a crispy skin if you use the bag.
Pauline says
This was the best turkey I ever made. Even though the pop-up timer never popped and I accidentally overlooked the turkey to over 180 degrees, the meat was very juicy and the skin was perfectly crisp. I will be using this method from now on.
Rachael says
Pauline! Thanks for taking time to comment. I am so glad you liked it, and that it turned out great for you. It is definitely my go to, and always gets great results. Happy Thanksgiving.
Michelle says
It was attempt at turkey. It turned out perfectly. My turkey came in a brine already so I was able to skip that step
Melinda says
Used this recipe last year for thanksgiving. It was my first time cooking a turkey, ever! Literally the best turkey I’ve ever tasted!Everyone LOVED it. Planning on roasting a turkey next weekend, and will 100% be following this recipe again!
Judy says
I’m following this recipe n I’m just wondering about if u put the roaster lid on plus the tin foil hat?
Rachael says
No lid at all while cooking. Thanks for asking, I should have clarified.
Amandakae says
What would your advice be if I have to cook the turkey ahead and reheat it? Thanks!
Rachael says
I would say you have 2 options, cook it nearly all the way so that when you reheat you essentially finish cooking it, rather than have it dry out. Or when you reheat it make sure to add some moisture with a fat or gravy of some kind.
Brittny says
I accidentally bought a prebasted turkey with 9.5% of turkey broth, salt and sugar… Will I be safe to brine still? Or will it make it too salty? If no to the brine, would you still recommend the butter rub and cooking at 500 degrees for 30 minutes?
Thank you!
Rachael says
I actually do not know the answer to this exactly because i have not experienced it. However, I would still brine, but not for as long. You don’t want it to be too salty. Yes, add the butter and the cook time should stay the same.
VENA says
I HAVE COOKED MY TURKEY BUFFET IN BAG FOR MANY YEARS ALWAYS GOOD NEVER USED BRINE .SHOULD I START THIS YEAR
IvyBargeman says
parakachi1990_Earn 152 usd/day, it’s here>http://moneyflow24.icu/#QBC6I6N
Kimberly says
That turkey looks like total perfection, I can’t wait until Thanksgiving! Great tutorial full of helpful tips, thank you!
Kristyn says
Mmm…that turkey does look perfect & so juicy!! I’m hosting this year, so these tips will come in so handy for me!!
Kim says
Thank you!!! This will definitely come in handy! Printing it out!
Toni says
Such a perfect recipe for Turkey! I can’t wait to make it for Thanksgiving dinner!
Toni says
This is such a perfect recipe for Turkey! I can’t wait to make it for Thanksgiving dinner!