Chicken Kiev
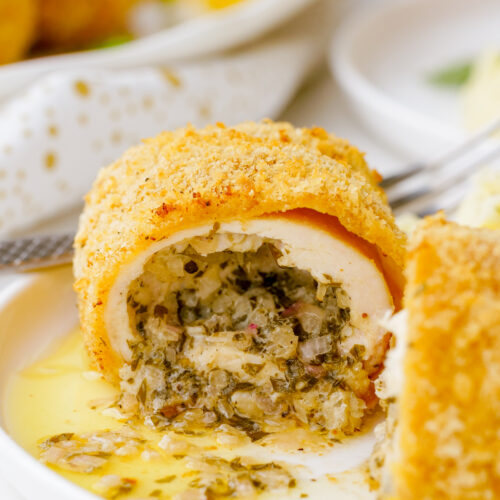
There is nothing like this classic chicken dish. Crispy, breaded chicken with a delectable, herb butter oozing out from the center, Chicken Kiev is a rich, savory dish that everyone in your home will enjoy every last bite of.
It may just be the best ever use of chicken breasts. It is easy, simple, and so dang good.
Serve with Kale Chopped Salad and Easy Rice Pilaf for a great meal.
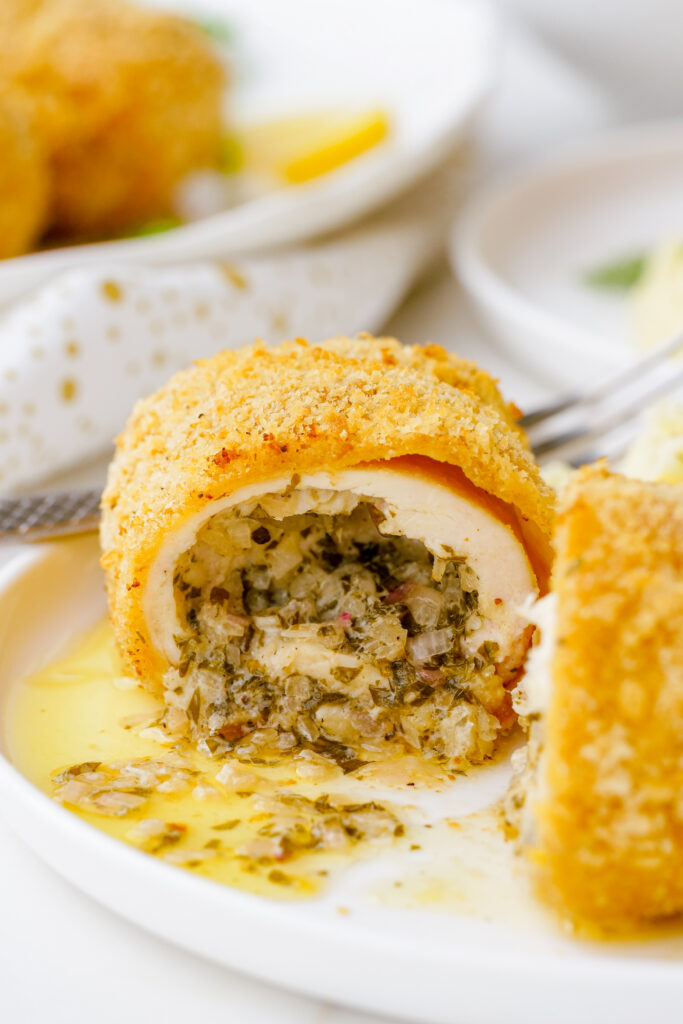
Not only is Chicken Kiev a crave-worthy dish, I love how it can be prepped the night before or made as a freezer meal, making this meal a super convenient choice.
While I love a simple Baked Breaded Chicken with nothing more than a basic but flavorful outer coating, I love that Chicken Kiev has a delicious, crispy outer coating, plus a surprise center of buttery goodness as you cut into this dish. It is kind of like a Chicken Cordon Bleu but instead of ham and cheese inside, it is herby melted butter.
What You Need to Make Chicken Kiev
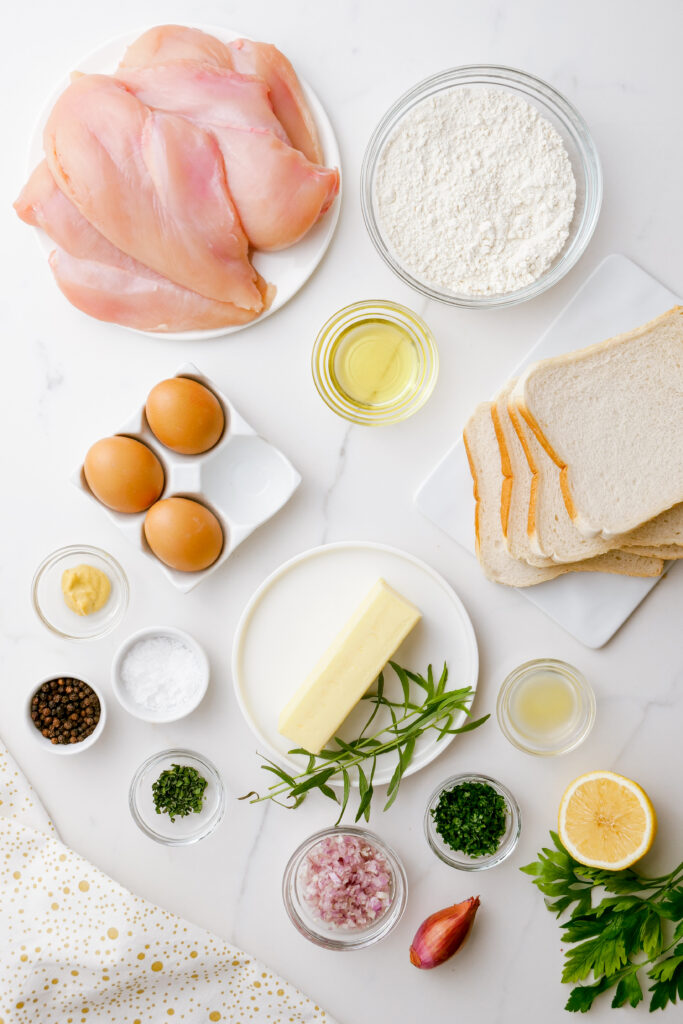
Chicken Kiev will become a favorite recipe in your home. So wait no longer my friend, and let’s add these ingredients to your shopping list.
Herb Butter
- Butter
- Shallot
- Fresh Parsley
- Fresh Tarragon
- Fresh Lemon Juice
- Salt
- Pepper
Chicken
- Breading or Sandwich Bread, Vegetable Oil, and Salt and Pepper
- Boneless, Skinless Chicken Breasts Tenderloins
- Unbleached All Purpose Flour
- Eggs
- Dijon Mustard
How to Make Chicken Kiev
Follow some quick steps and before you know it you will have delicious Chicken Kiev. First, make the herb butter. Then either use already made breadcrumbs or prepare and bake your own. Next, season and flatten the chicken. After the chicken is seasoned and flattened, add cut slices of herbed butter to the chicken. Then, refrigerate the chicken. Finally, dredge the chicken, and bake it. Lastly, let the chicken rest and then serve and enjoy. It’s so good!
Step one: Make the Herb Butter
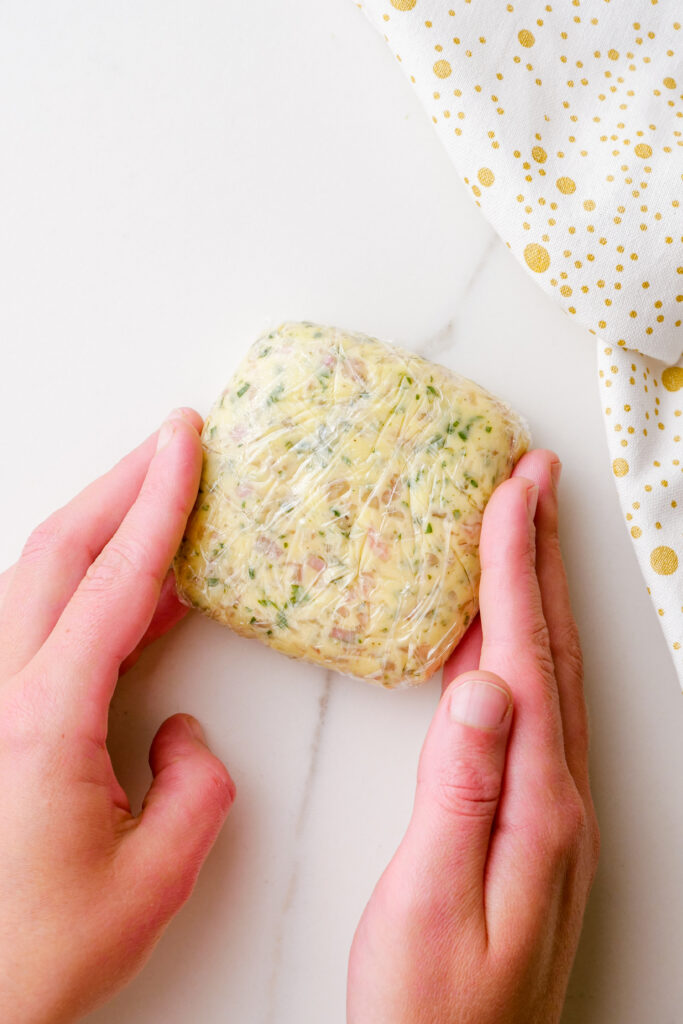
Mix together the above listed ingredients for the herb butter. Place the butter mixture on plastic wrap, shape the butter into a 3 inch square, and then wrap it tightly in plastic wrap. Refrigerate herb butter until firm, about 1 hour.

Step two: Preheat the Oven
Adjust the middle rack to the lower position and preheat the oven to 300 degrees.
Step three: Make the Bread Crumbs
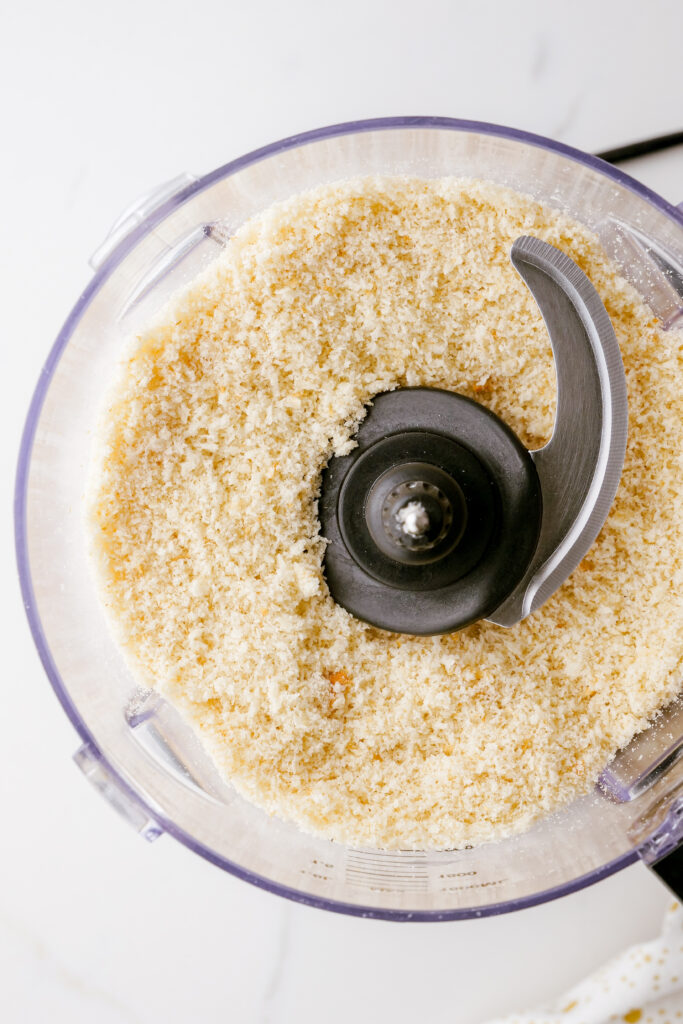
Use already made bread crumbs or make your own.
To make your own:
- Pulse the bread in a food processor to coarse crumbs and then toss in oil.
- Season with salt and pepper until coated, using ⅛ tsp of each.
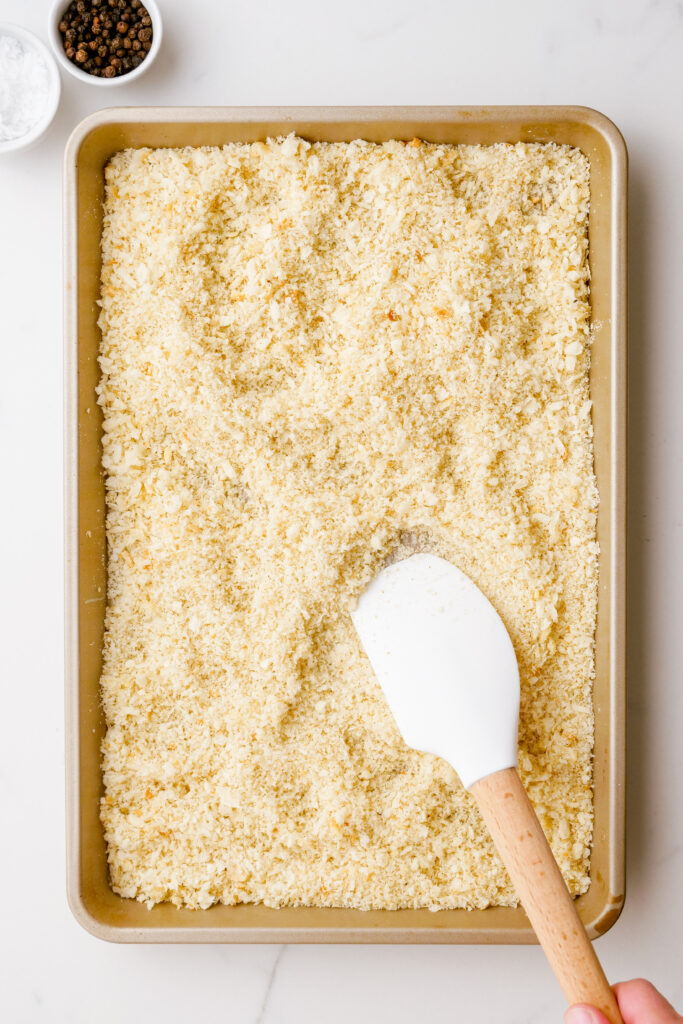
- On a rimmed baking sheet, bake bread crumbs until golden brown, about 25 minutes, stirring twice during the baking time.
- Let crumbs cool to room temperature.
Step four: Cut Herb Butter
Cut the herb butter into 4 rectangular pieces in preparation for the chicken.
Step five: Pat Dry and Season Chicken
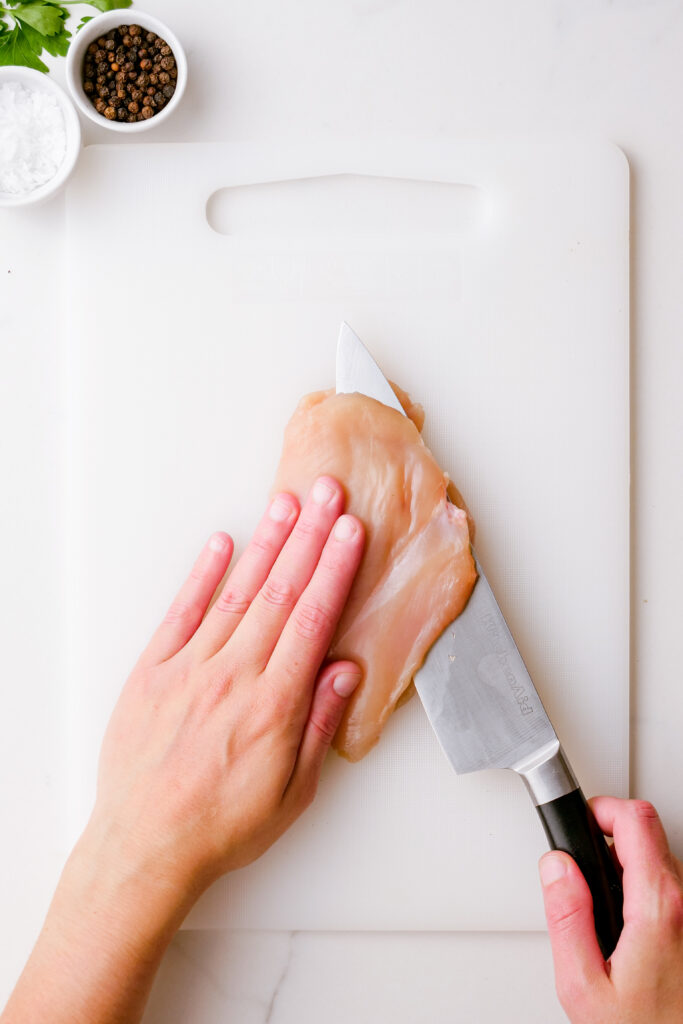
With paper towels pat dry the chicken. Then season chicken with salt and pepper. Then cut it to make it even thinner.
Step six: Flatten the Chicken
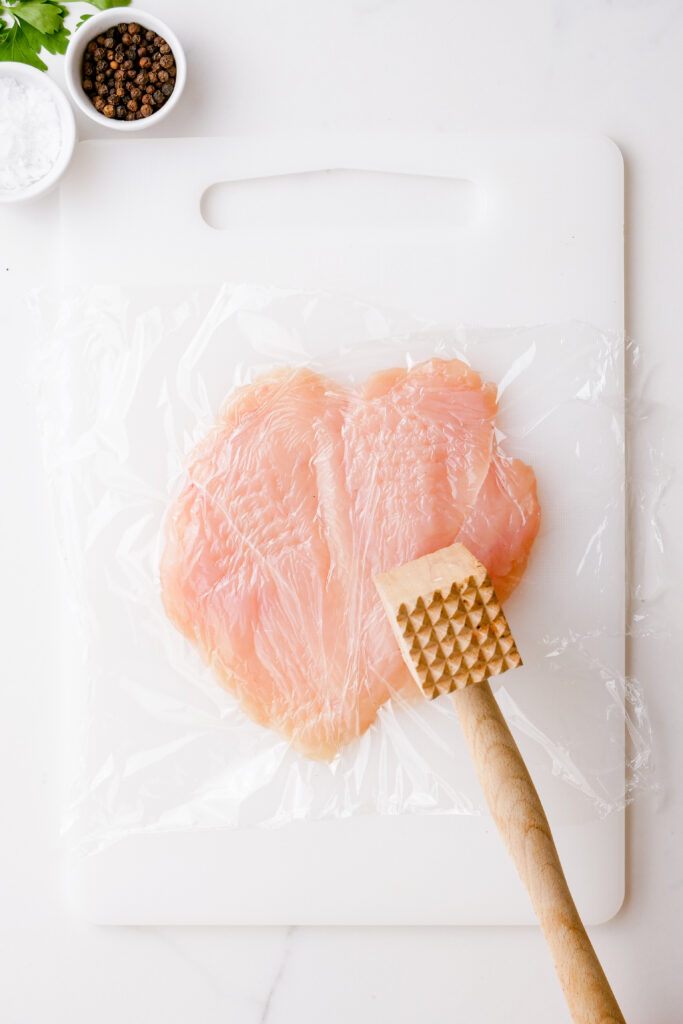
On a work surface, pound the chicken breast cut side up and flatten into an even thickness. Make sure to pound the chicken thinner at the edges in order to make sealing the chicken together easier.
Step seven: Add the Butter to the Chicken
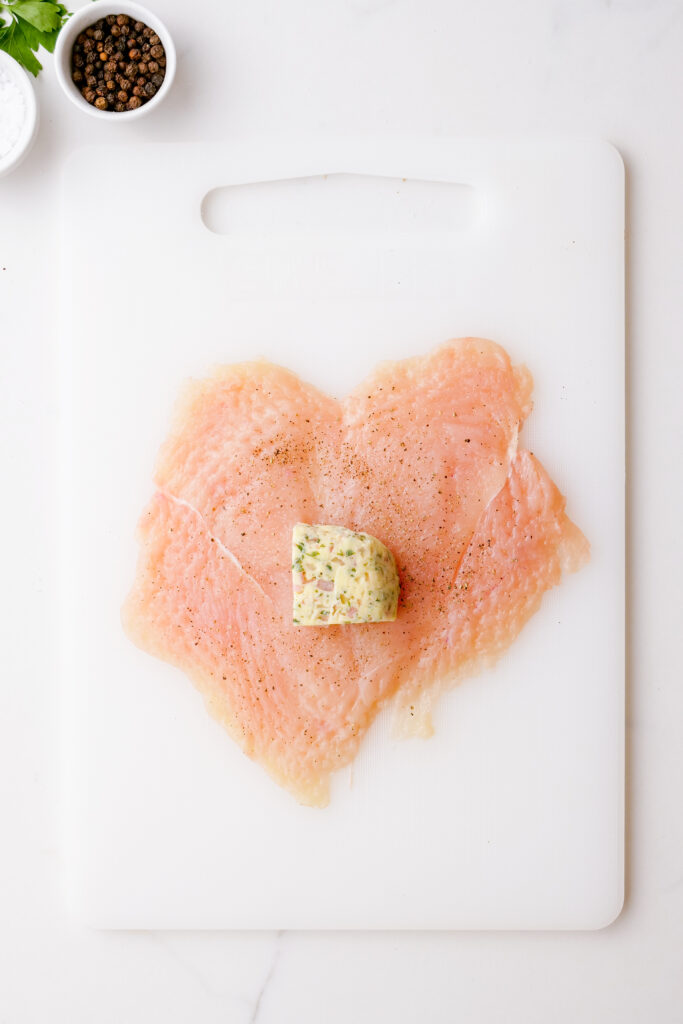
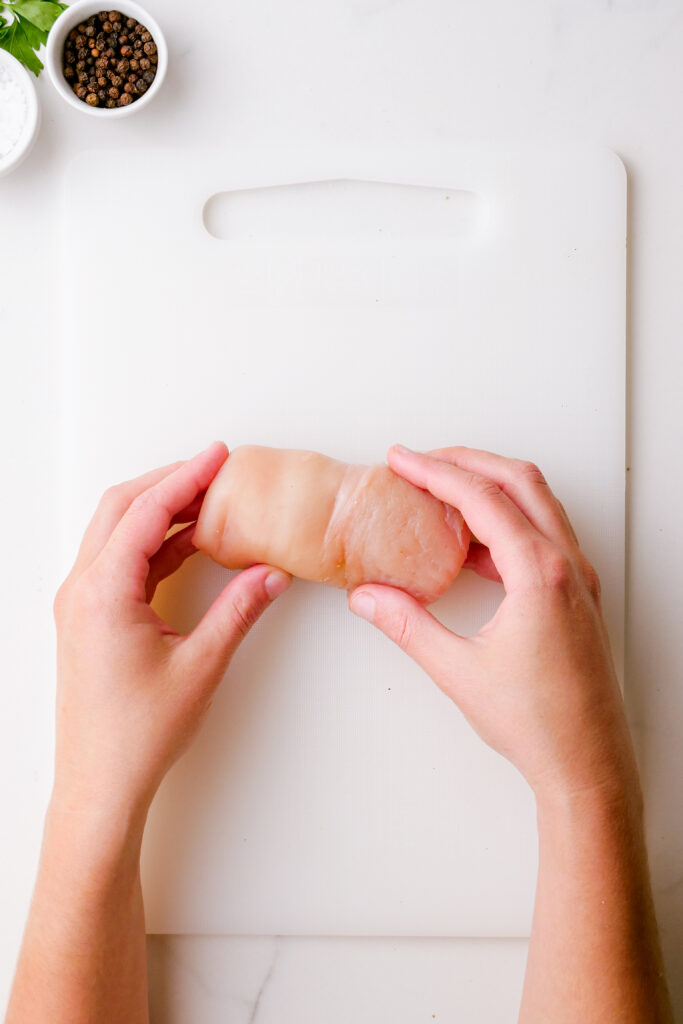
Place one piece of prepared butter into the center of the bottom half of each breast. Then, using your hands, roll the bottom edge of the chicken over the butter and fold into the sides.
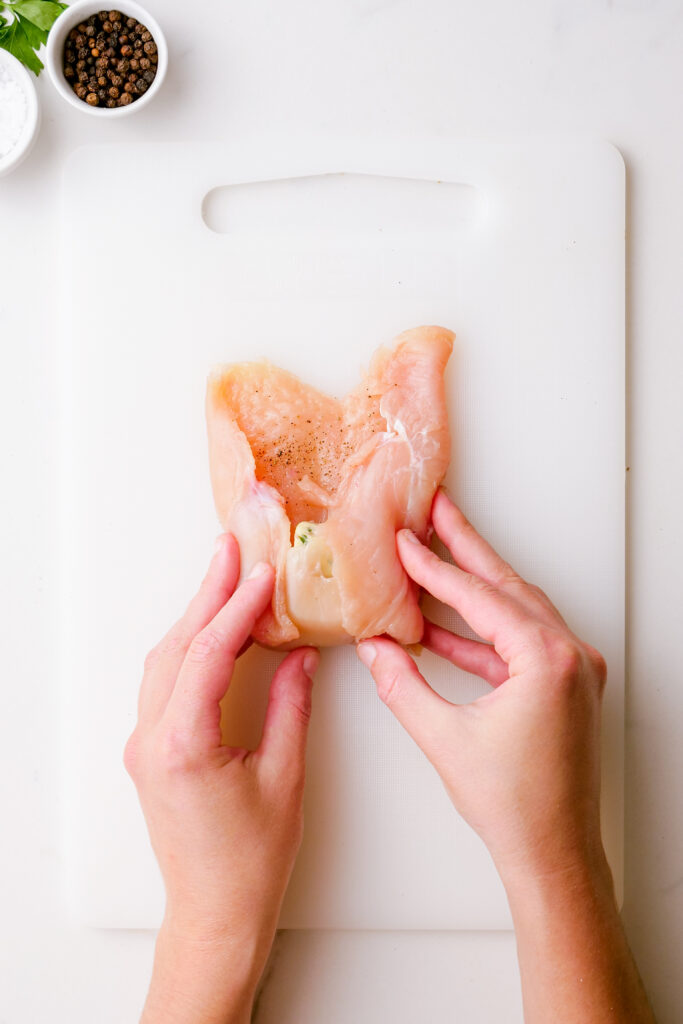
Continue to roll to form a neat little packet. Press the chicken seams together to help it seal.
Step eight: Refrigerate the Chicken
Place the chicken seam side down on a plate and refrigerate the chicken, uncovered, for about 1 hour.
Step nine: Prep Oven and Baking Dish
Adjust the oven rack to the middle position and preheat the oven to 350 degrees. Place a wire rack over a rimmed baking dish, and set aside.
Step ten: Prepare the Dredge Station
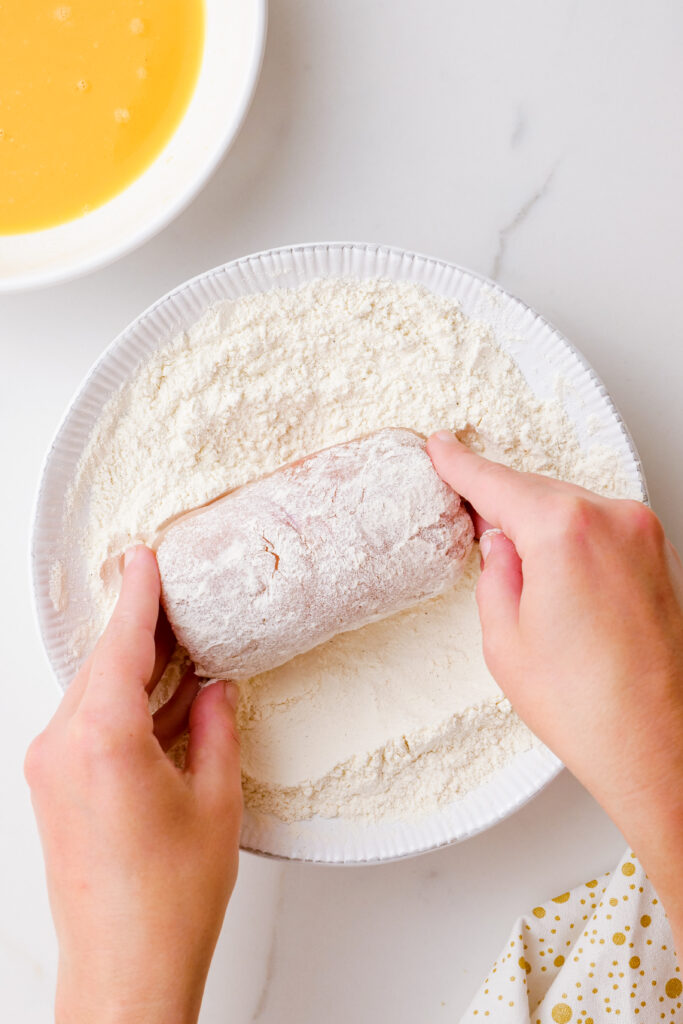
Place the flour, eggs, and the breadcrumbs into three separate, shallow dishes.
Season the flour with ¼ tsp salt and ⅛ tsp pepper.
Season the breadcrumbs with ½ teaspoon salt and ¼ teaspoon pepper.
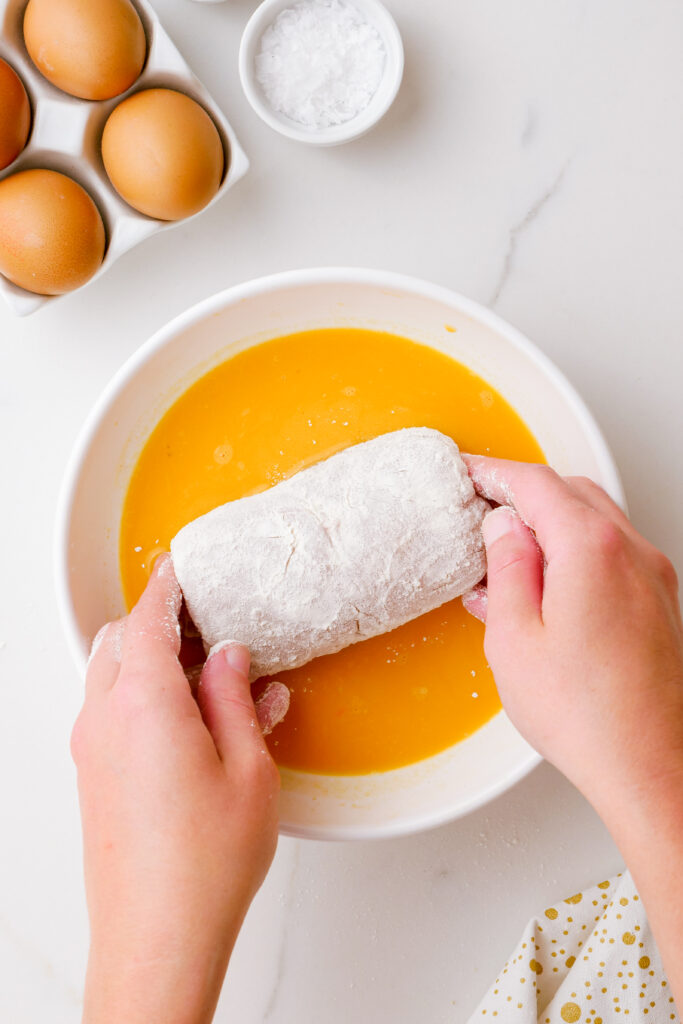
Lastly, crack and whisk the eggs with mustard.
Step eleven: Dredge the Chicken
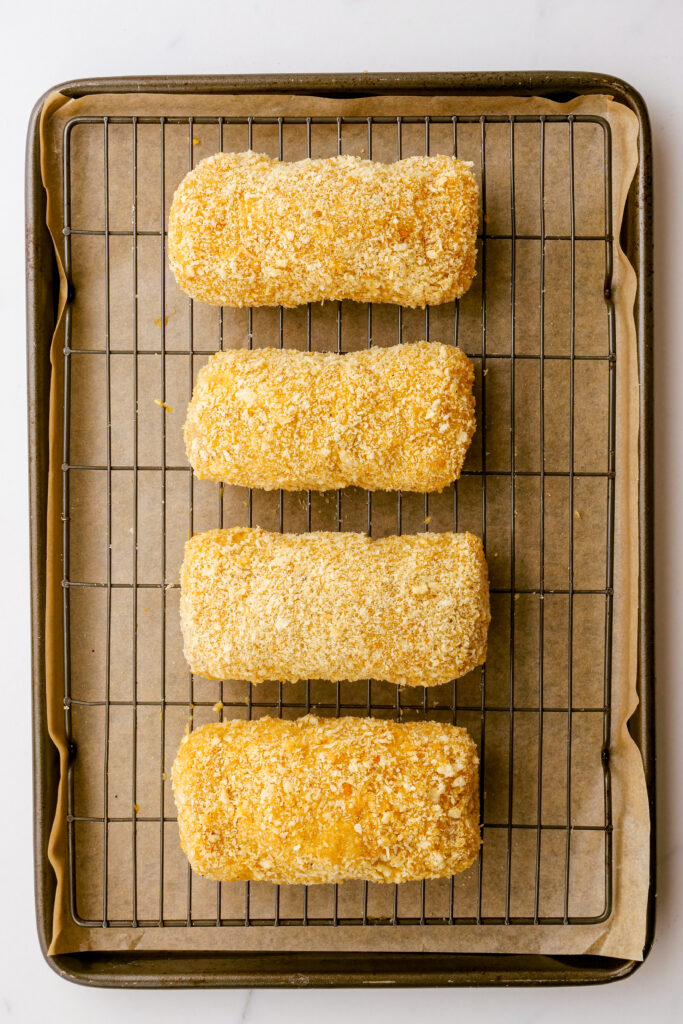
Dredge the chicken in the flour, making sure to shake off excess flour, then coat with egg mixture, allowing excess to drip off, and lastly coat with breadcrumbs, pressing gently so the crumbs adhere.
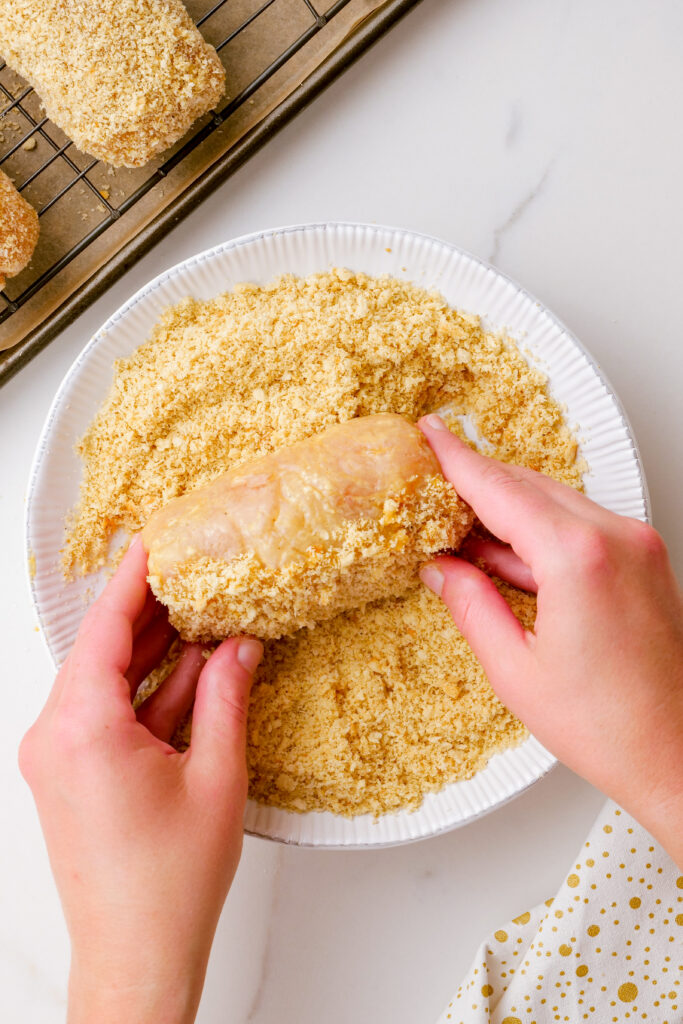
Place dredged chicken on a wire rack set over the rimmed baking sheet.
Step twelve: Bake
Bake chicken for 40-45 minutes. Check the temperature with an instant read thermometer inserted into the center of the chicken. Chicken should be baked until it reaches 160 degrees.

Step thirteen: Rest and Serve
On the wire rack, let chicken rest for five minutes and then serve.

Tips and Tricks
Making this recipe is Eazy Peazy…
- Do not skip the refrigerating step: Refrigerating the chicken helps everything stay intact and prevents the butter from leaking out. You can even partially freeze it, if it makes sense.
- Get ahead of the game and make Chicken Kiev the night before: Breaded Chicken Kiev can be refrigerated overnight and then easily just baked the next day, at your convenience.
- Don’t forget your meat pounder: You will need a meat pounder to properly flatten the chicken.
- If using Chicken Kiev as a freezer meal, do not thaw: If you have frozen the Chicken Kiev, simply increase the baking time by 50-55 minutes when ready to bake. Do not thaw first.
- Change it up and add cheese: While this recipe is packed with flavor as is, you can intensify the taste by stuffing the chicken with some cheese too.
Make Ahead and Storage
How to make this recipe ahead of time:
Make the night before, except do not bake. Then refrigerate chicken in a tupperware container. Bake the next day at your earliest convenience.
Freezer Meal:
- Follow directions like normal up to the point of baking.
- Individually wrap chicken in plastic wrap and place in freezer bags in the freezer.
- Chicken will last for up to one month in the freezer.
- When ready to eat, unwrap chicken, and cook frozen in the oven, increasing the time by 50-55 minutes.
Storage:
While Chicken Kiev is best the day that it is cooked, you can store baked Chicken Kiev in an airtight container in the fridge for up to 3 days.
Reheat in the microwave, covered with a damp paper towel until heated through.
Chicken Kiev will be your new favorite dish and you will love the flexibility of being able to prep the night before or freeze for up to a month. Trust me it’s a winner of a dish!
Other Great Recipes:
- Bruschetta Chicken
- Chicken with Lemon Crema
- Slow Cooker Chicken Pomodoro
- Roasted Chicken Thighs
- Baked Greek Chicken Breasts
Chicken Kiev Recipe
Equipment
- Meat Pounder https://amzn.to/3FI4e7l
Ingredients
Herb Butter:
- 8 tablespoons unsalted butter 1 stick, softened
- 1 shallot minced (3 tablespoons)
- 1 tablespoon fresh parsley minced
- ½ teaspoon fresh tarragon minced
- 1 tablespoon lemon juice fresh
- ⅜ teaspoon salt
- ⅛ teaspoon pepper
Chicken:
- 4 slices sandwich bread torn into quarters
- 2 tablespoons vegetable oil
- Salt and Pepper
- 4 boneless skinless chicken breasts tenderloins removed, breasts halved horizontally and pounded to a ¼ inch thickness
- 1 cup unbleached all purpose flour
- 3 large eggs beaten
- 1 teaspoon Dijon mustard
Instructions
- Make herb butter: Mix the butter, shallot, herbs, lemon juice, salt, and pepper together in a medium bowl. Place mixture on plastic wrap, and shape it into a 3 inch square, wrap it tightly in plastic wrap, and refrigerate until firm, about an hour.
- Preheat Oven: Adjust oven rack to the lower middle position and heat to 300 degrees F.
- Make bread crumbs (Or skip and use already made breadcrumbs): Pulse the bread in a food processor to coarse crumbs, about 8 pulses. Toss the breadcrumbs with the oil and ⅛ teaspoon each salt and pepper until coated. Bake the crumbs on a rimmed baking sheet until golden brown and dry, about 25 minutes, stirring twice during the baking time. Let the crumbs cool to room temperature.
- Prep Chicken: Cut the herb butter into 4 rectangular pieces. Use paper towels to pat the chicken dry, then season with salt and pepper. Cut chicken breasts in half, but leave in tact, so do not cut all the way through. Spread apart, and take chicken and place the breast cut side up on the work surface. Pound to flatten into an even thickness. Pound thinner at the edges to make sealing the chicken together easier. Then place 1 piece of the prepared butter into the center of the bottom half of each breast. Roll the bottom edge of the chicken over the butter, then fold in the sides and continue rolling to form a neat, little packet. Press the chicken seams together to help it seal. Then place it seam side down on a plate, and refrigerate the chicken, uncovered, for about 1 hour.
- Prep Oven and Baking Dish: Adjust oven rack to the middle position and heat the oven to 350 degrees F. Place a wire rack over a rimmed baking dish, and set aside.
- Prepare Dredge Station: Place the flour, eggs, and bread crumbs in three separate shallow dishes. Season the flour with ¼ teaspoon salt and ⅛ teaspoon pepper. Season the breadcrumbs with ½ teaspoon salt and ¼ teaspoon pepper. Crack and whisk eggs with mustard.
- Dredge Chicken: Dredge each stuffed chicken breast in flour, shaking off the excess, then coat with the egg mixture, allowing the excess to drip off, then coat the chicken with the breadcrumbs, pressing gently so that the crumbs adhere.
- Place dredged chicken on a wire rack set over the rimmed baking sheet.
- Bake for 40-45 minutes, until an instant read thermometer inserted into the center of the chicken registers 160 degrees F. Let the chicken rest for 5 minutes on the wire rack before serving.
Notes
Nutrition
Our recipe card software calculates these nutrition facts based on averages for the above ingredients, different brands, and quality of produce/meats may have different nutritional information, always calculate your own based on the specific products you use in order to achieve accurate macros for this recipe.


Leave a Reply