
The best sandwich bread!
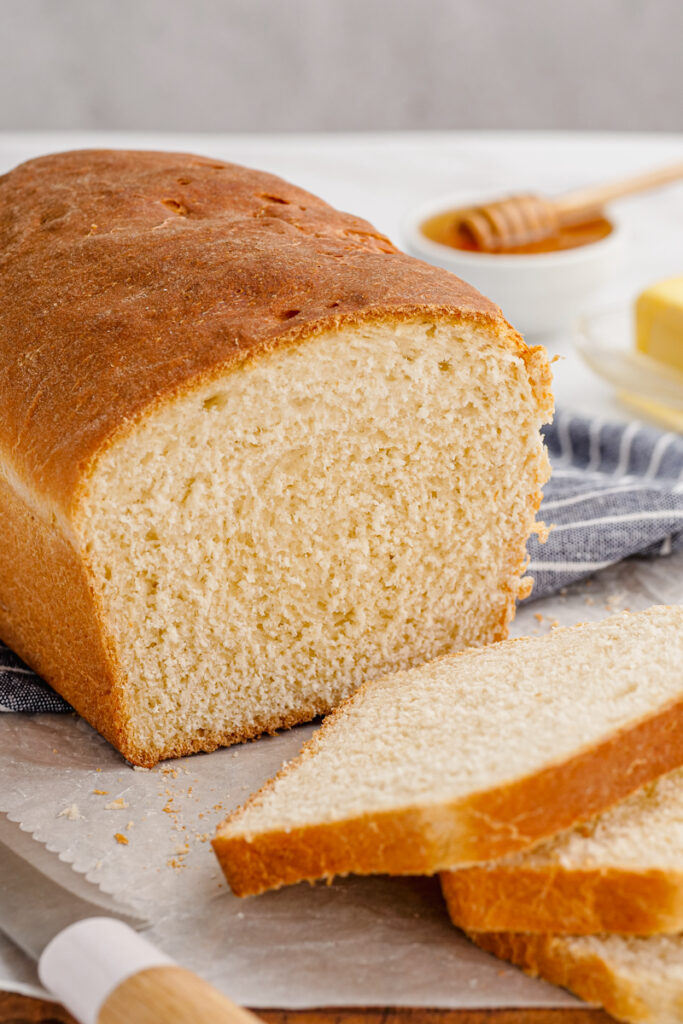
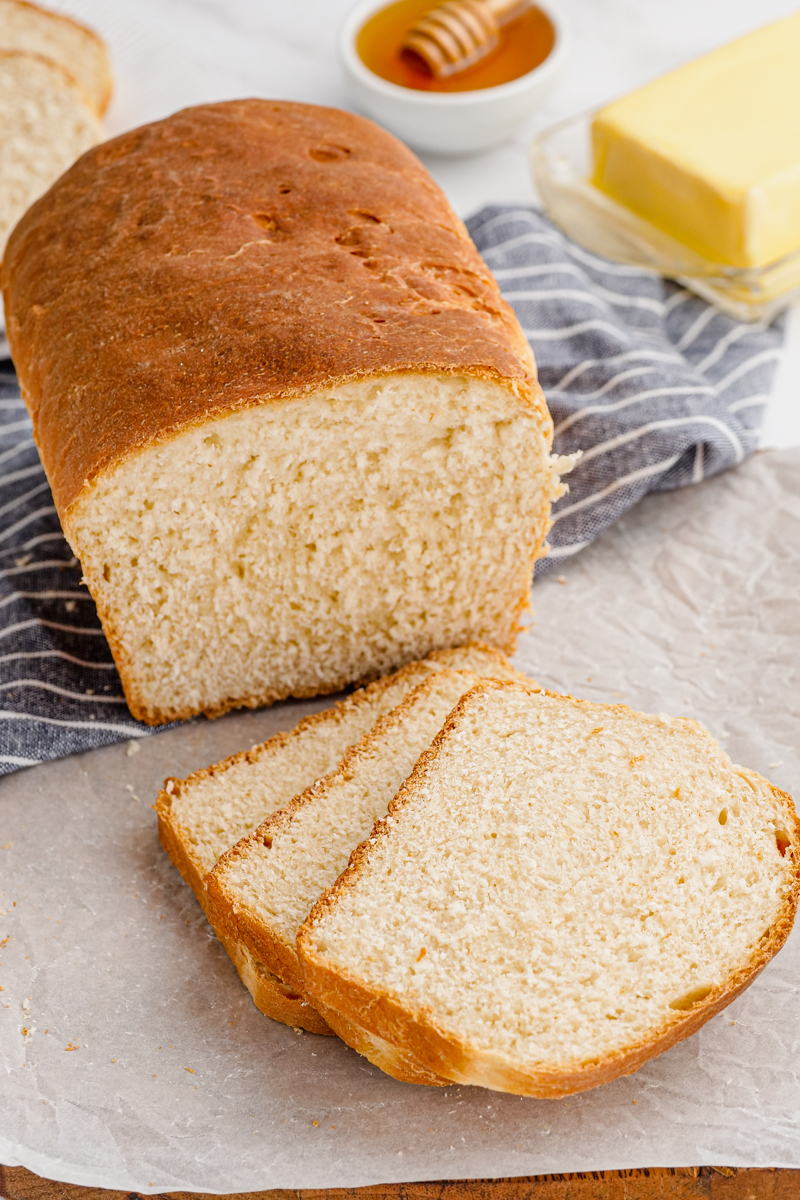
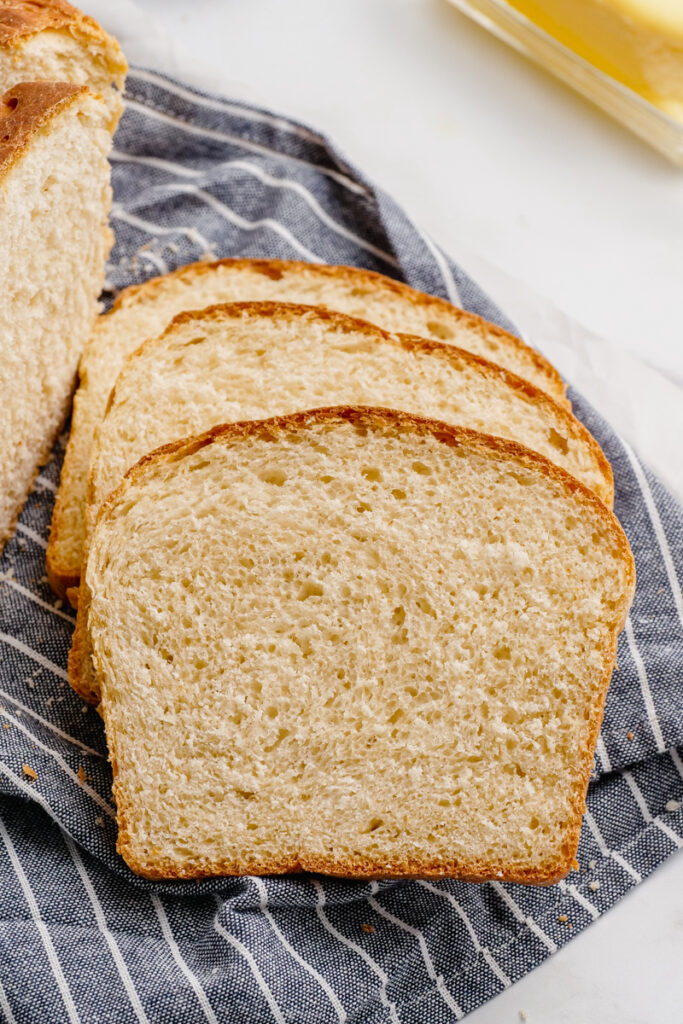
This is everything you are looking for in a sandwich bread! It is soft, delicious, great crumb, beautifully browned crust. Basically the perfect tender sandwich bread, without the preservatives and plastic wrapping you get from a store bought loaf.
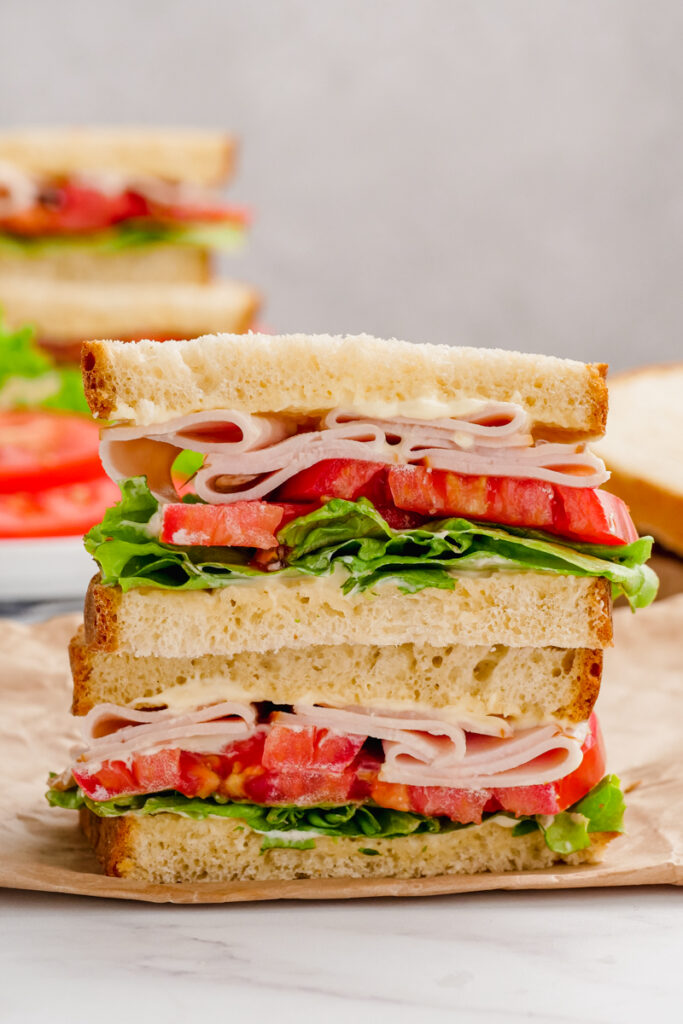
Use the bread to make a great Easy Chicken Club Sandwich, Light Chicken Salad Sandwich, or serve with Homemade Mayonnaise and fresh veggies for the perfect lunch!
Homemade bread in all forms is a favorite over here, from Focaccia to Beer Bread, and everything in between. But any good baker knows they need a solid recipe for sandwich bread, and this it the perfect one to have on hand.
What You Need to Make Sandwich Bread
Making sandwich bread is simple, and takes only a few ingredients you likely already have on hand:
- Whole milk – The high fat content helps make this bread so soft.
- Water
- Honey- adds sweetness
- Unsalted butter melted- additional fat for flavor and softness
- Bread flour
- Rapid rise yeast – this is the kind that doesn’t have to be activated with the warm water.
- Salt
Key Equipment
To get this sandwich bread to turn out properly, you are going to need a few key pieces of equipment.
- 8 1/2 x 4 1/2- inch loaf pan
- Water filled spray bottle
- Instant read thermometer
Do not let this intimidate you. The loaf pan size helps it get the right rise. The spray bottle allows you to mist the crust, which helps it bake to that nice golden brown. And the instant read thermometer is how you get the right temperature for a soft, fully cooked, and not dough interior, that is still tender and moist.
How to Make Sandwich Bread
Time needed: 5 hours
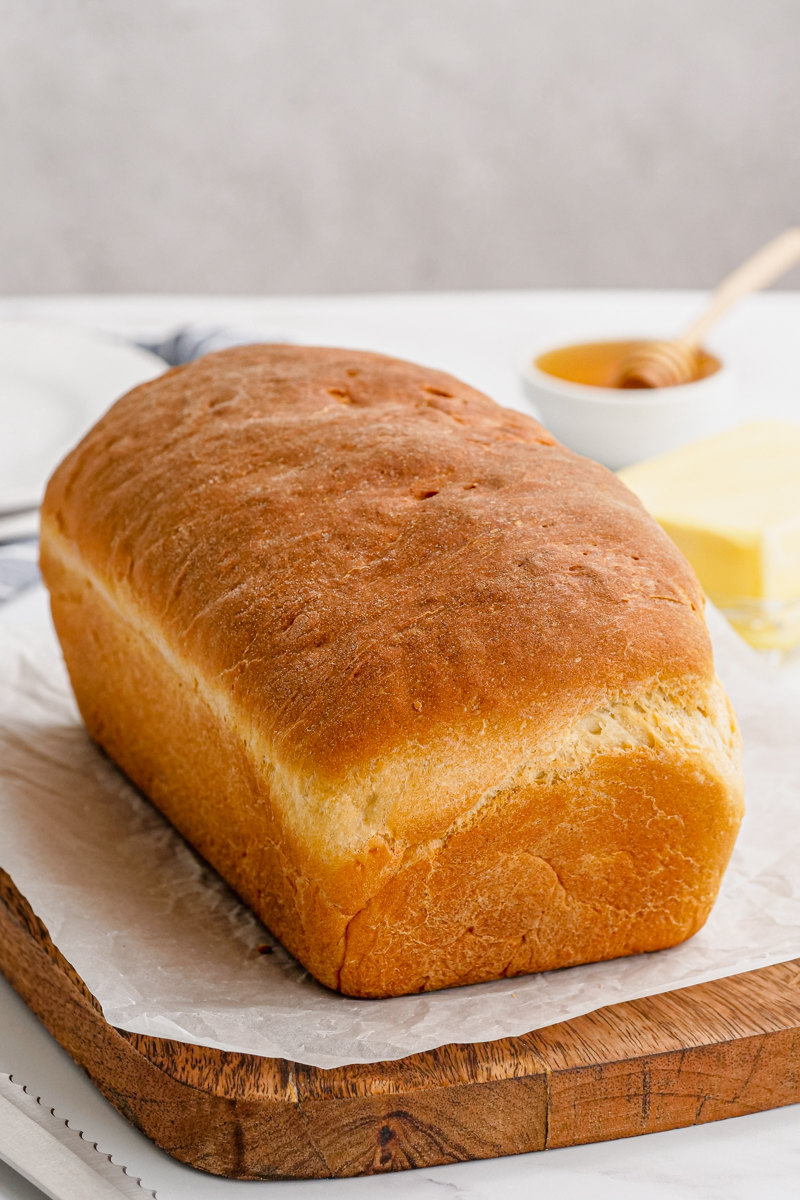
Tall and domed sandwich bread with a golden crust, and soft, pillowy, white crumb. Make this household staple from scratch.
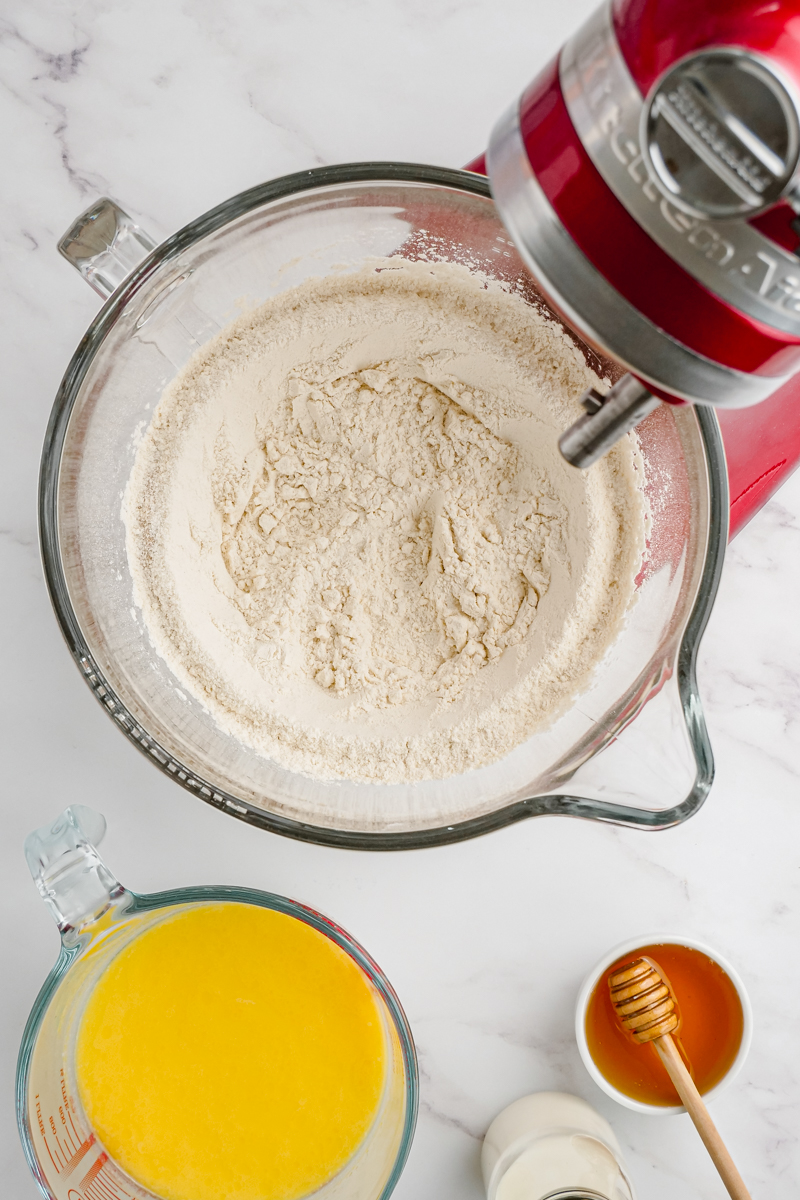
- Mix dry ingredients
Put you flour, yeast, and salt in a stand mixer bowl, and use the whisk attachment to mix together.
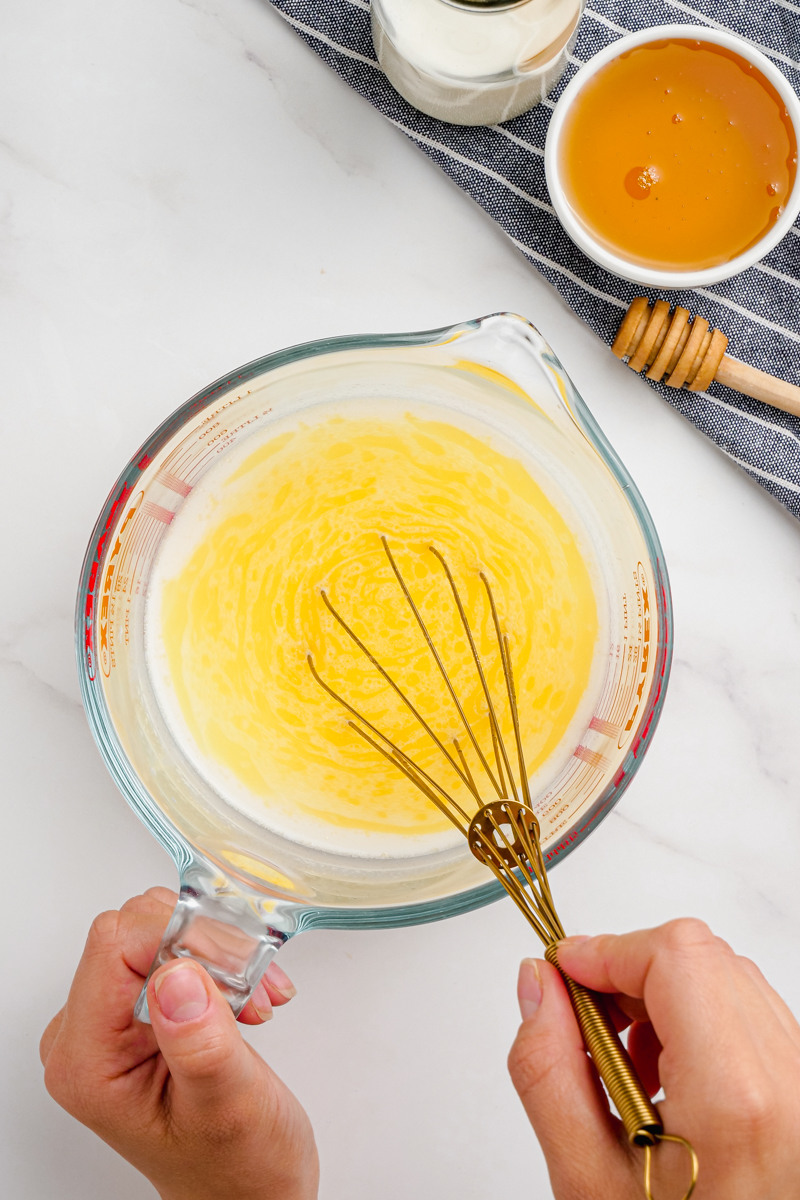
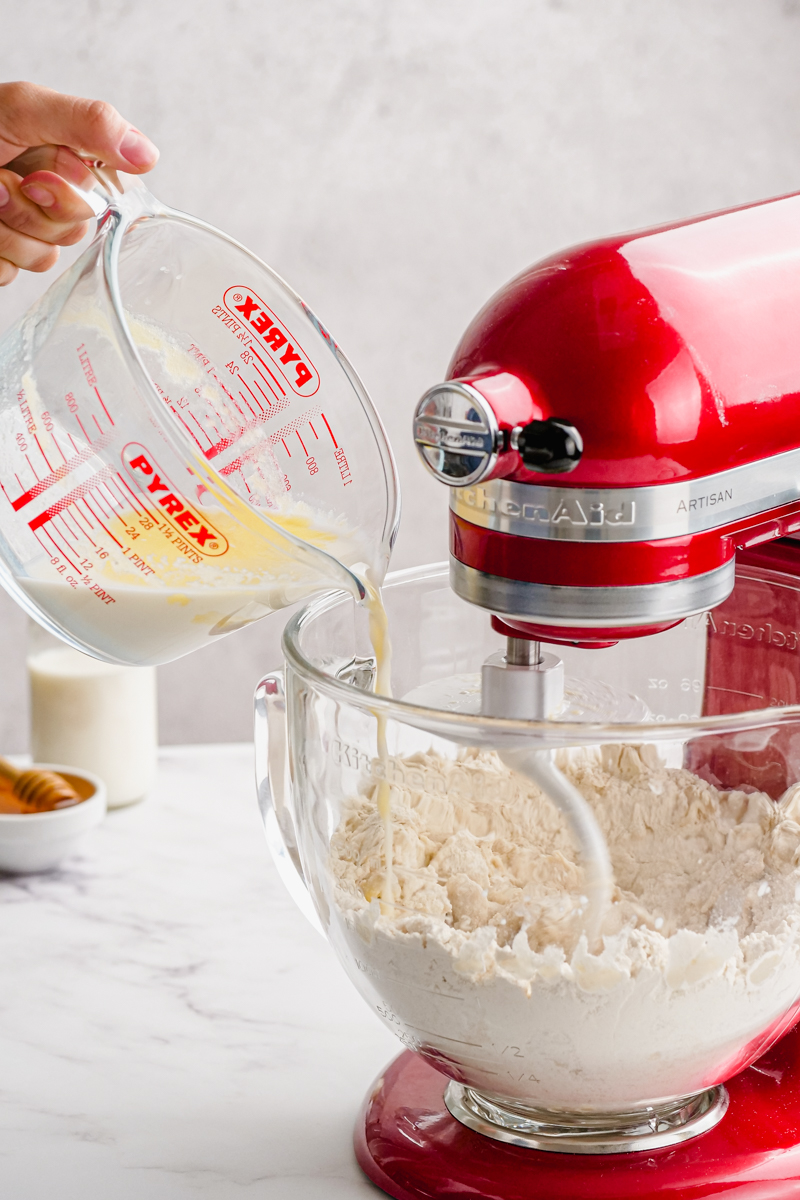
- Mix wet ingredients
Whisk together the milk, water, melted butter, and honey. And don’t be lazy about this, you want the honey to fully dissolve. Use a 4 cup liquid measuring cup to make it easier to pour into the mixer later.
- Combine and knead
Use a dough hook, turn the stand mixer on to low speed, too high of a speed can rip the gluten chains, so low is good. Slowly add the wet ingredients to the dry, mixing throughout, about 2 minutes. Then scrape the sides, and increase speed to medium-low, and knead until the dough is smooth, elastic, and comes away from the sides cleanly. About 8 minutes.
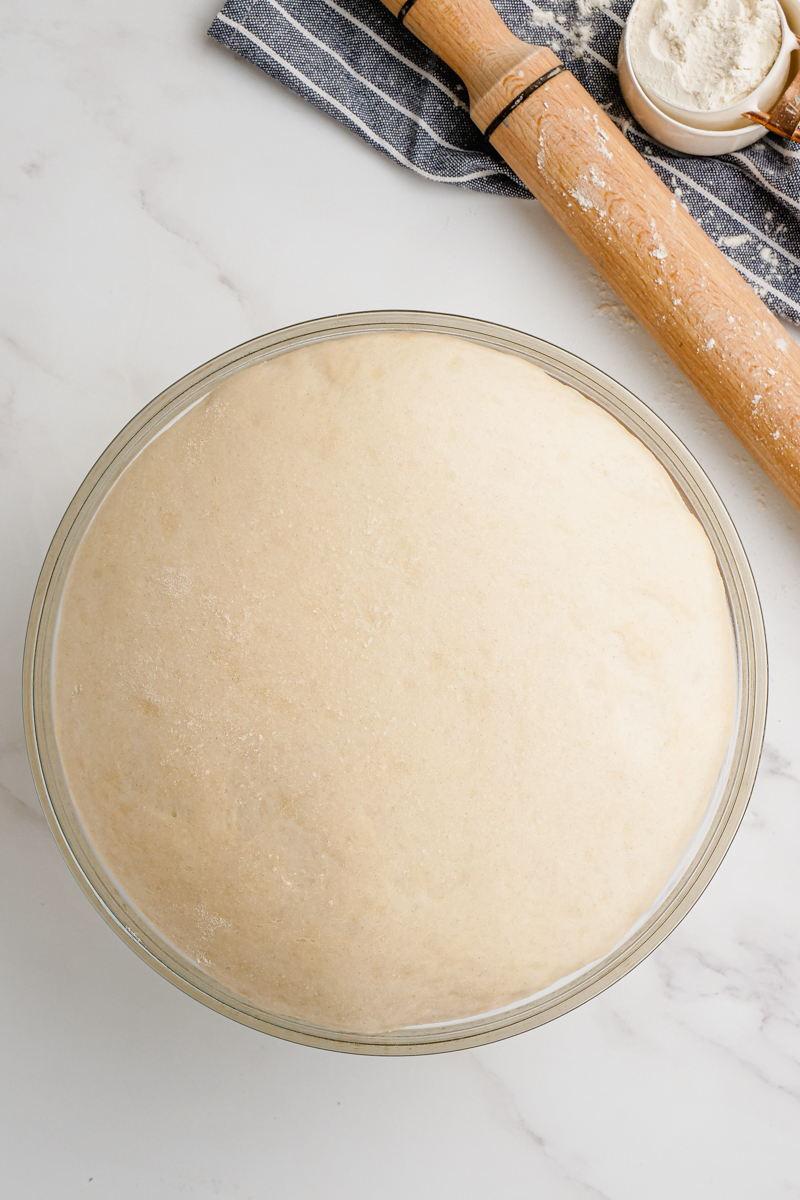
- Hand knead, then let rise
Put dough on lightly floured surface, and hand knead it for 30 seconds or so, kneading it into a firm, round ball. Then place seam side down in lightly greased bowl, cover with plastic wrap, and let rise until doubled in size (1.5-2 hours).
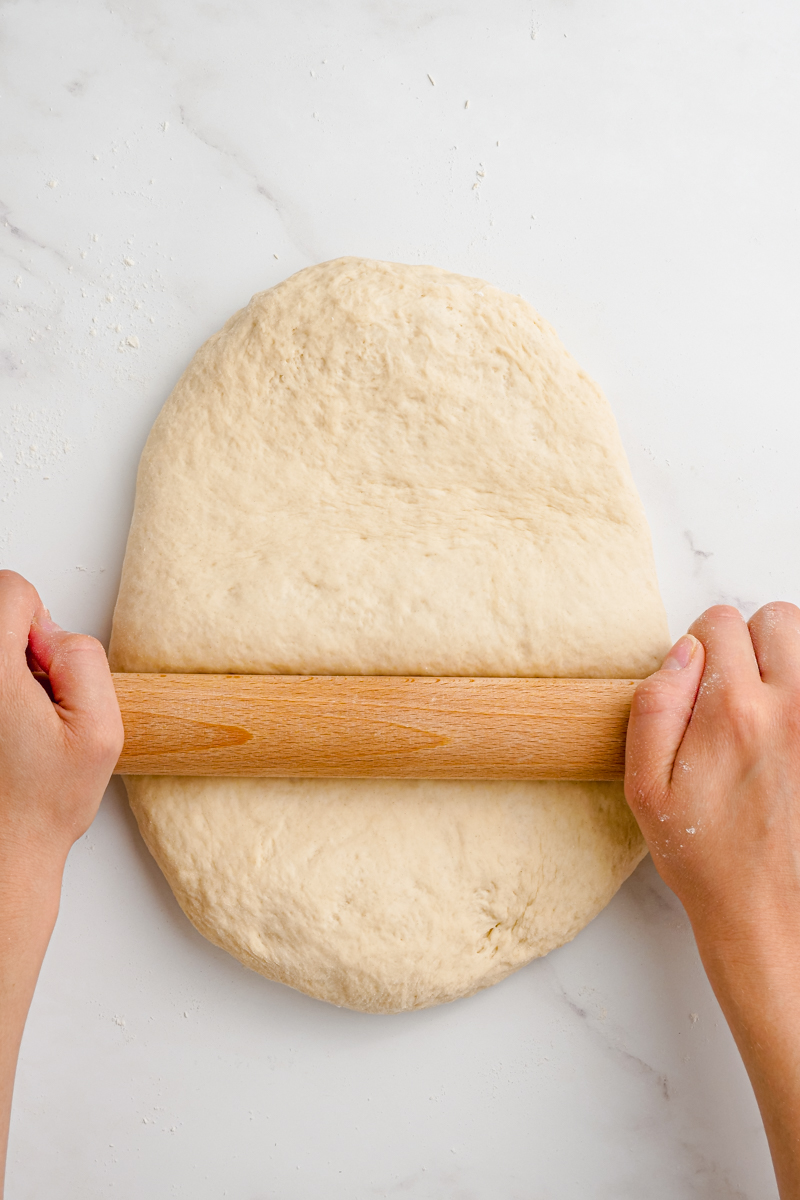
- Shape Dough
Turn dough out of bowl onto a lightly floured surface. And press and stretch the dough into an 8×6-inch rectangle.
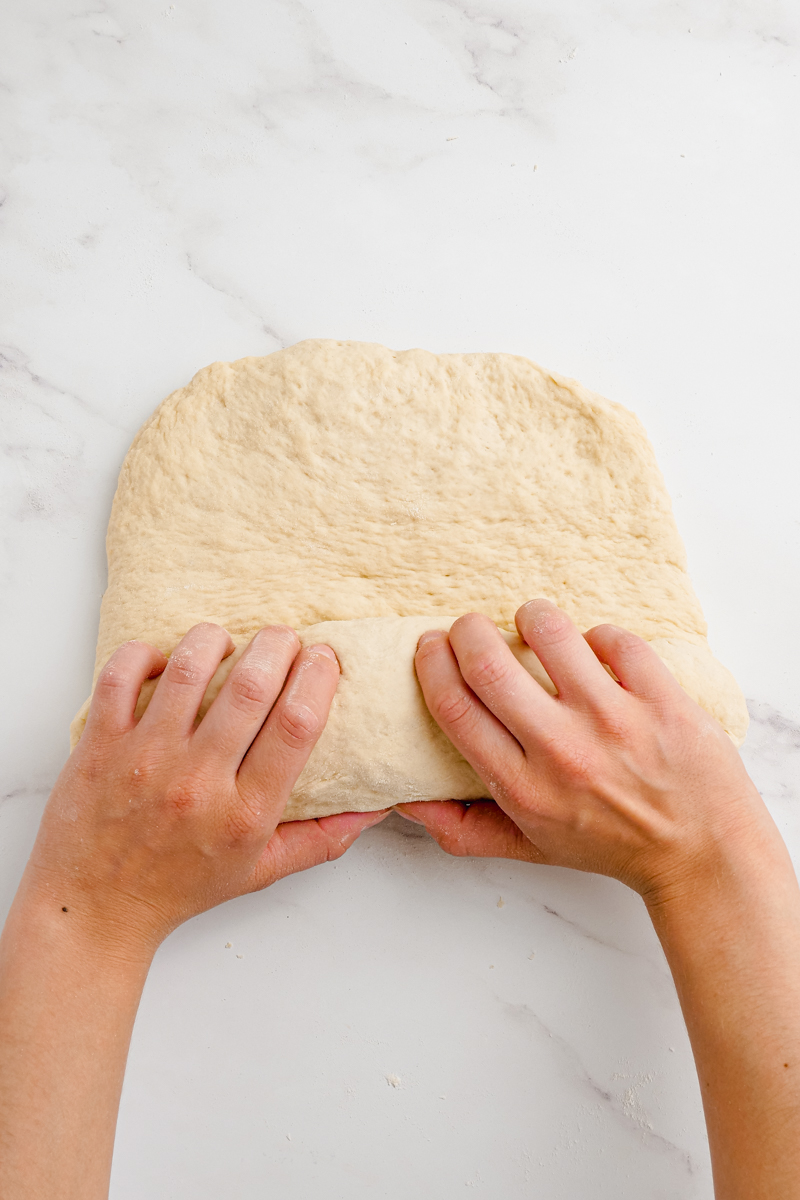
- Roll into a tight cylinder
Starting on the longer side, roll the dough into a firm cylinder, keeping it taut, and tucking it under itself as you go. Pinch the seam closed and place the loaf seam side down in a greased 8 1/2 x 4 1/2- inch loaf pan.
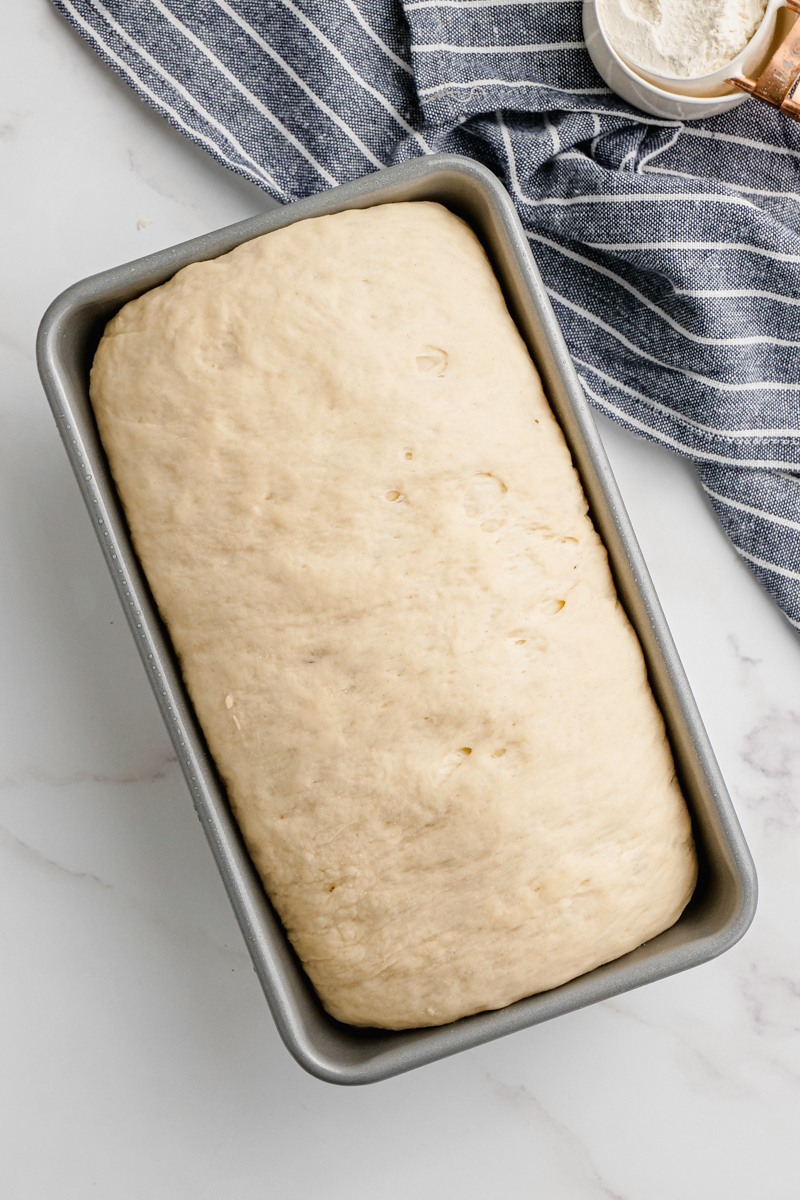
- Rise again
Cover the pan loosely with a greased piece of plastic, and let rise until it is 1 inch above the lip of the pan. Gently press a knuckle into the dough, it should spring back. This takes about 1- 1.5 hours depending on the temperature in your kitchen.
- Bake
Remove the plastic from the loaf, and mist top with water. Put oven rack in lower-middle position. And preheat to 350 degrees F. Bake for 35-40 minutes, rotating pan half way through baking time, and use an instant read thermometer to check for doneness. When loaf registers 205-210 degrees F, it is done.
- Cool then Enjoy
Let the loaf cool in the pan for 15 minutes. Then 3 hours out of the pan. Then serve this awesome sandwich bread by making an epic sandwich.
Tips and Tricks
Making this recipe is Eazy Peazy…
- Use the Right Size Loaf Pan: To get the proper doneness, rise, and shape you want to use an 8 1/2 x 4 1/2 loaf pan. Or if you use a 9 x 5 inch loaf pan, increase the shaped rising time by 20 minutes, and check doneness 10 minutes sooner.
- Roll dough evenly: Properly shaping your dough is going to help with the appearance of the final loaf, but also with the rise and bake. An improperly shaped loaf will rise and bake unevenly, and result in an inferior loaf. So be sure to tuck the loaf under as you roll it, and pinch the seams together well so that they don’t pop open while baking.
- Roll into a tight cylinder: How you roll the dough really does make such an impact on the final product. A tight cylinder is going to result in the gasses being trapped and thus an end result that has an airy crumb. This is what you want for sandwich bread.
- Pay attention to rise time: The rise time is very important to this bread turning out properly, an underproofed loaf will be not have relaxed gluten, so it can cause the sides of the loaf to tear. This means the gluten network has torn, and the gases that create the proper rise and crumb can escape. Avoid this by allowing the dough to rise a full inch above the lip of your pan.
- Cool your loaf: Let your loaf cool in the pan for 15 minutes, and then remove it from the pan and cool completely, about 3 hours. Bread is so tempting to eat hot and fresh out of the oven, but this sandwich bread is best cooled.
Variations
This is a classic white sandwich bread recipe, that is tender because of the high fat content, slightly sweet because of the honey, and perfect for making sandwiches, but what can you do differently?
You can make it into a whole-wheat American sandwich bread with a few simple variations.
- Reduce bread flour to 1 1/2 cups
- Add 1 cup whole-wheat flour
- Add 3 Tablespoons wheat germ (add to the dry ingredients).
- Increase honey to 3 Tablespoons
Other Great Recipes:
- World’s Best Cheesy Garlic Bread Recipe
- 7 Minute (Prep) Artisan Crock Pot Bread
- Honey Whole Wheat Bread
- Fried Egg and Avocado BLT with Cheese
- One Bowl Banana Bread
WANT MORE EZPZ? Subscribe to my newsletter and follow along on Facebook, Pinterest and Instagram for all of the latest updates.

Sandwich Bread
Equipment
- 8 1/2 x 4 1/2 inch loaf pan
- Spray bottle
Ingredients
- 1 cup whole milk heated to 110 degrees
- ⅓ cup water heated to 110 degrees
- 3 Tablespoons honey
- 2 Tablespoons unsalted butter melted
- 3 ½ cups bread flour
- 2 ¼ teaspoons rapid rise yeast
- 2 teaspoons salt
Instructions
- Heat milk and water to 110 degrees, use an instant read thermometer to check temp.
- In a bowl, whisk milk, water, honey, and butter together until honey is fully dissolved.
- In a stand mixer, fitted with a dough hook, combine flour, yeast, and salt on the lowest speed. Slowly add the milk mixture to the flour mixture (should take about 2 minutes to add it all) while on the lowest speed.
- Once everything is combined, turn speed up to a medium speed and allow to knead for a FULL 8-10 minutes, until dough is smooth and satiny. Scrape sides as needed during this time.
- Transfer the dough to a floured work surface. Knead dough by hand to form a smooth, round ball, for about 15-30 seconds.
- Place dough in a large bowl that has been sprayed with non-stick cooking spray. Cover tightly with plastic wrap, and rise until double in size. On counter for 1 – 1 1/2 hours. or in warmed oven for 40-50 minutes. *See notes
- Preheat oven to 350 degrees F with rack in the lower-middle position, and grease an 8 1/2 x 4 1/2 inch loaf pan. Set aside
- Transfer the dough to a lightly floured counter, and press into a rectangle shape about 1 inch thick, and about 8.5-9 inches in length. Roll dough into a firm cylinder shape. Be sure the cylinder is tight. Turn loaf seam side up, and gently pinch it closed. Making sure the seam is sealed so it does not pop open while baking.
- Place in prepared pan, seam side down, and press it slightly so it fits into the corners of the pan. Cover with a greased piece of plastic, and let rise until double in size, and about 1 inch above the edge of the pan about 60 minutes at room temp.
- Check dough by gently pressing it with your knuckles, it should barely spring back.
- Remove the plastic from the loaf, and mist top with water using a water filled spray bottle. Bake for 35-40 minutes, rotating pan half way through baking time, and use an instant read thermometer to check for doneness. When loaf registers 205-210 degrees F, it is done.
- Remove from oven and transfer pan to a wire rack. Let bread cool in the pan for 15 minutes before dumping out onto rack. Let cool completely *about 3 hours, before slicing and serving.
Notes
Nutrition
Our recipe card software calculates these nutrition facts based on averages for the above ingredients, different brands, and quality of produce/meats may have different nutritional information, always calculate your own based on the specific products you use in order to achieve accurate macros for this recipe.
Pin to your baking board on Pinterest:


Leave a Reply