
Crispy Oven Baked Chicken Wings:
If you want the perfect crispy baked hot wings, but want to skip the fat of frying, look no further than this baked chicken wings recipe.
Not only have I tested this recipe hundreds of times, tweaking, and adjusting to make them perfect and be able to answer all the questions, but am sharing everything I have learned with you here.
This post has all the tips for how to prep your wings, how long to bake chicken wings, how to get truly crispy wings in the oven, and how to get finger licking good hot wings with minimal work! These wings come out crispy every time, the fat renders, and they are ready to be sauced with your favorite hot wings sauce recipe, like buffalo sauce , or something from a bottle if you want to keep it easy.
Whether it is Super Bowl Sunday or you just love a good crispy wing recipe, you are going to love these! We are obsessed with wings over here:
No matter how you sauce them, you have to start with crispy, crunchy, golden brown wings that are baked in the oven! So let’s get down to the nitty gritty for how to do this:
How do you make chicken wings crispy in the oven?
How do you make crispy chicken in the oven? For years I thought it was impossible, and I settled for terrible wings in order to cut the calories by avoiding frying them.
But why would anyone want to make a sacrifice like that when it comes to chicken wings?
So, I did a ton of research, and tested and tested, and now I can share with you how to get baked chicken wings that are truly crispy, from the oven not a fryer!
There are some key steps that can’t be missed if you want crispy baked wings. I learned these from Cook’s Illustrated. And I am going to simplify them for you here.
The basics of how to make chicken wings crispy in the oven are:
- Prep the wings: Segment them into the various pieces. (Don’t worry I will show you how)
- Pat the chicken wings dry. This step is an absolute must. You don’t want them to steam in the oven. The surface water has to evaporate before they will crisp up, so do your chicken a favor and get rid of as much of it as you can. This is why it is so important for baked wings that you do not make them from frozen! Fresh chicken is best. More on that later.
- Coat wings with baking powder…don’t worry I will explain why. The science geek in me loves this stuff! Just be sure to use baking powder not baking soda (ewwww)
- Cook at a low heat on a rack so the fat under the skin can render.
- Turn the heat up to crisp up that skin. When it is done you will have crispy baked chicken wings.
- Now, let’s coat those baked wings with your favorite hot wings sauce.
How To Segment a Chicken Wing
First thing is first, you need to get the right wings! So, let’s talk fresh versus frozen:
Whenever possible, opt for fresh wings.
Frozen wings have too much moisture, which is basically the nemesis of crispy wings. There are ways around it, and I will show you how to make frozen wings work. But if you can pick fresh.
Segmenting the Wings
Save yourself money by buying your wings whole, and cutting them down yourself. It i s WAY easier than you think. You just need a few extra minutes for prep, and a sharp knife and cutting board.
How to:
- Locate the two joints in the wing using your fingers. You can feel where they connect.
- Use a sharp knife and cut through the center of each joint. You should have 3 pieces as a result: ,the Drumette, the Wingette (often called a Flat), and the tip.
- For this recipe, you are going to use the Drumettes and Wingettes. You can either discard the wing tip, or pop it in a bag and freeze to use later to make bone broth, or chicken stock.
That is it! Eazy Peazy.
Coat Oven Baked Wings in Baking Powder:
The next step in the process, after segmenting your wings and patting them dry is to coat them in a mixture of baking powder, salt, and pepper.
- TIP: The first thing I have to warn you about is to use Baking Powder, not baking soda! If you use baking soda, just plan now to toss those wings now. It will ruin them, while the baking powder makes them awesome.
Why Baking Powder?
The baking powder is a key factor in making these oven baked wings crispy. Like not joking, seriously crunchy, crackly, crispy wings. Like you pulled them out of the deep fryer, only way less fat–crispy!
- In a nutshell this is because the baking powder will help to draw moisture to the surface of the skin, and the heat of the oven will cause it to evaporate, and then the skin will be left moisture-less, and thus become far crispier.
- It also helps to render the fat, so you get a delicious, lower fat, far crispier, but still juicy and delicious wing.
Alternative methods:
Parboil the Wings: While I was doing my research for this post, and this cooking method, I came across the idea of parboiling your wings before baking them.
This essentially means putting them in a pot of simmering (almost boiling) water, and cooking them for 6-7 minutes to help render out the fat before baking them.
The smaller the layer of fat under the skin means the crispier the wing.
What To Do If You Only Have Frozen Wings:
This is so important. Whenever possible start with fresh wings, not frozen. But life happens….
I get it, sometimes you can’t find them. Sometimes you forget to pull them out of the freezer. Bottom line, if your wings are frozen, you can still get crispy oven baked wings, but you HAVE to use the parboil method or completely defrost them.
If you can only find frozen wings, here is what you need to do:
- Let them defrost fully in the refrigerator. Never leave them on the counter to defrost, as bacteria can form and that is not good.
- Once fully defrosted, drain off any excess liquid.
- Use paper towels and squeeze each wing to get any excess moisture out of it.
- Pat the wings dry with more paper towels, and set aside.
Or
- Parboil wings in simmering water for 6-7 minutes until completely defrosted and fat is rendered.
- Remove from water. And drain to let the exterior dry.
- Pat dry and let air dry. Be sure to shake off and pat off any excessive moisture.
- Toss with salt and pepper
- Continue as normal
I found this method to work well for a crispy skin, but not so well for my life and house.
A big pot of boiling meat that you have to really pay attention to the time on not to ruin was a bit too fussy for me. So while it worked awesome, and the skin was super crispy. I still much prefer the defrost and use baking powder alternative for ease.
Of course, feel free to use whatever method works best for you! The key is simply to reduce the fat under the skin, and dry the skin well so you can get a crispy exterior.
Baking Powder TIPS
I have made these wings countless times and haven’t run into problems with the wings tasting like baking powder, but many have commented they have had this problem, so I have done some trouble-shooting. And here are my suggestions:
- First make sure you are using BAKING POWDER. I have had far too many readers mistakenly use baking soda, which makes these inedible.
- Mix baking powder, salt, and pepper together first (unlike in video, I found later this works better)
- Put in a zip top bag and toss so it is more evenly distributed. This way no one wings has too much baking powder on it.
- Make sure you have the correct amount of wings. If you use fewer than 5 lbs, adjust the baking powder accordingly or you will taste it.
- Cook according to instructions for a crispy, golden brown result.
Other Tips for Perfect Wings
- Don’t Skimp On Drying the Wings: If you really want to be safe, let the wings sit, uncovered in the refrigerator for a day after patting them dry, and pat them dry one more time. You want to get rid of as much of that excess moisture as you can.
- Line The Pan: Line the bottom of the baking sheet with foil to catch the fat and make clean up easier.
- Spray The Rack: Spray the baking rack/cooling rack with non-stick spray before placing your wings on it to make clean up easier.
- Sauce them Right: When coating the wings with sauce, use just enough to cover them without making them too saucy. This will take that crispy skin and make it soggy. If you love sauce, serve them with a side of extra sauce, rather than over-saucing the wings to begin with.
- Serve right away: Wings come out hot, which produces steam, which is going to make those crispy skins less crispy. So plan to serve right after cooking for optimal crispiness.
How long does it take to cook chicken wings in the oven at 400?
The easy answer is until cooked through with an internal temp of 165 degrees, and a crispy skin. It can vary, based on the size of the wings, your oven, etc. But here is a good rule of thumb:
- Conventional Oven – cook at 400 degrees F for 45-50 minutes, flipping them halfway through.
- Convection Oven – cook at 400 degrees F, but reduce the cook time to 35-45 minutes flipping them halfway through.
The ideas is simple, start cooking them at a lower heat, and rendering the fat out, so when you turn the temperature up to 400, it should take only about 45-50 minutes to get a nice crispy skin!
- You can move the rack up so they are closer to the heating element too if you want to speed things up a little.
- You could bake them at 450 and it will cook faster, but after a lot of testing, I like the slightly longer cooking time at 400 degrees. They still come out juicy, and have optimal crispiness.
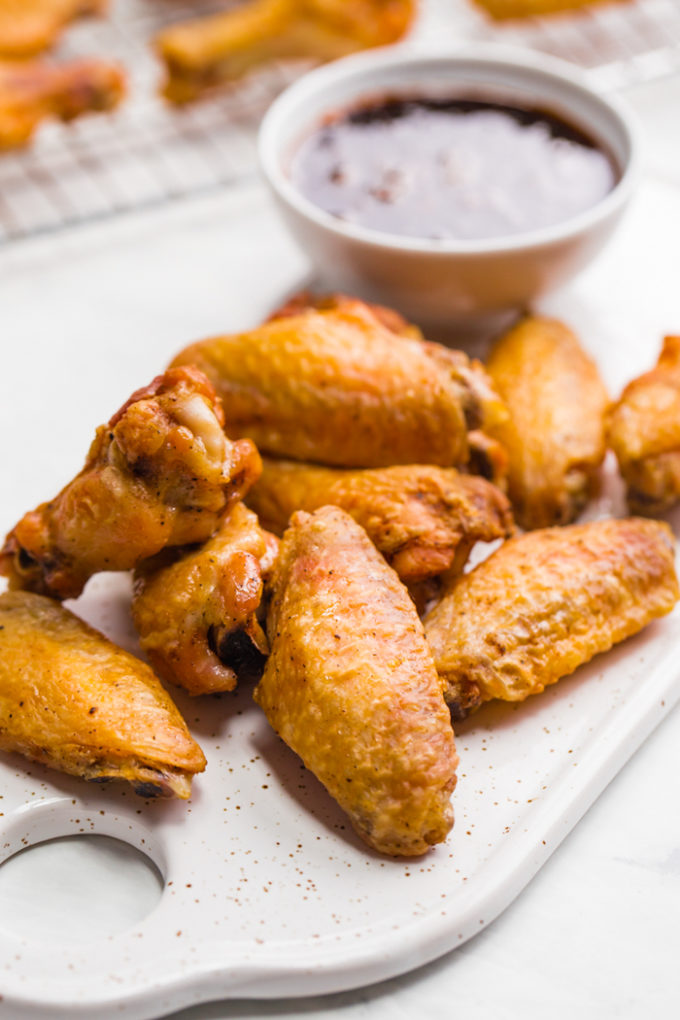
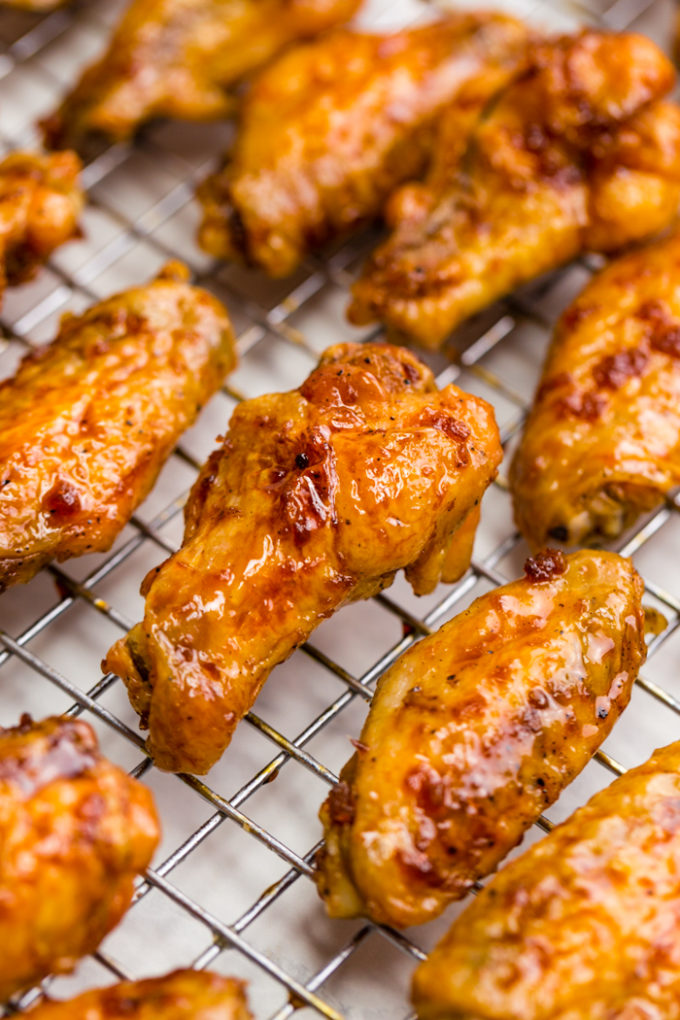
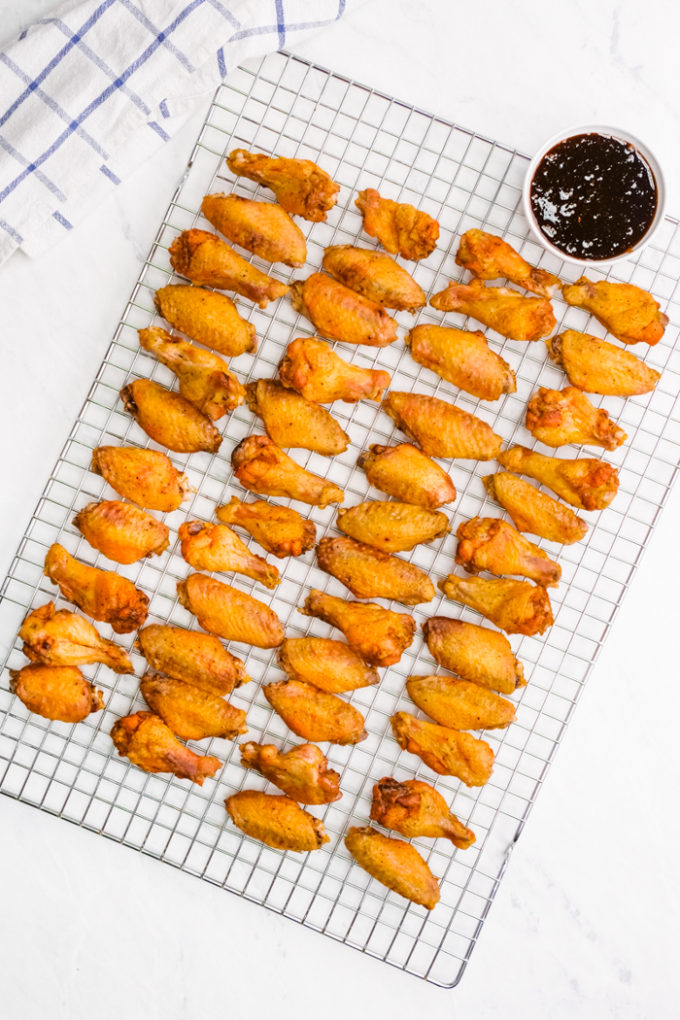
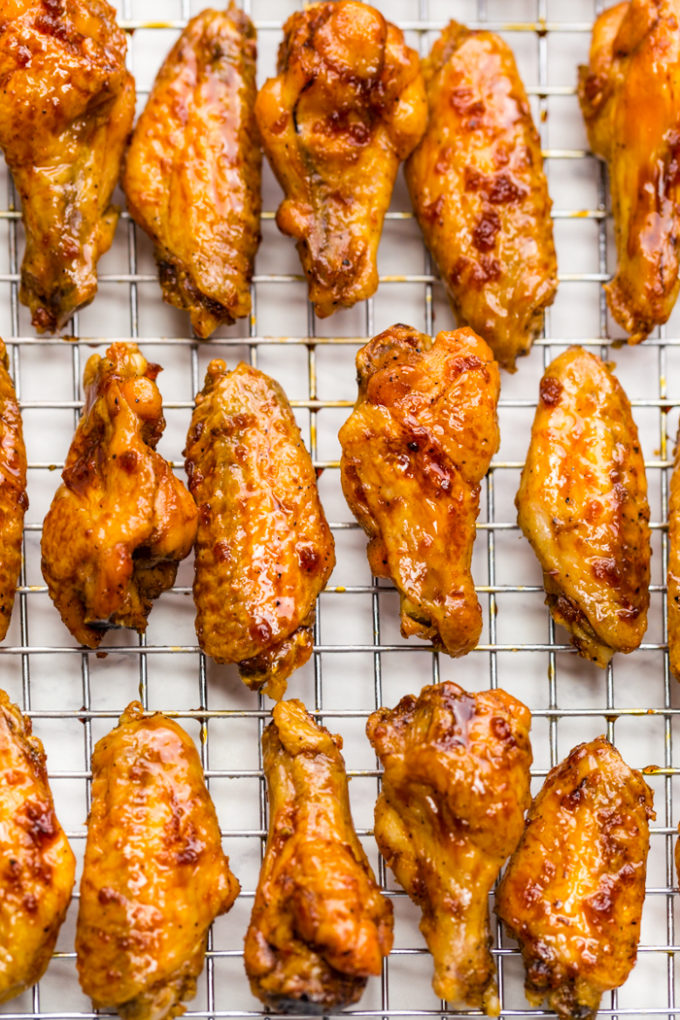
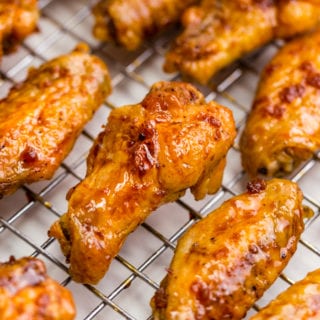
As you can see from this pre-sauce picture, the skin is crispy, and golden brown, and ready to be sauced or eaten as is.
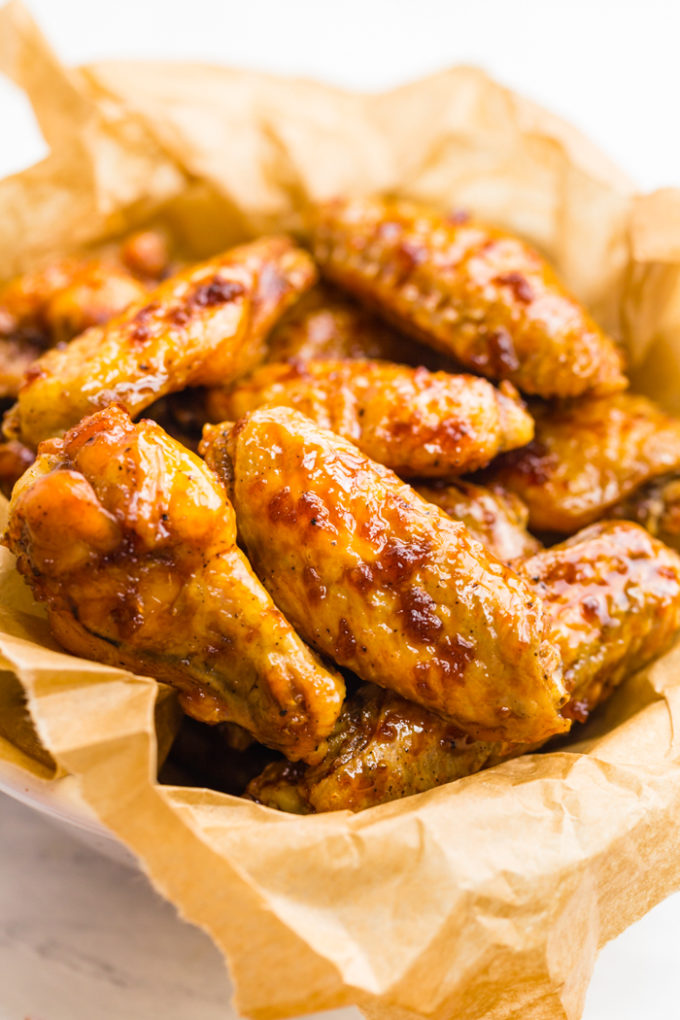
I love that these wings are reduced fat because it melts away and you discard it. And that they can be paired with whatever sauce you want!
I love making my own sauces, but I also know that sometimes I just need a quick solution, so a bottle sauce or dip is also great.
So for your next tailgating party, or football watching weekend, or just when you want something extremely tasty and delicious, make these awesomely crispy baked wings!
What side dish goes with chicken wings?
Other Wings Recipes
Are you looking for an easy weeknight dinner solution?
Try the Eazy Peazy Mealz Recipe Binder: Get a printable version of this recipe and all our favorite recipes in one convenient e-book for only $5!
Plus, you’ll get so much more, from conversion charts and tips, to meal planning worksheets and shopping lists.
⇒ ⇒ Get it here ⇐ ⇐
Crispy Baked Chicken Wings
Ingredients
- 5 pounds chicken wings
- 1 1/2 Tbs baking powder
- 2 Tbs vegetable oil
- 1/2 Tbs kosher salt Or less, see note
- 1/2 tsp freshly ground black pepper
Ginger Soy Glaze:
- 1/4 cup honey
- 2 tablespoons low sodium soy sauce Use low sodium or it will be too salty
- 1 1/2 tsps minced garlic
- 1 1/2 tsp minced ginger
- 1/4 cup water
Instructions
Wings instructions:
- Preheat oven to 250°F. And place on rack at the lowest setting, and one near the top.
- Use a paper towel to pat the totally defrosted wings dry. This will not work with frozen wings.
- Place wings in a large bowl or in a ziplock bag. Add the baking powder and salt and pepper, and toss to coat evenly. Note: Some have complained the wings are too salty, adjust to preference, but remember salt is needed to help dry out the skin and get crispy wings.
- Line a tray with foil, and set a wire rack inside the rimmed baking sheets.
- Brush rack with vegetable oil, or spray with cooking oil. Place the wings on the baking tray in a single layer with the skin side up. It will be a tight fit, use two sheets if needed. Make sure wings don't touch, You need space for air to get around them.
- Brush wings with remaining oil. Or spray with cooking spray
- Bake wings at 250 F. for 30 minutes at the lowest oven rack setting, this will help to help render the fat.
- After 30 minutes, increase temperature to 400 degrees F., and move wings up to the top of the oven. Bake an additional 45-50 minutes until cooked through and skin is crispy, and wings are golden brown. Optional: Flip once during baking
- Once baked, remove wings from pan, and toss in a bowl with 1/4 cup - 1/2 cup sauce of choice to coat wings.
- Return to baking sheet rack, bake for 5-6 minutes until glaze is lightly caramelized.
Ginger Soy Sauce:
- Bring all ingredients to a boil in a small saucepan, stirring to dissolve honey. Taste, and adjust as desired, such as adding sweetener.
- Reduce heat to low; simmer, stirring occasionally, until reduced to 1/4 cup, 7–8 minutes.
Video
Notes
- Mix baking powder, salt, and pepper together, and toss with wings.
- If you adjust the amount of wings you use, adjust the amount of baking powder, it is supposed to only very slightly coat them to draw out moisture. If you use too much it will be gritty and add a bitter flavor to your wings.
Nutrition
Our recipe card software calculates these nutrition facts based on averages for the above ingredients, different brands, and quality of produce/meats may have different nutritional information, always calculate your own based on the specific products you use in order to achieve accurate macros for this recipe.
Pin to your Chicken or Tailgating board on Pinterest:


Maria Lamm says
Hey, I did it many times. My kids love it. Can you tell me what the size of your cooling racks is? Thanks in advance for giving me the information.
Joe says
Recipe sounds great and i’m Eager to try it. However, I am a novice. I understand the low temp oven for 30 minutes, but I am a bit confused with the 400 degree oven. Are you saying to bake the wings an additional 45 – 50 minutes or just an additional 15 minutes? I am so looking forward to trying this recipe.
Rachael says
Turn it up and cook 45-50 minutes to crisp that skin up and finish cooking the meat. Thanks
Pj gandy says
Hi
The recipe calls for vegetable oil, but didn’t
See or read were it comes into place?
Thanks
PJS
Rachael says
I am so sorry for the oversight, You add half ofit to the bag when coating the chicken with seasonings, and use the rest to brush the rack on the baking tray.
Alice says
can you do this with Chicken Legs instead of wings?
Rachael says
Yes, but wings have more fat under the skin than the legs do, so you won’t need to render the fat as long. But you will need to bake longer so they reach an internal temperature of 165 degrees.
Katerina @ diethood .com says
YUMMY!! These are totally my kind of wings!! Perfect for game day!
Jennifer says
My new favorite wing recipe!! Thanks so much!!
Michael Wurm Jr. says
With fall and winter on the horizon these are going to be the PERFECT party food. What a great recipe!
xo Michael
Liz says
These chicken wings look incredible! My house full of men would love them, especially for watching football games!
Sabrina says
The crisp on these wings look like perfection! I’ll definitley be using this recipe for every game day party I have! Yum!
brittni says
What if i don’t have a rack? Should I flip them half way through?
Rachael says
It is best with the rack because then the oil has a place to drip out of the wing, and they aren’t sitting in it. But yet, flip half way otherwise.
Linda says
Best wing recipe out there…so crisp. Thank you so much for the recipe!
betty babb says
Where can I find your Blue Cheese Dressing reciepe? I love wedge salads too….and yours looks delicious…..except…I can’t find the dressing reciepe……[email protected]
Rachael says
Dressing
1/4 cup crumbled blue cheese
1/4 cup sour cream
1/3 cup buttermilk
1/2 cup mayonnaise
1/4 cup red wine vinegar
1 tablespoon extra-virgin olive oil
1 1/2 tablespoons white sugar
Here you go!
betty babb says
*recipe LOL
Barb Nudo says
Looks like a good recipe & I want to try it. However you’re print feature is impossible! Had to cut and paste and email to myself because I don’t cook with a computer/phone at hand. Don’t ad a “print” button, if printing isn’t really possible.
Rachael says
Shoot, you are the second person this week that has had problem with the print feature, I will send an email to the developer to see if they can help me address this problem. I think it may have been from the update, and I am so sorry you have had to experience this. I am working on it.
Diana Sanders says
Question! Is the 45-50 in addition to the 30 minutes (75-80 minutes total) or 25-30 minutes after the initial 30? Thanks!
Rachael says
Great question, sorry that was unclear, I reworded the recipe to clear that up. It is an additional 45 minutes. The first 30 is at a low temp and it is to render the fat under the skin so the skin can become crispy instead of rubbery. The other 45 is to cook fully and crisp up the skin.
Meg says
I just want you to know that I made these for my husband for “Football Sunday” and he was thrilled! Best oven wings ever!
Rachael says
Thank you Meg for taking time to comment! I am so glad he liked the wings.
Jamielyn says
These are PERFECT for game day!! They look so flavorful and delicious!
Nida says
Thanks so much for posting this recipe
Online. I’m definitely gonna try it at
Home. Can you please let me know what
The temperature is for slow cooking range
When baking the chicken the first 30 min?
Courtney O'Dell says
So easy and delicious – I loved these wings!
Julie says
These are so incredible! Our new go to for game day!